Configure Custom Domain | GitHub Pages
In this section, we plan to just show you how we configured the custom domain in GitHub Pages, so that you can replicate the same.
Pre-requisites
To go through this section, you would need to already have:
- Have GitHub pages site up and running. If not, you can refer to the article on how to create a free professional website
- Procured a custom domain from a registrar such as GoDaddy or Hostinger.
Update your domain to point to GitHub Nameservers
- If you have a domain name already, please access your registar’s console. For me – it’s GoDaddy.
- In the Console, look for a section specifying DNS Management and update your A records based on GitHub IP address
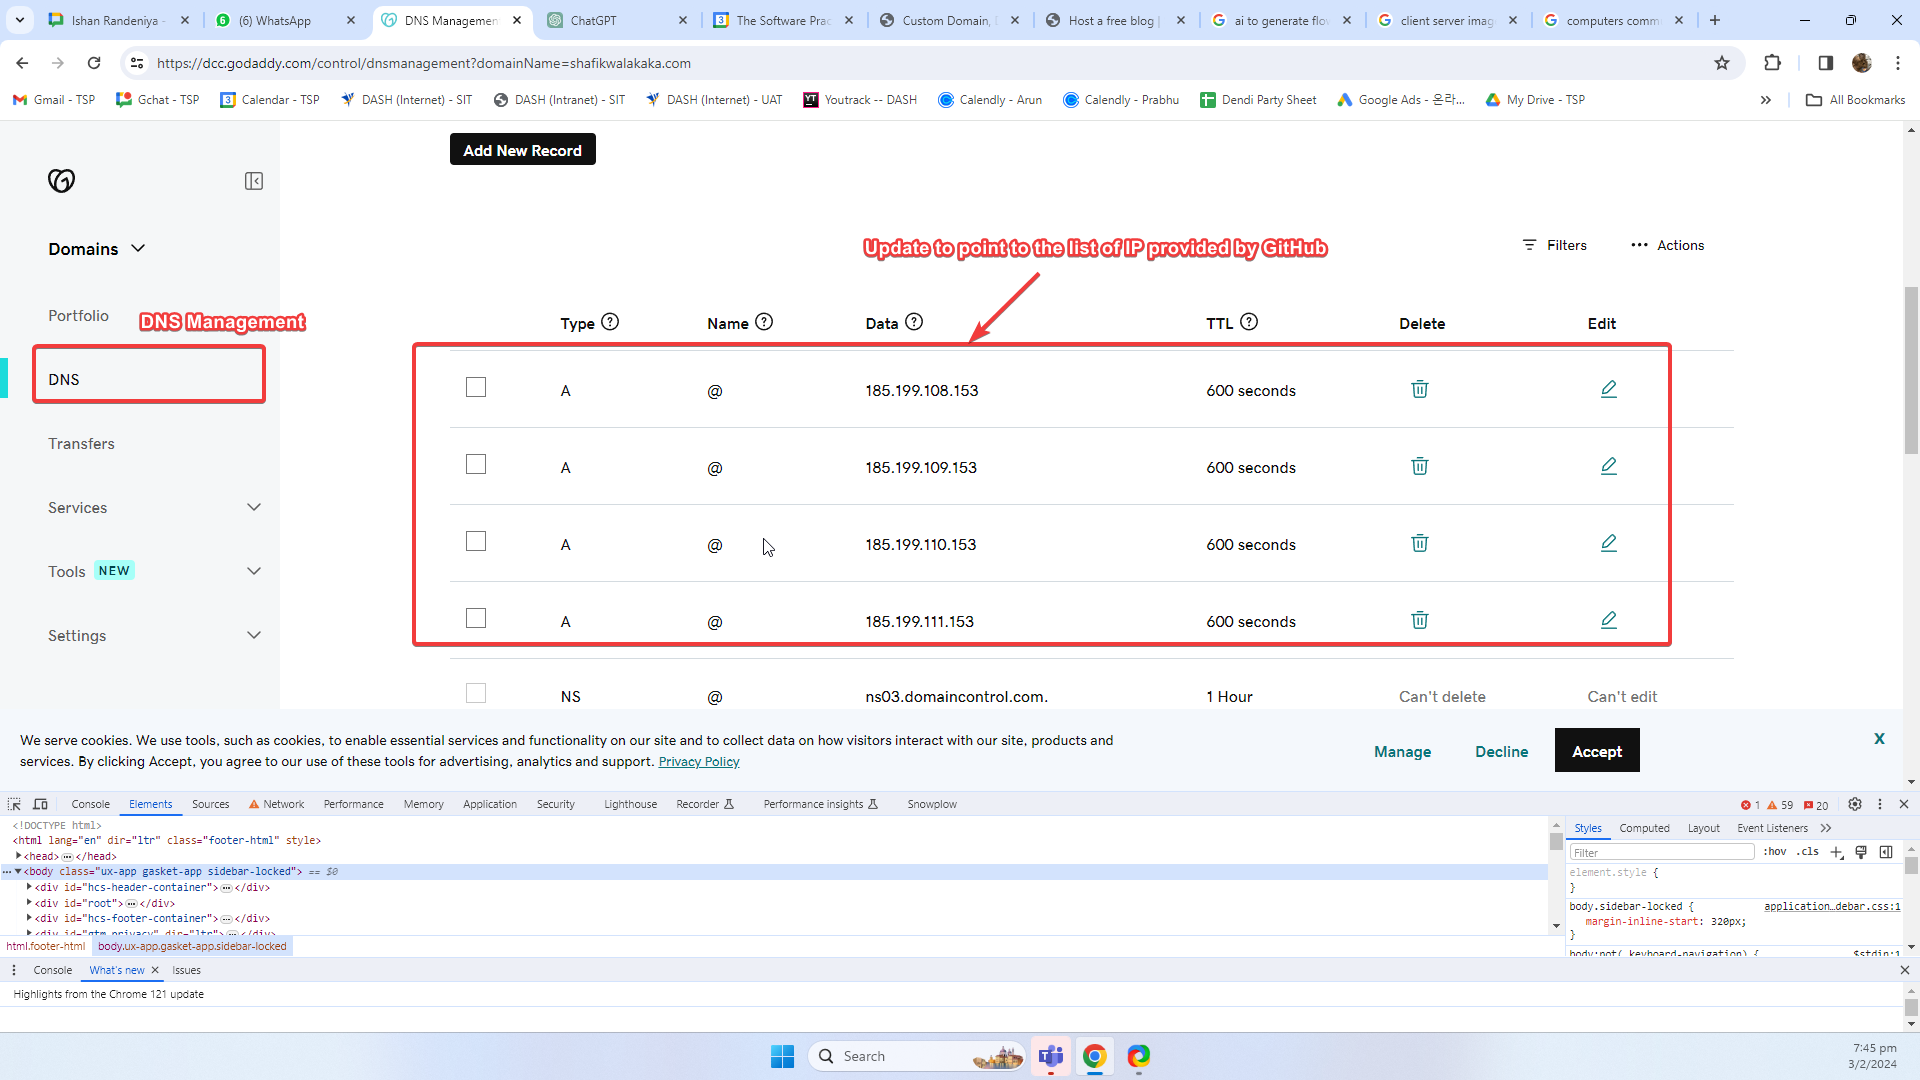
- Here, update your A records to point to the list of IP addresses provided by GitHub
- Always refer to GitHub latest docs in case there are any changes. You find details here on configuring apex domain for GitHub pages
- At the time of writing, the IP addresses provided by GitHub are as follows
  185.199.108.153
  185.199.109.153
  185.199.110.153
  185.199.111.153
- Verify that your domain are now pointing to the GitHub nameservers IP adress by running
nslookup <your-domain-name>- For my domain
shafikwalakaka.com, results were as follows: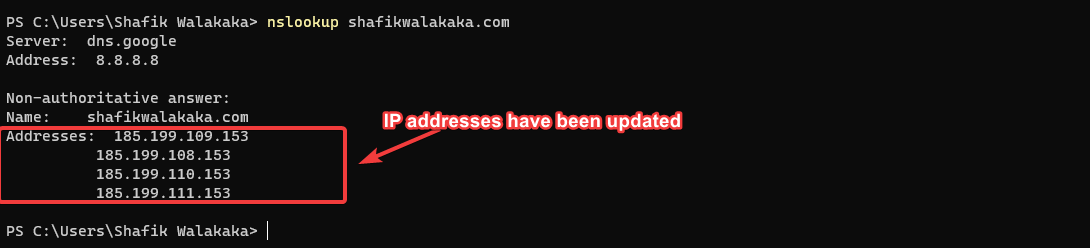
- For my domain
Once the verification is complete, we can proceed to update the GitHub pages settings for our domain in our GitHub Repository Settings.
Update GitHub Pages Repository Settings
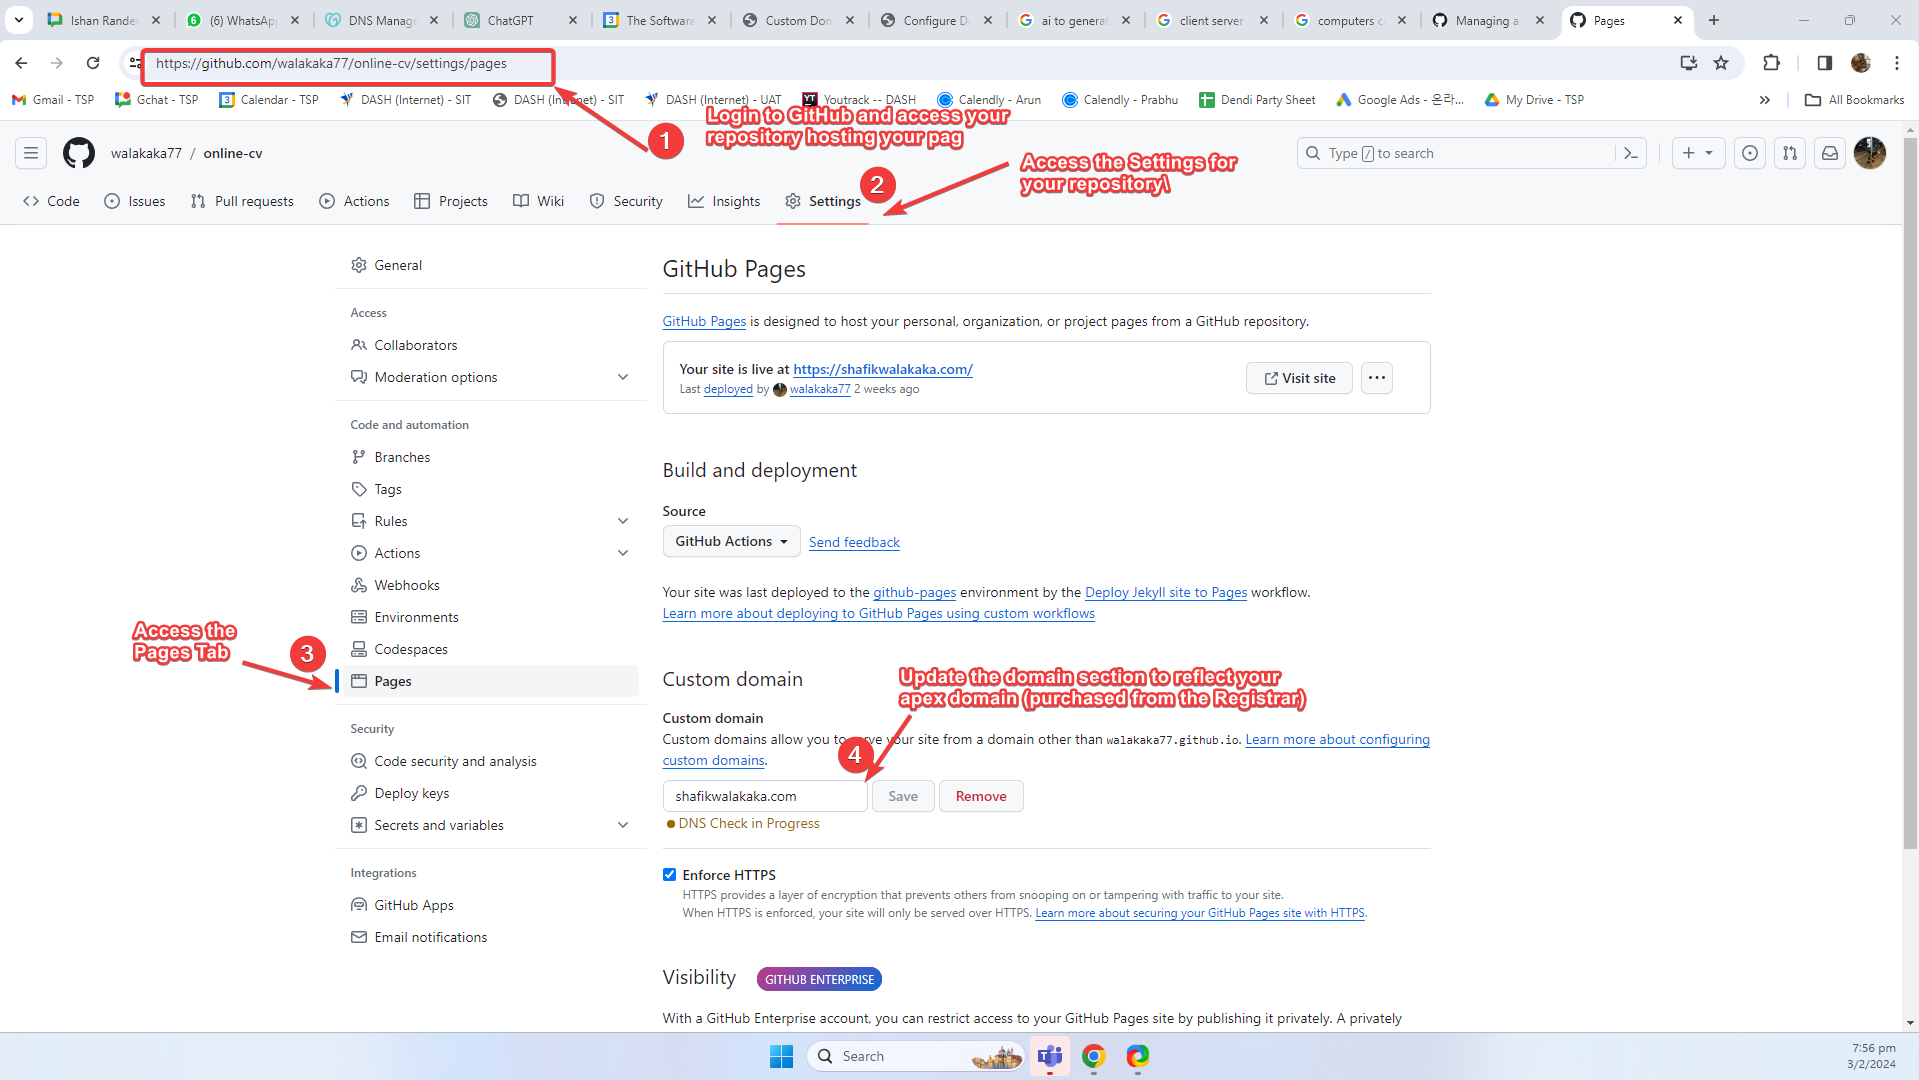
- Login to GitHub and access your repository that hosted your Jekyll page
- Access the Settings of your repository
- Access the
pagestab - Update the
custom domainwith your main domain that was purchased for your registrar. For mine – it’sshafikwalakaka.com
Configuring a subdomain
As previously mentioned, if you want to configure subdomains, such as blog.shafikwalakaka.com, there’s a different config in your DNS management to be done. Once the configuration in your Domain Registrar is completed, the settings in GitHub pages are the same!
Domain Registrar
Let’s go to our domain registrar, GoDaddy and checkout the sub domain blog that has been configured for the main domain shafikwalakaka.com. 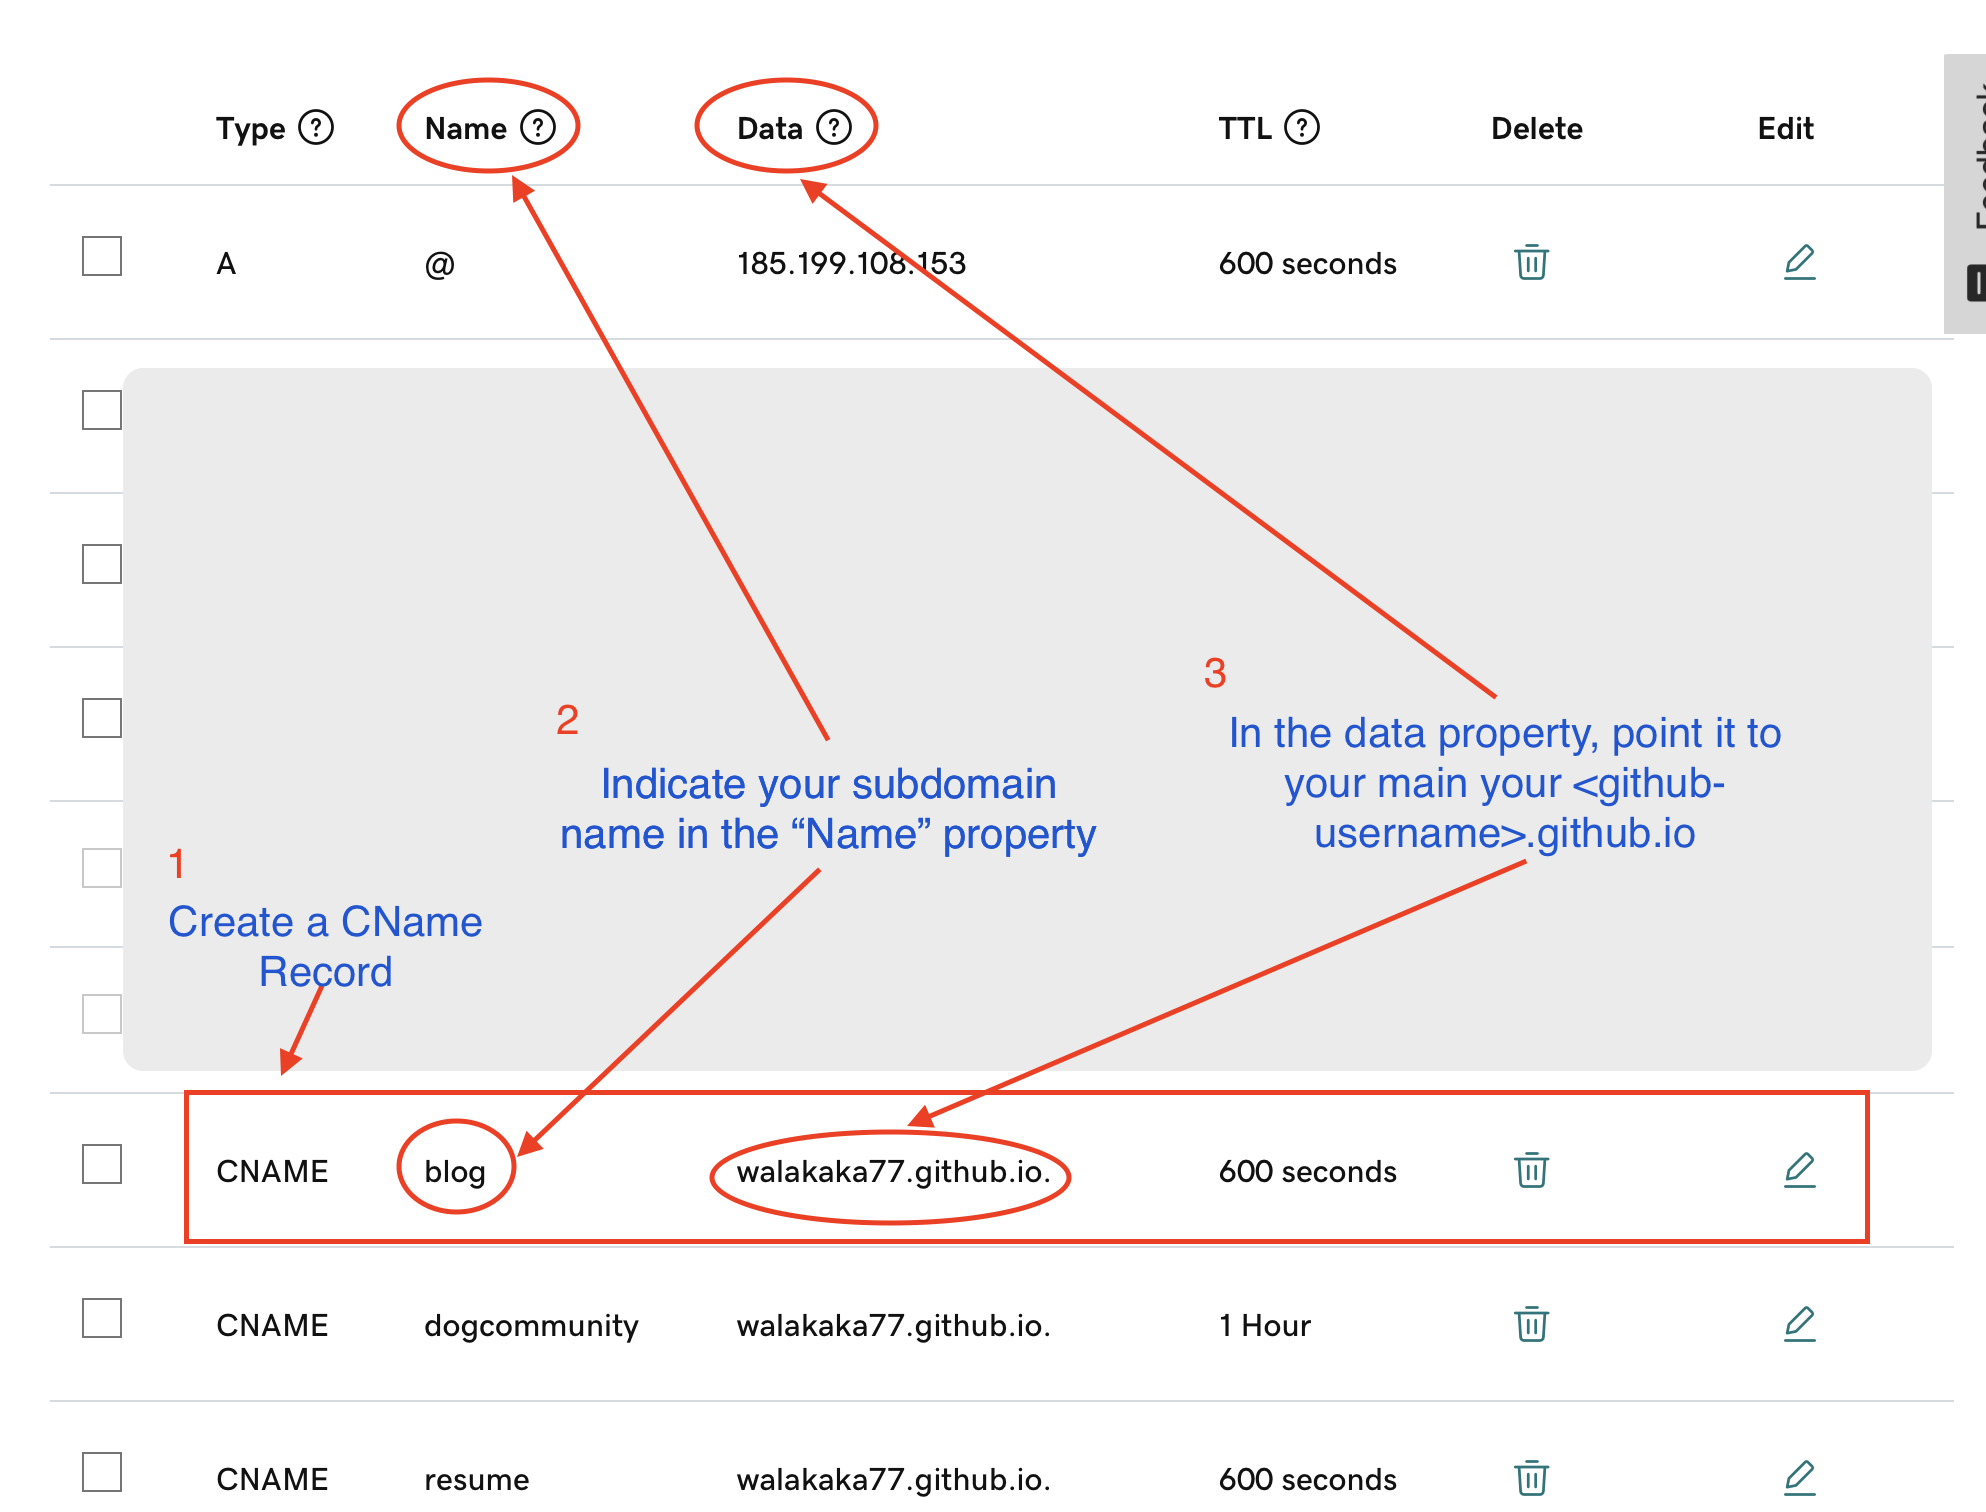
- We have created a CName record
- The CName record has the subdomain value that we desire, in our case – it’s
blog - The CName record is pointing to your
<github-username>.github.io, unlike the configuration for your main domain. This is specified in GitHub’s documentation (and since you’re reading this blog, it’s proven to work lol)
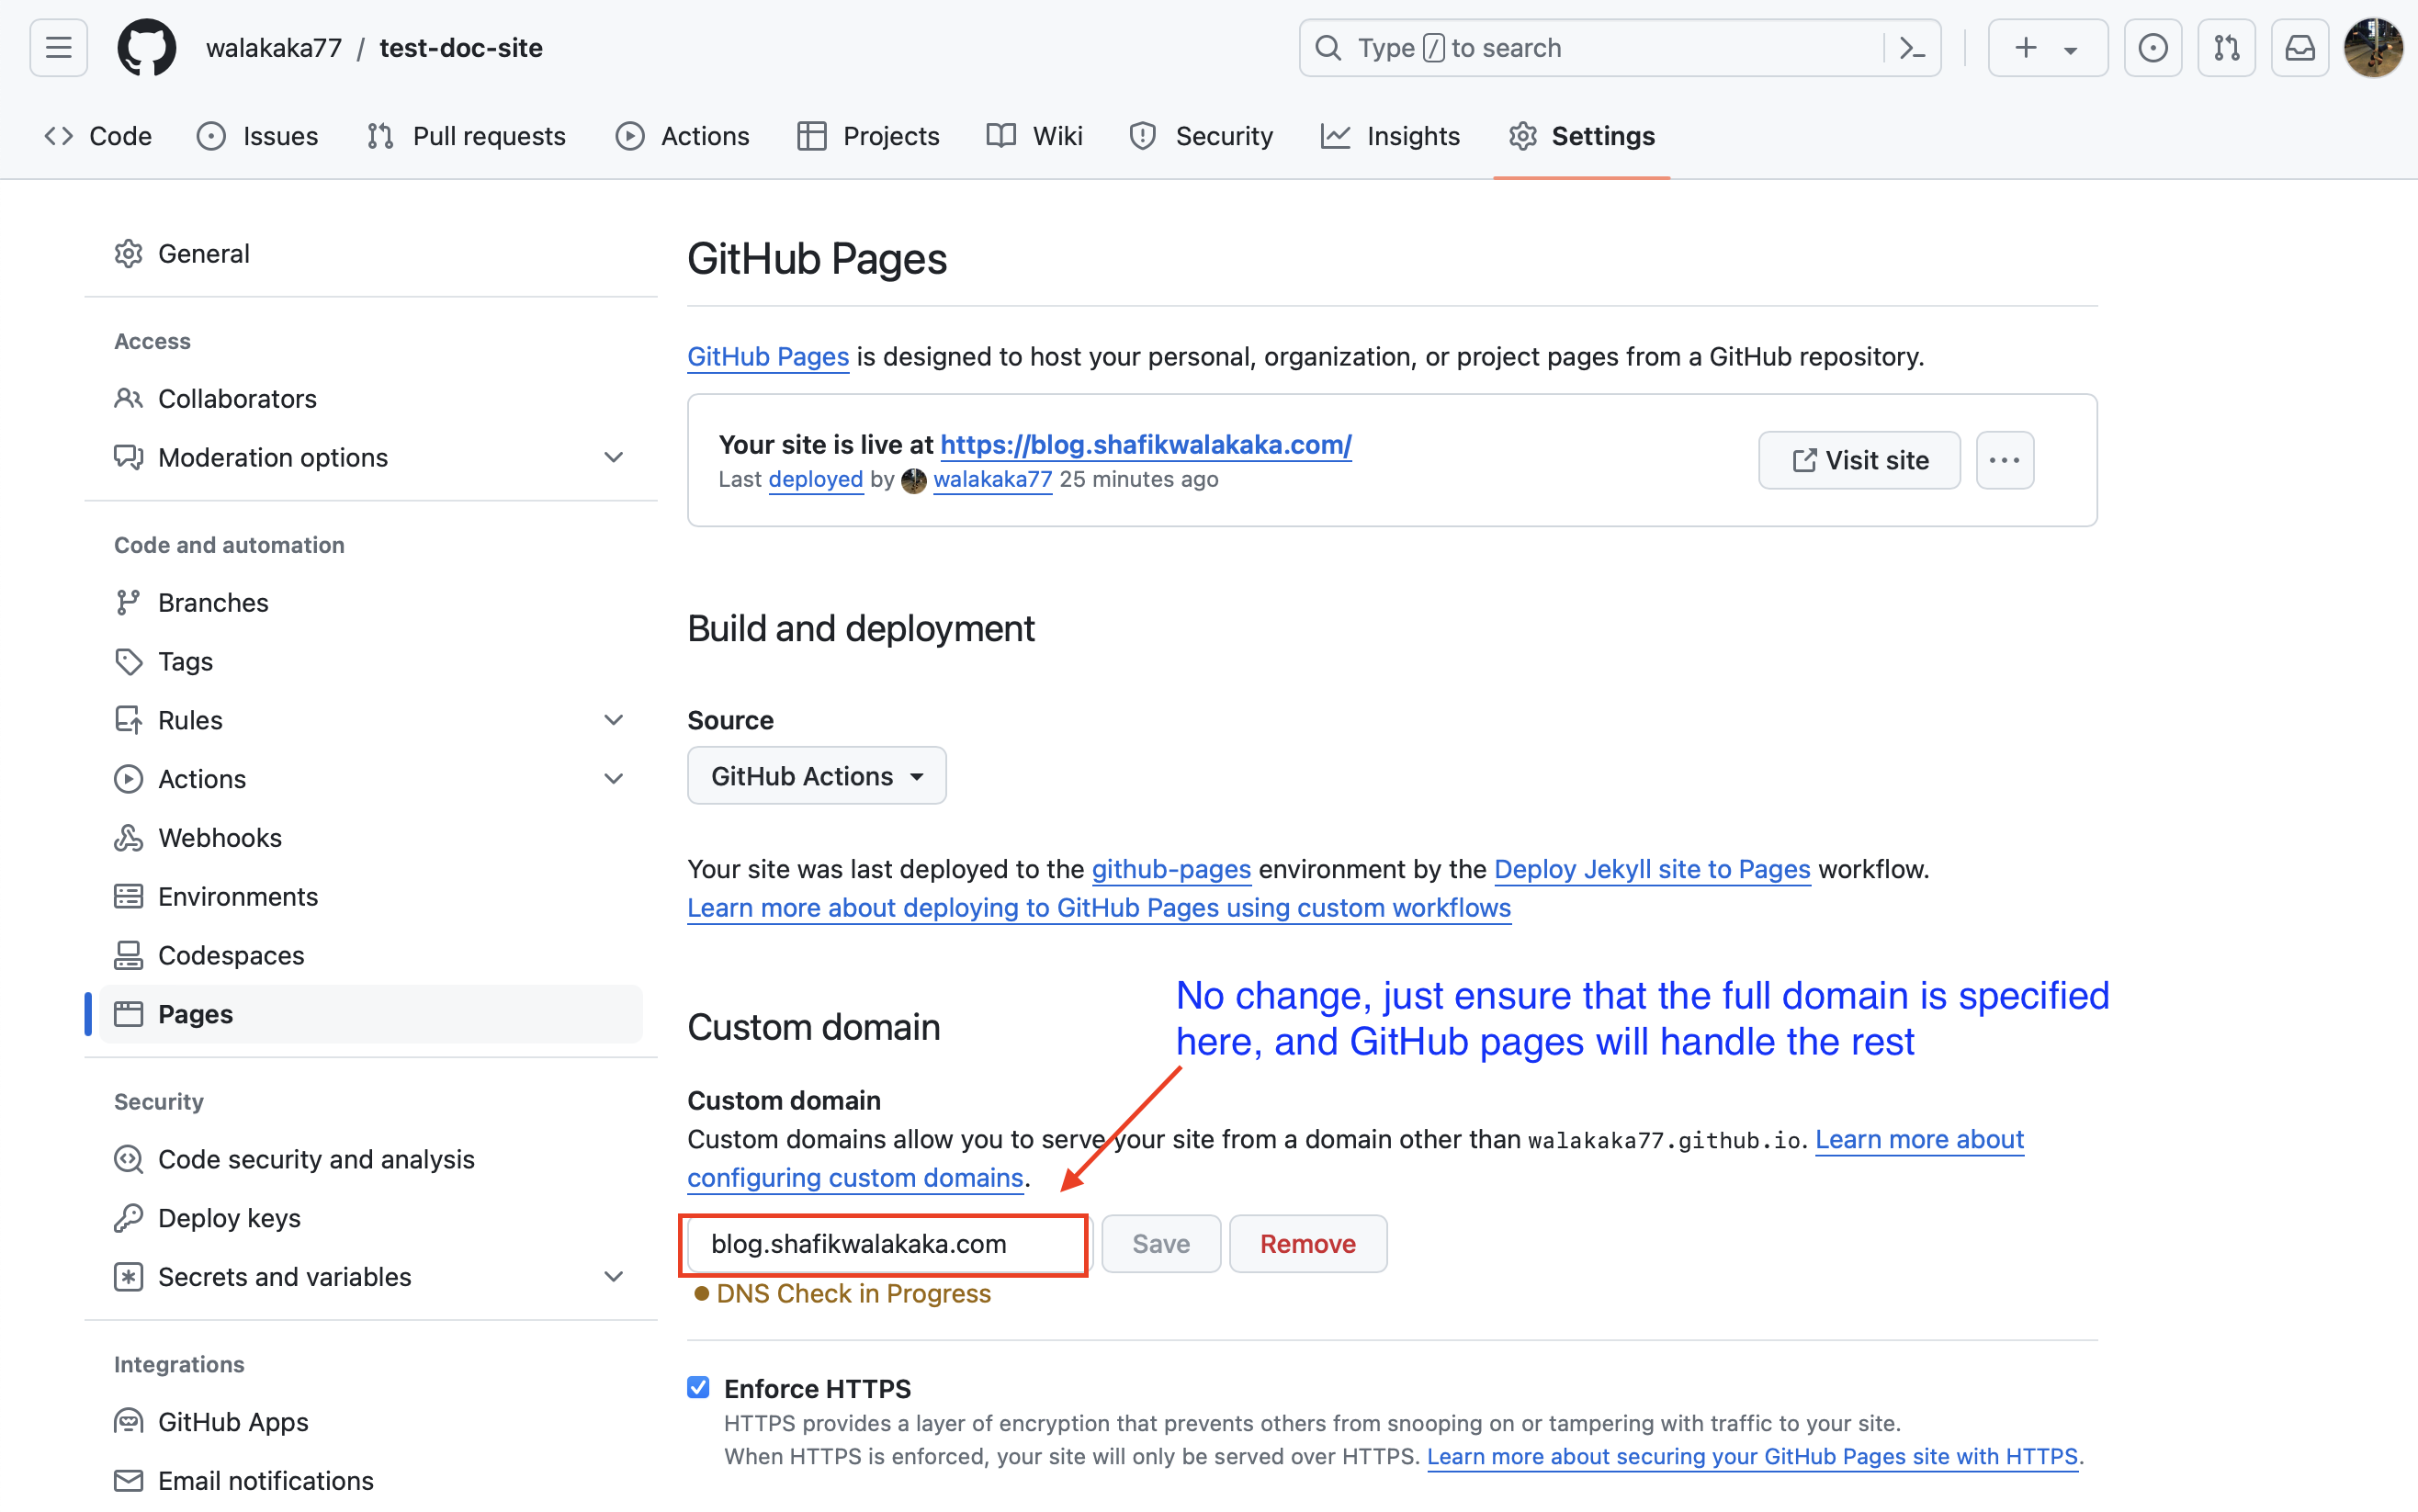
GitHub Configuration
The GitHub Configuration is identical to what we had done earlier. Ensure that the fully qualified domain name is specified in the custom domain field, and you’re all set. For us, we’ve set it to blog.shafikwalakaka.com!
Thank you!
Thanks again for taking your time to engage and read this article. If anyone’s got any other shortcuts, please feel free to holla.
Else, we look forward to you having your own website with your own domain soon :D!
Peace, Love
Shafik Walakaka