My Local WordPress Setup
For bloggers, developers, and small business owners, there’s a thrill in watching your online presence take shape. You pour your creativity and expertise into every detail, meticulously crafting messages and design to represent your brand. But have you considered bringing this process closer to home, literally? I’m talking about your local WordPress setup – a sleek, tailored environment right on your PC.
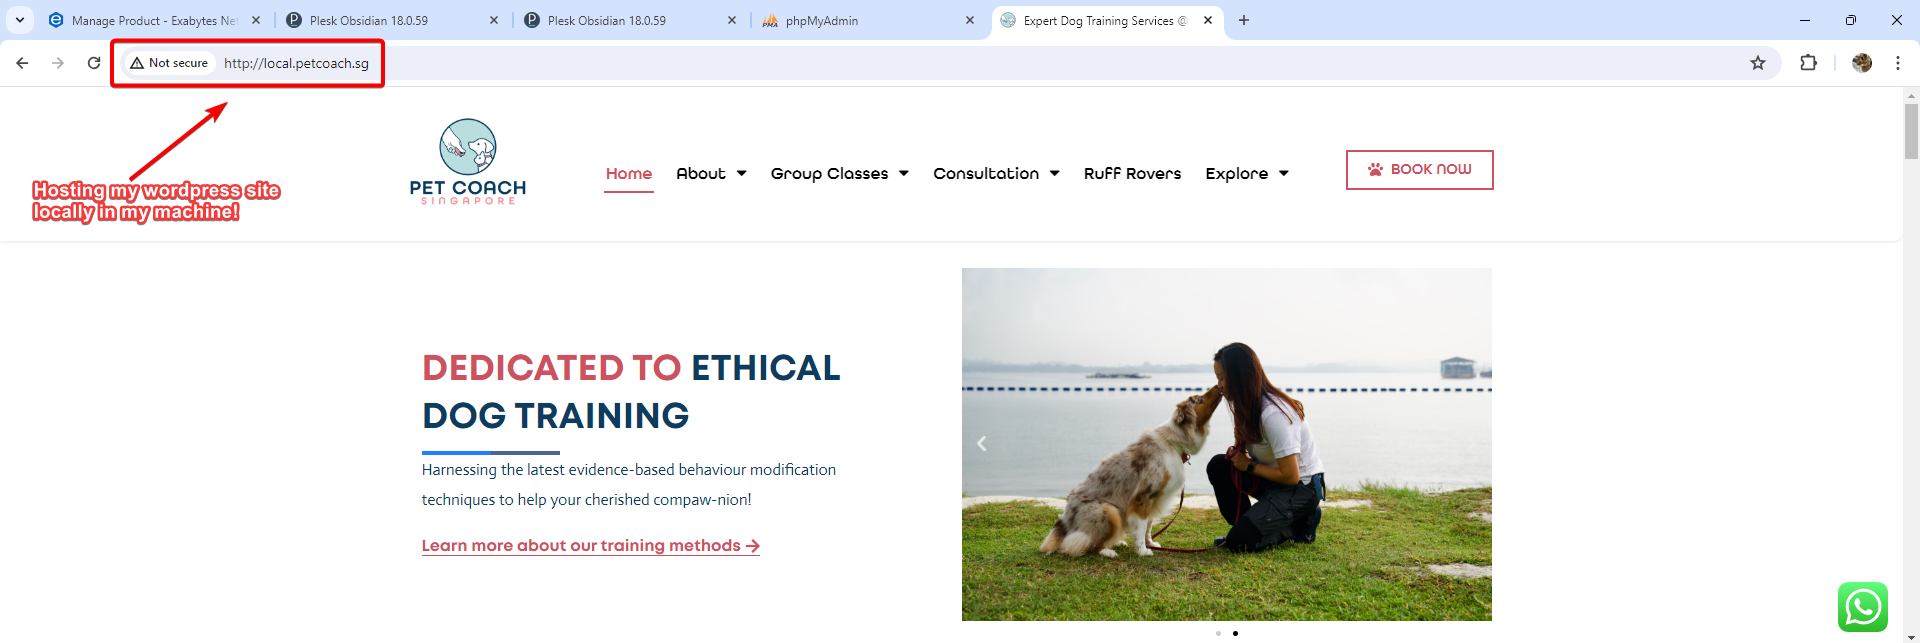
In my personal setup, I’ve delved deep into WordPress hosting and discovered that a local setup might just be the secret weapon I’ve been missing. Local hosting empowers you with unprecedented control over your digital domain, opening up opportunities for learning and safeguarding that extend beyond the internet’s bounds. By the end of this post, readers will have a clear understanding of my local WordPress setup. I’d love to hear your thoughts and suggestions to make this even better for both of us. Your input really matters to me!
Why setup WordPress Locally?
More Control at Your Fingertips
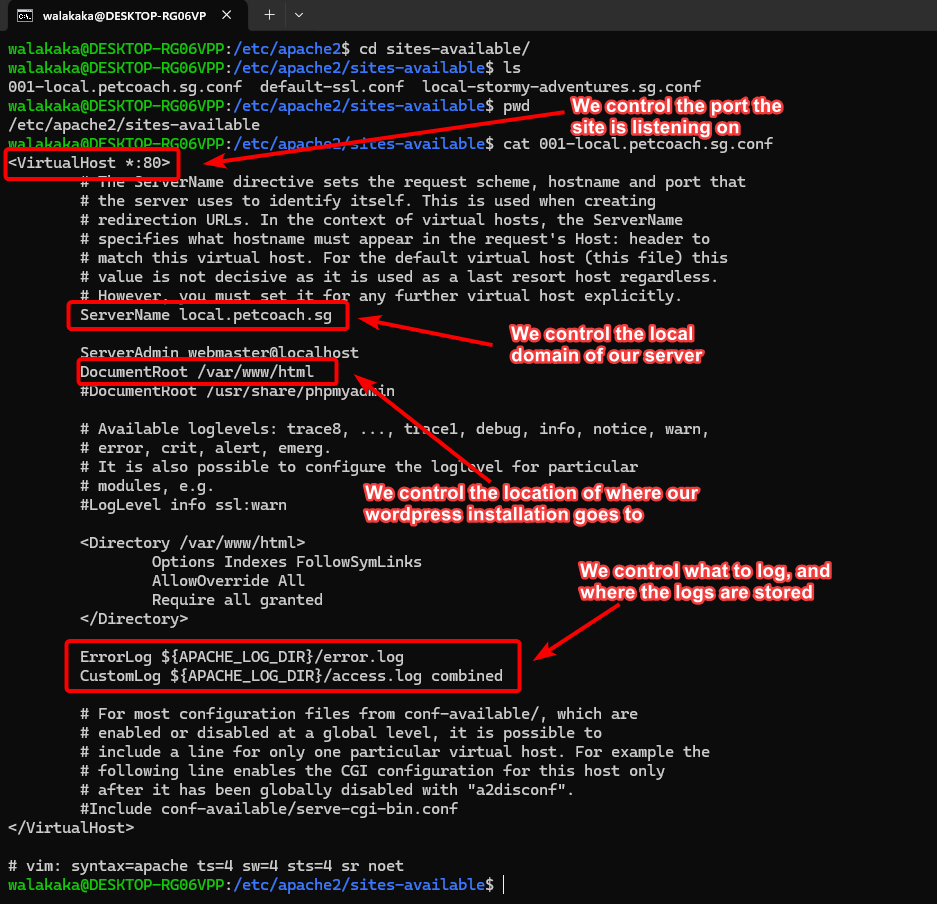
When you host a WordPress site locally, there’s a comfort in knowing that every tweak, every upgrade, is under your direct command. This isn’t just about changing colors and themes (though that’s definitely a perk!). It’s a deep-rooted control that spans from the server-level settings to the bowels of your database. No more waiting for hosting service automations or delays in service tickets, it’s all up to you.
Easier to Troubleshoot, Harder to Disrupt
Bugs happen – it’s an inevitable part of web development. But, when your WordPress resides on your PC, you can troubleshoot mishaps in real-time without affecting your live site. This local haven acts as a sandbox where you can play, break, and fix things without fearing a plunge in your site’s reliability ratings.
Understand WordPress from the Inside Out
The barrier between you and the servers that host your production site is a curtain that conceals a great deal of complexity. When you host locally, that complexity becomes a part of your day-to-day. You dig into file structures, code, and server settings, and in doing so, you’ll understand WordPress at a level that would normally require an IT degree.
My Local WordPress Setup
Okay, you’re on board with the benefits, but how do you actually set up your WordPress site on your PC? I’ll guide you through my own experience with Windows Subsystem for Linux (WSL) – a powerful tool that brings a Linux environment to Windows users. WSL was a game-changer for my local hosting experience. It provided the isolation I needed to separate my setups, ensuring updates to one environment didn’t accidentally affect another. With WSL, I could install and run WordPress’s dependencies (Apache, MySQL, PHP) without fear of Windows interference.
Step 1: Windows Strikes Harmony with WSL
The first step is to enable WSL on your Windows machine. Once it’s activated, head to the Microsoft Store and install your preferred Linux distribution. I opted for Ubuntu, but the choice is yours. This is your home base for a secure local environment.
Step 2: The Suite of WordPress’s Infrastructure
With WSL at the helm, installing Apache, MySQL, and PHP is a breeze thanks to the sudo apt command. This one line kickstarts the download and installation process, setting up the foundational layer that WordPress needs to flourish.
We installed the LAMP (Linux, Apache, MySQL, PHP) stack on Windows Subsystem using the following commands:
Installing apache: sudo apt install apache2
Installing mariaDB: sudo apt install apache2
Downloading the latest wordpress release: sudo wget https://wordpress.org/latest.tar.gz
Step 3: Nesting WordPress in the Apache Nest
Apache is the gatekeeper of your local host. It’s where you tailor your WordPress settings and ensure that your site is reachable via your chosen port – often, the familiar 80. A quick look at the Apache configuration file will reflect these changes, revealing a listening port and the document root, usually found at /var/www/html/.
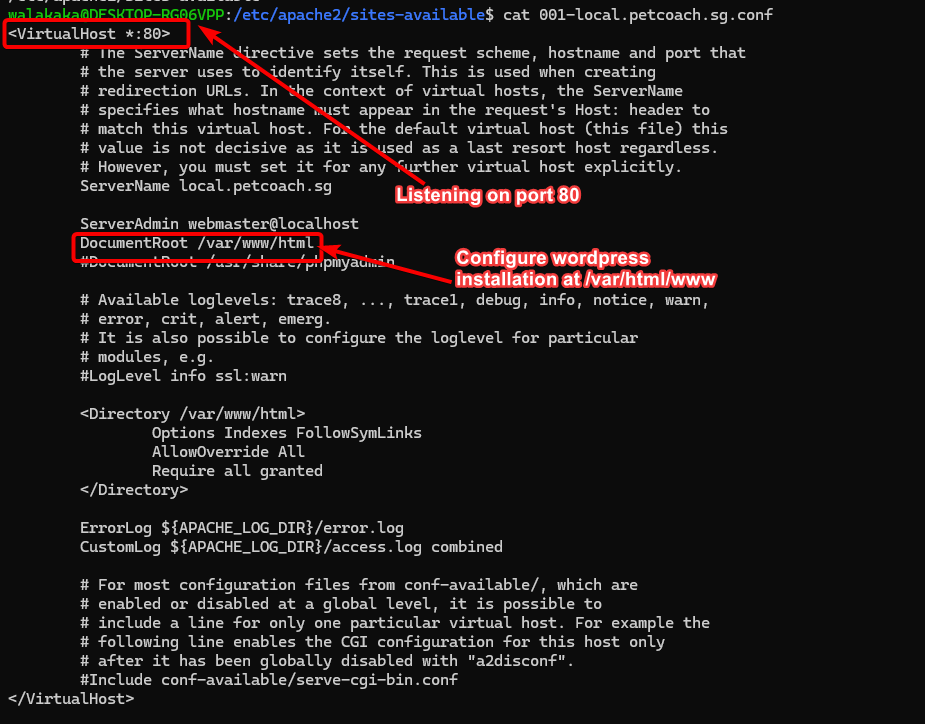
Step 4: The WordPress Files Unraveled
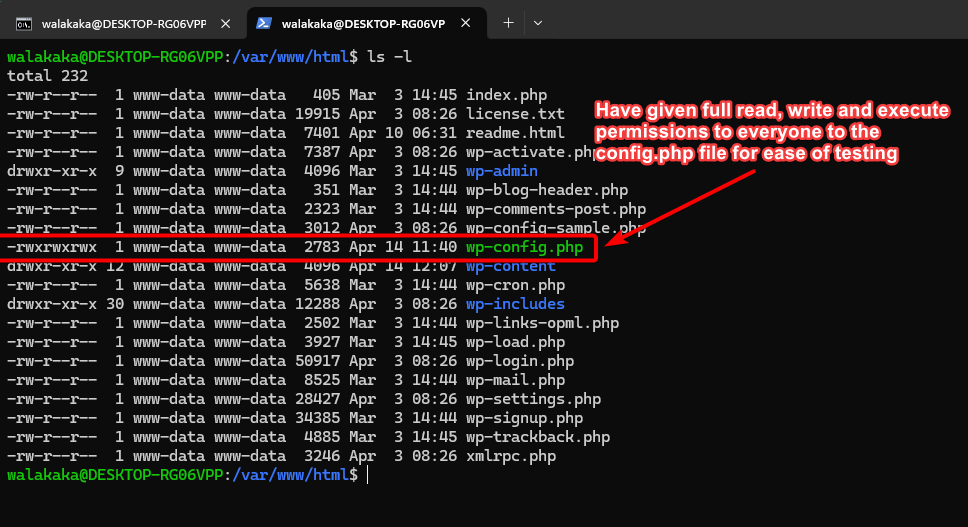
Navigate to the document root in the Linux file system, and you’ll see the familiar array of WordPress files. This is where you can drop your existing WordPress installation or architect one from scratch. It’s also where you’ll address permissions to ensure the right files have the right access.
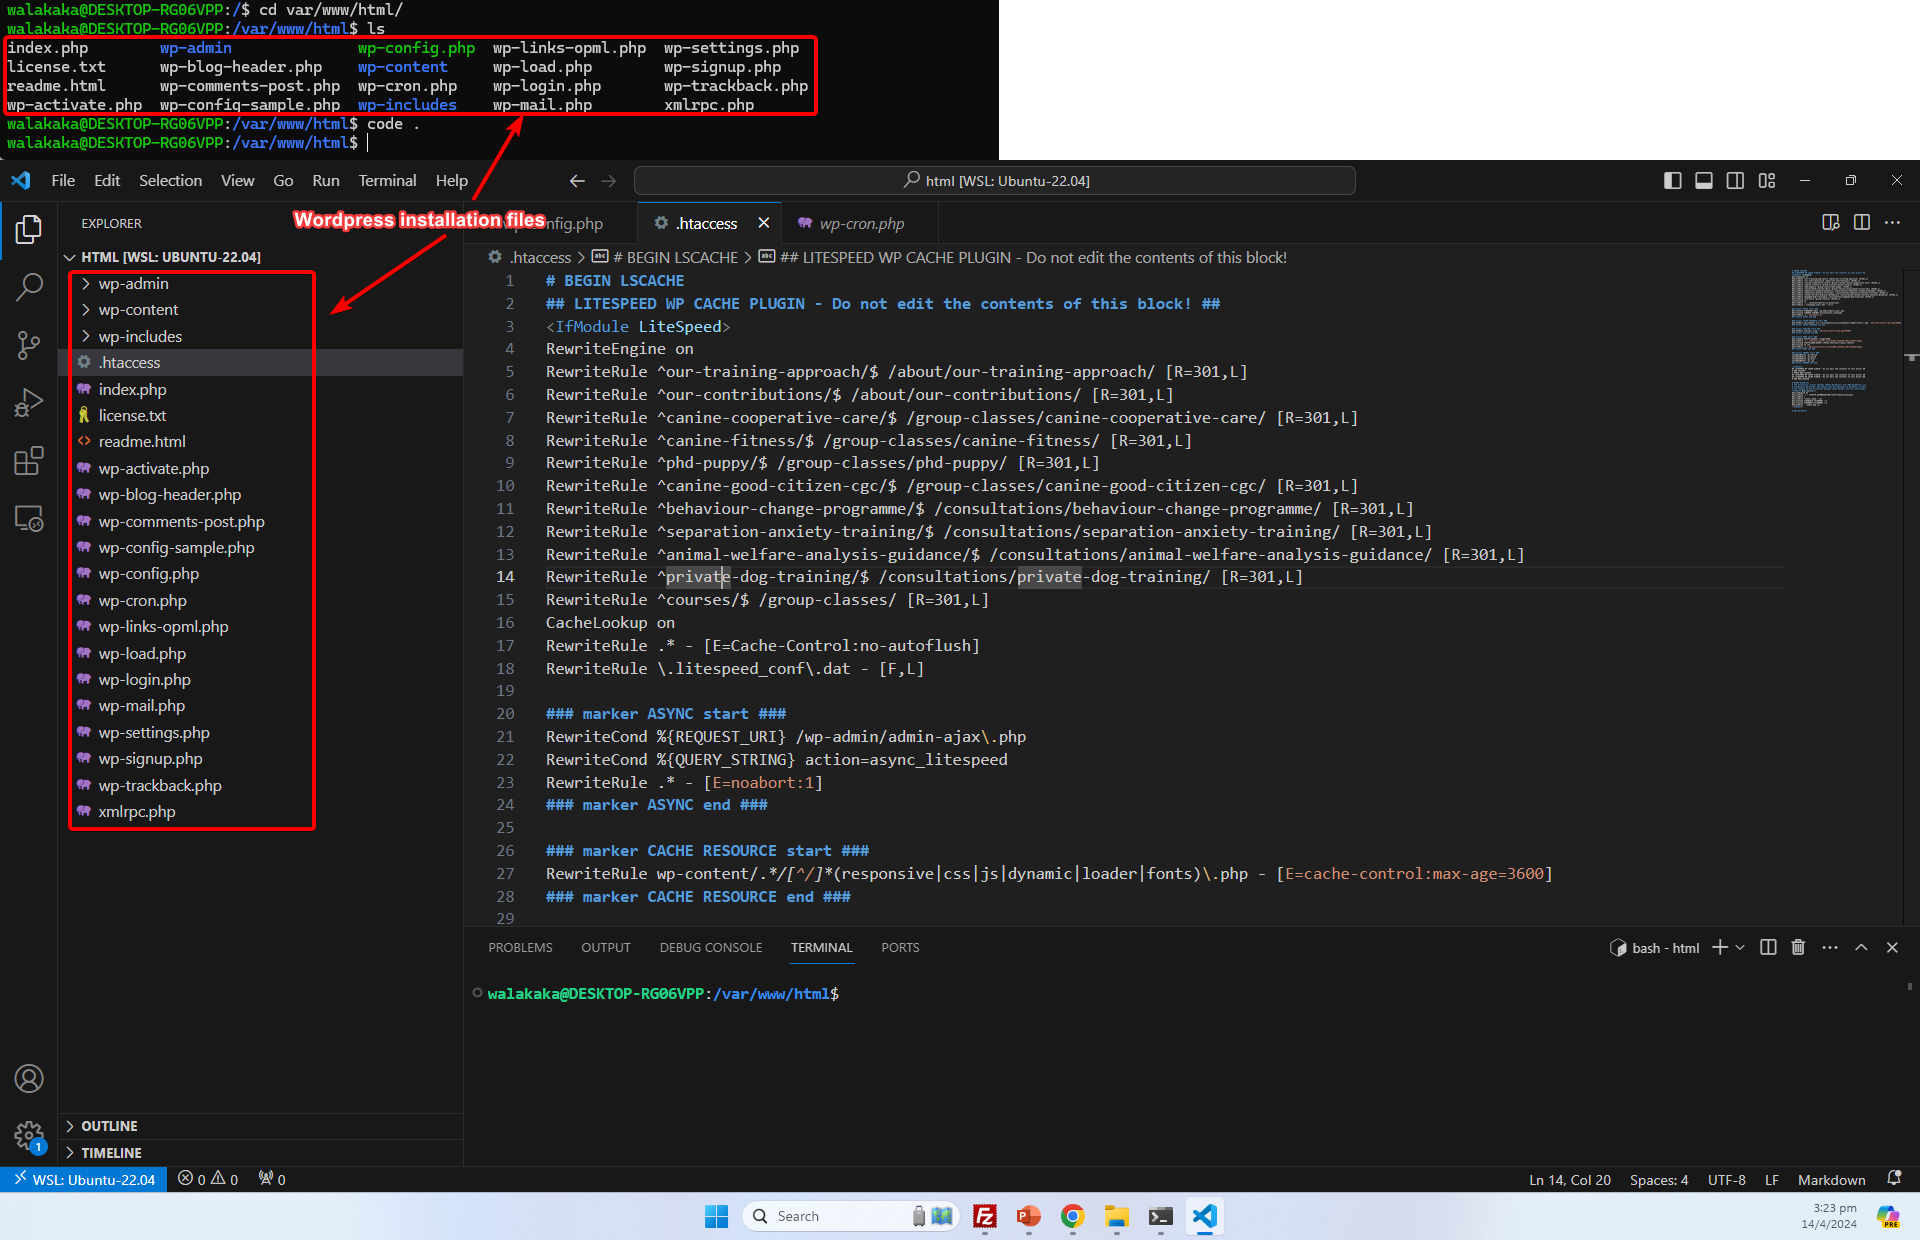
As previously mentioned, since this is our own local hosting, we have the right to modify the ownership and access permissions to these files to our hearts content. Just be sure not to replicate the same in UAT or PROD, else it may raise security concerns.
Step 5: Maria DB Setup
MariaDB, a fork of MySQL, is a heartbeat away from being WordPress-ready. After installation, you’ll want to ensure it’s running so that you can connect via PHPMyAdmin or a similar tool. It’s here where you’ll create, modify, and interact with the databases that will house your local site’s data.
A screenshot sense checking that Maria DB is in active status. Run the following command: sudo service mariadb status 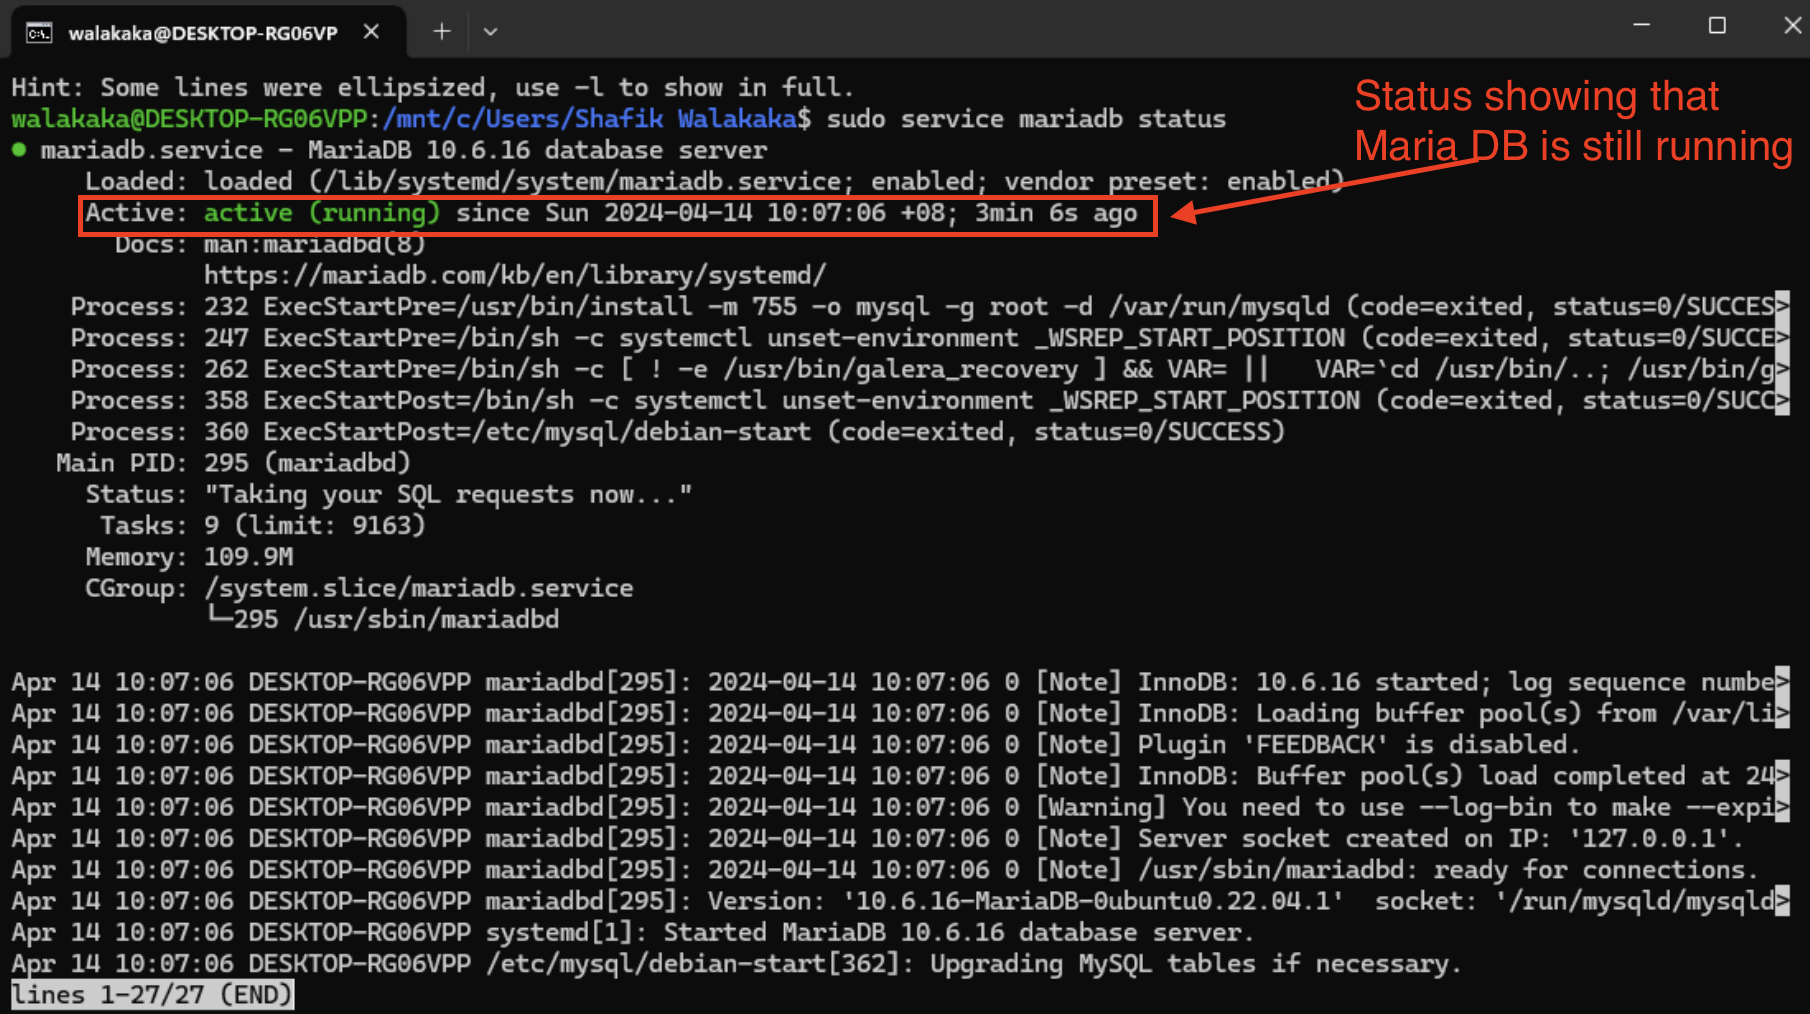
A screenshot showing that we are able to access MariaDB successfully via the PHPMyAdmin console: 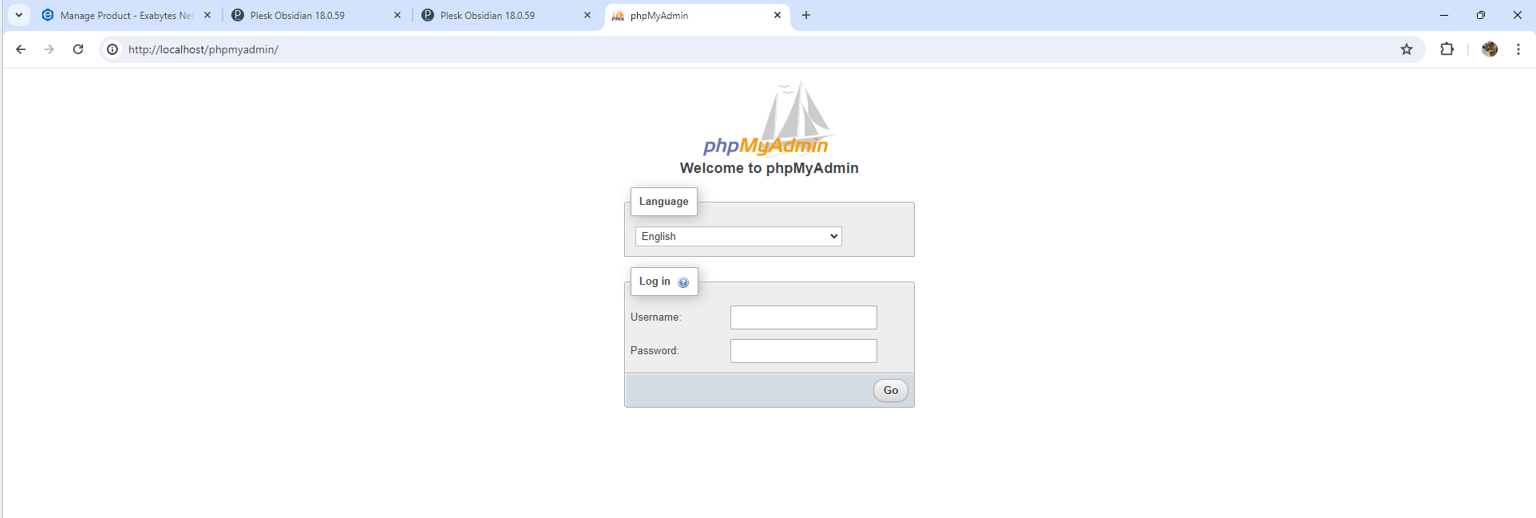
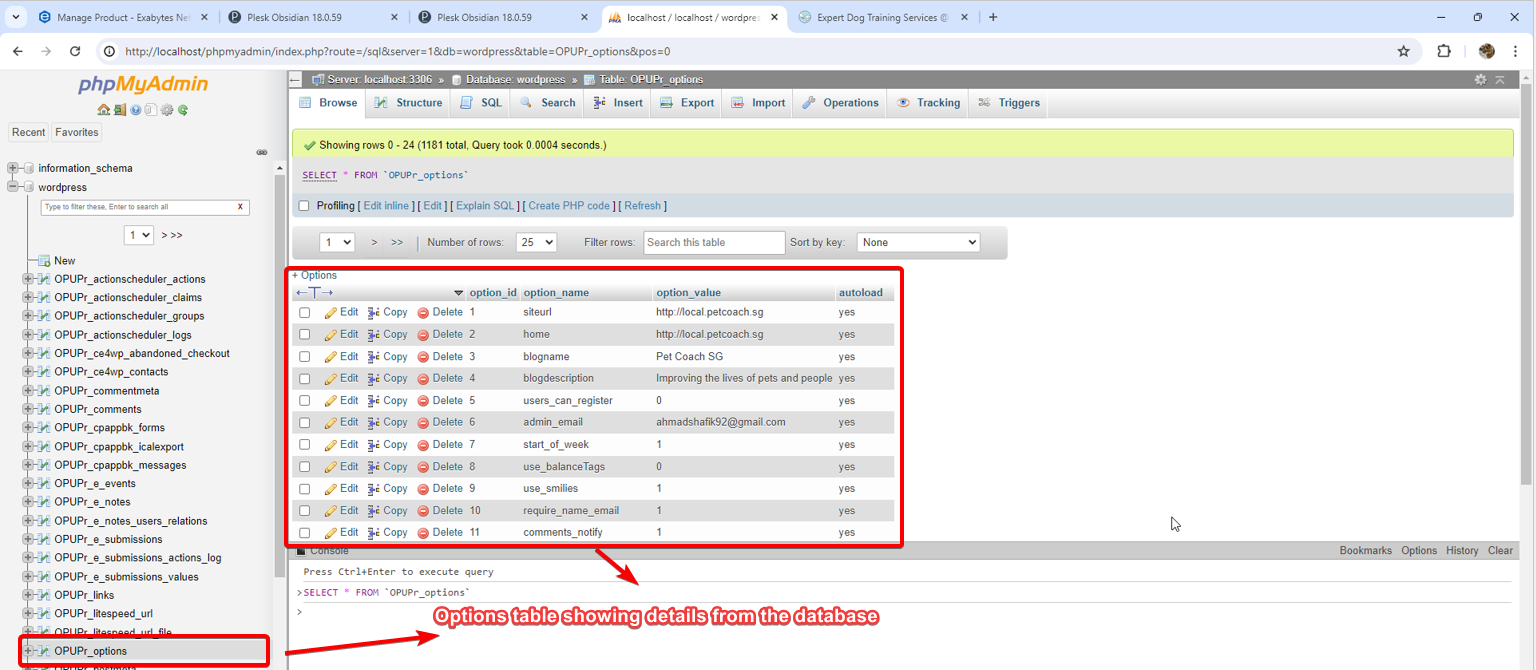
Logging in using our test credentials, we can see that the details of our website are loaded into the database. These details are restored from our database in the Production site!
Step 6: Access the site locally!
The last test is to access the website locally, and see if it works as expected. As seen from the screenshot below, we are able to access the site locally, and all the assets and details that were available in the production environment has been copied over to our local wordpress hosting!
Screenshot showing that we are able to access the wp-admin page locally: 
Logging into the wordpress admin dashboard, we can see that all the production assets and data has been successfully migrated over to our local hosting: 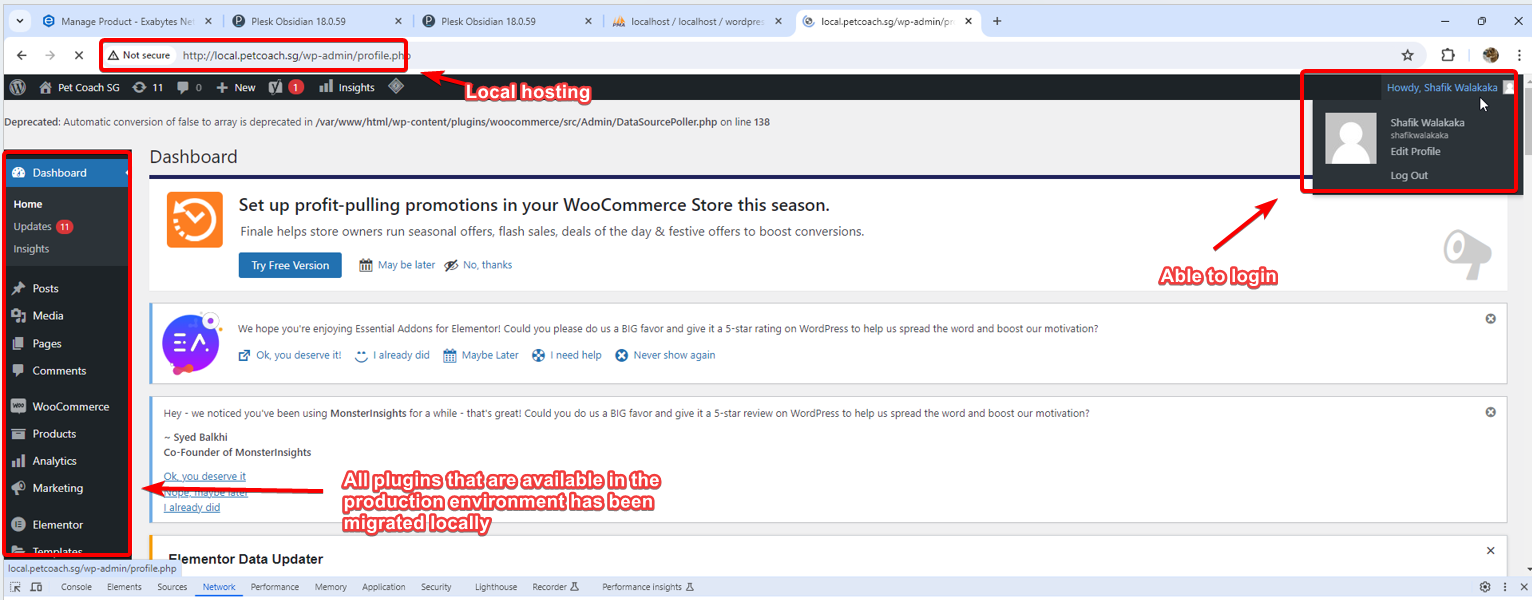
My Personal Experience
The first time I accessed my WordPress local site, it was like looking into a mirror of the web – everything was there, but it was just for my eyes. I could test different plugins, experiment with custom themes, and learn how every change I made influenced the site’s performance. The local hosting experience wasn’t just about convenience; it was about feeling cool ;) haha!
When Trouble Checks In
One of the most satisfying moments was when I encountered a plugin breaking my site. Instead of a panic, it was an opportunity. I could dig into the innards of the local WordPress, isolate the issue, and ensure my main site stayed operational. Local hosting isn’t just a place to build; it’s a refuge when things go wrong. Now, I always conduct testing on my local setup before implementing any changes on my production site. This strategy has been a lifesaver, effectively shielding me from unexpected issues and nasty surprises.
Delving into Access and Error Logs
Access and error logs are crucial for diagnosing issues and observing how interactions with your local WordPress site occur in real time. Understanding these logs can give you a clearer picture of your site’s behavior and help you swiftly rectify any problems.
Accessing Logs
On your local machine, the Apache server handles both access and error logs. You can find these logs within the /var/log/apache2/ directory if you’re using Apache with WSL. The access.log file logs all requests made to the server, providing insights into the incoming traffic. Meanwhile, the error.log file captures any errors encountered by the server, making it an invaluable resource for troubleshooting.
See screenshot below that shows an example of being able to view real-time access logs: 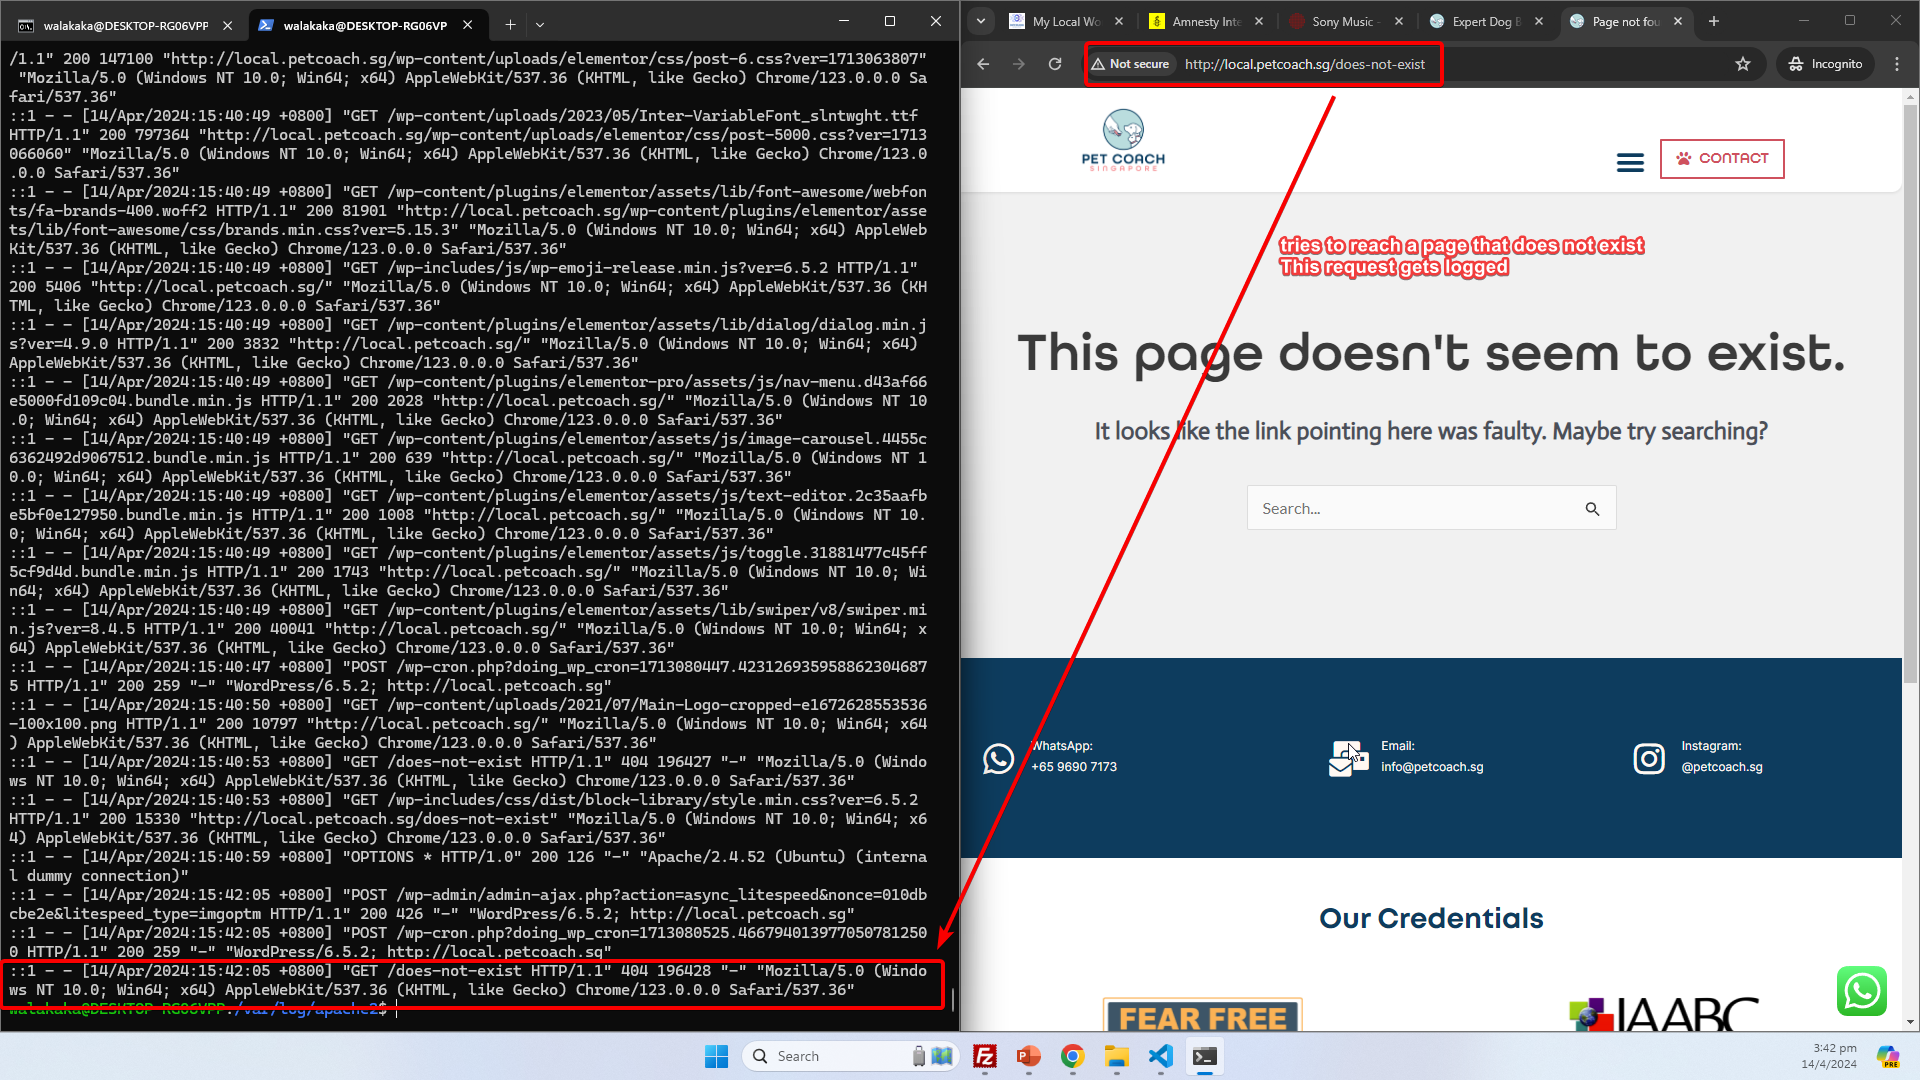
Triggering and Observing Real-Time Errors
To simulate an error and observe how it’s logged, try accessing a nonexistent page or intentionally causing a server error. For example, you could temporarily modify your site’s .htaccess file to include incorrect syntax or attempt to access a PHP file with a syntax error. Then, check the error.log file to see the error being logged in real time.
In a future update, we’ll include images illustrating how these logs appear on your screen, providing a visual guide to accompany your troubleshooting efforts. This will help you better understand the layout and information provided in the access and error logs, making it easier to diagnose and solve any issues that arise.
Low Latency
Local setups also offer a speed advantage. With no need to traverse the internet to access your development environment, you experience a lower latency that speeds up every click, every change, and every tweak you make. This boost in responsiveness is a subtle yet significant advantage.
A Local WordPress Site: Tangible Benefits
Setting up a local WordPress server is more than just a geek’s paradise. It empowers you to have a more hands-on approach to your website’s development, maintenance, and problem-solving. This control is not only liberating but also deeply educational. When you host locally, you bridge the gaps between software, servers, and understanding.
The benefits of running WordPress on your PC aren’t just theoretical. You’ll experience quicker load times, cultivate a deeper understanding of your WordPress setup, and have the means to address issues head-on. It’s about taking back the reins and steering your digital presence from the driver’s seat, even if it’s parked in your local folder.
Thank You
To those who followed this local WordPress geekout writeup, thank you. It’s a leap of faith from the traditional online hosting paradigms, but one that’s rich in rewards. Please don’t hesitate to share insights or suggestions you might have regarding my hosting approach. Hopefully, I’ve been able to offer some valuable information on setting up WordPress locally and this somehow benefits your work, blog, or business. Another big win for me was that the WordPress community is teeming with resources and individuals ready to assist you on this path; all you have to do is ask!

Peace and Love
Shafik Walakaka