WP Super Cache
Table of contents
What is WP Super Cache – it’s essentially a tool (developed by some wordpress developer) to cache your site. Caching yoursite basically means that your html files are stored and served to users without being dynamically generated!
Mind boggling, don’t worry – we’ll dumb it down, as we’re not a fan of these jargons anyways
How Wordpress Generate Pages
When you access a Wordpress website, the pages are generated in the following sequence:
- You type some stuff in the browser address bar
- Wordpress receives the request, and now dynamically generates the html document
- Once the html document is generated, it’s served to you on your browser
- Browser renders it, retrieves all static files such as css, js images etc. And wala – you see the website page
The Issue – Wordpress is Slow
I don’t know about you, but all the wordpress sites I’ve worked on is slow as hell lol. And the bottleneck normally occurs when wordpress is generating the html document dynamically. Don’t believe – see sample bottleneck for page load (due to the damn wordpress server dynamically generating the html doc): 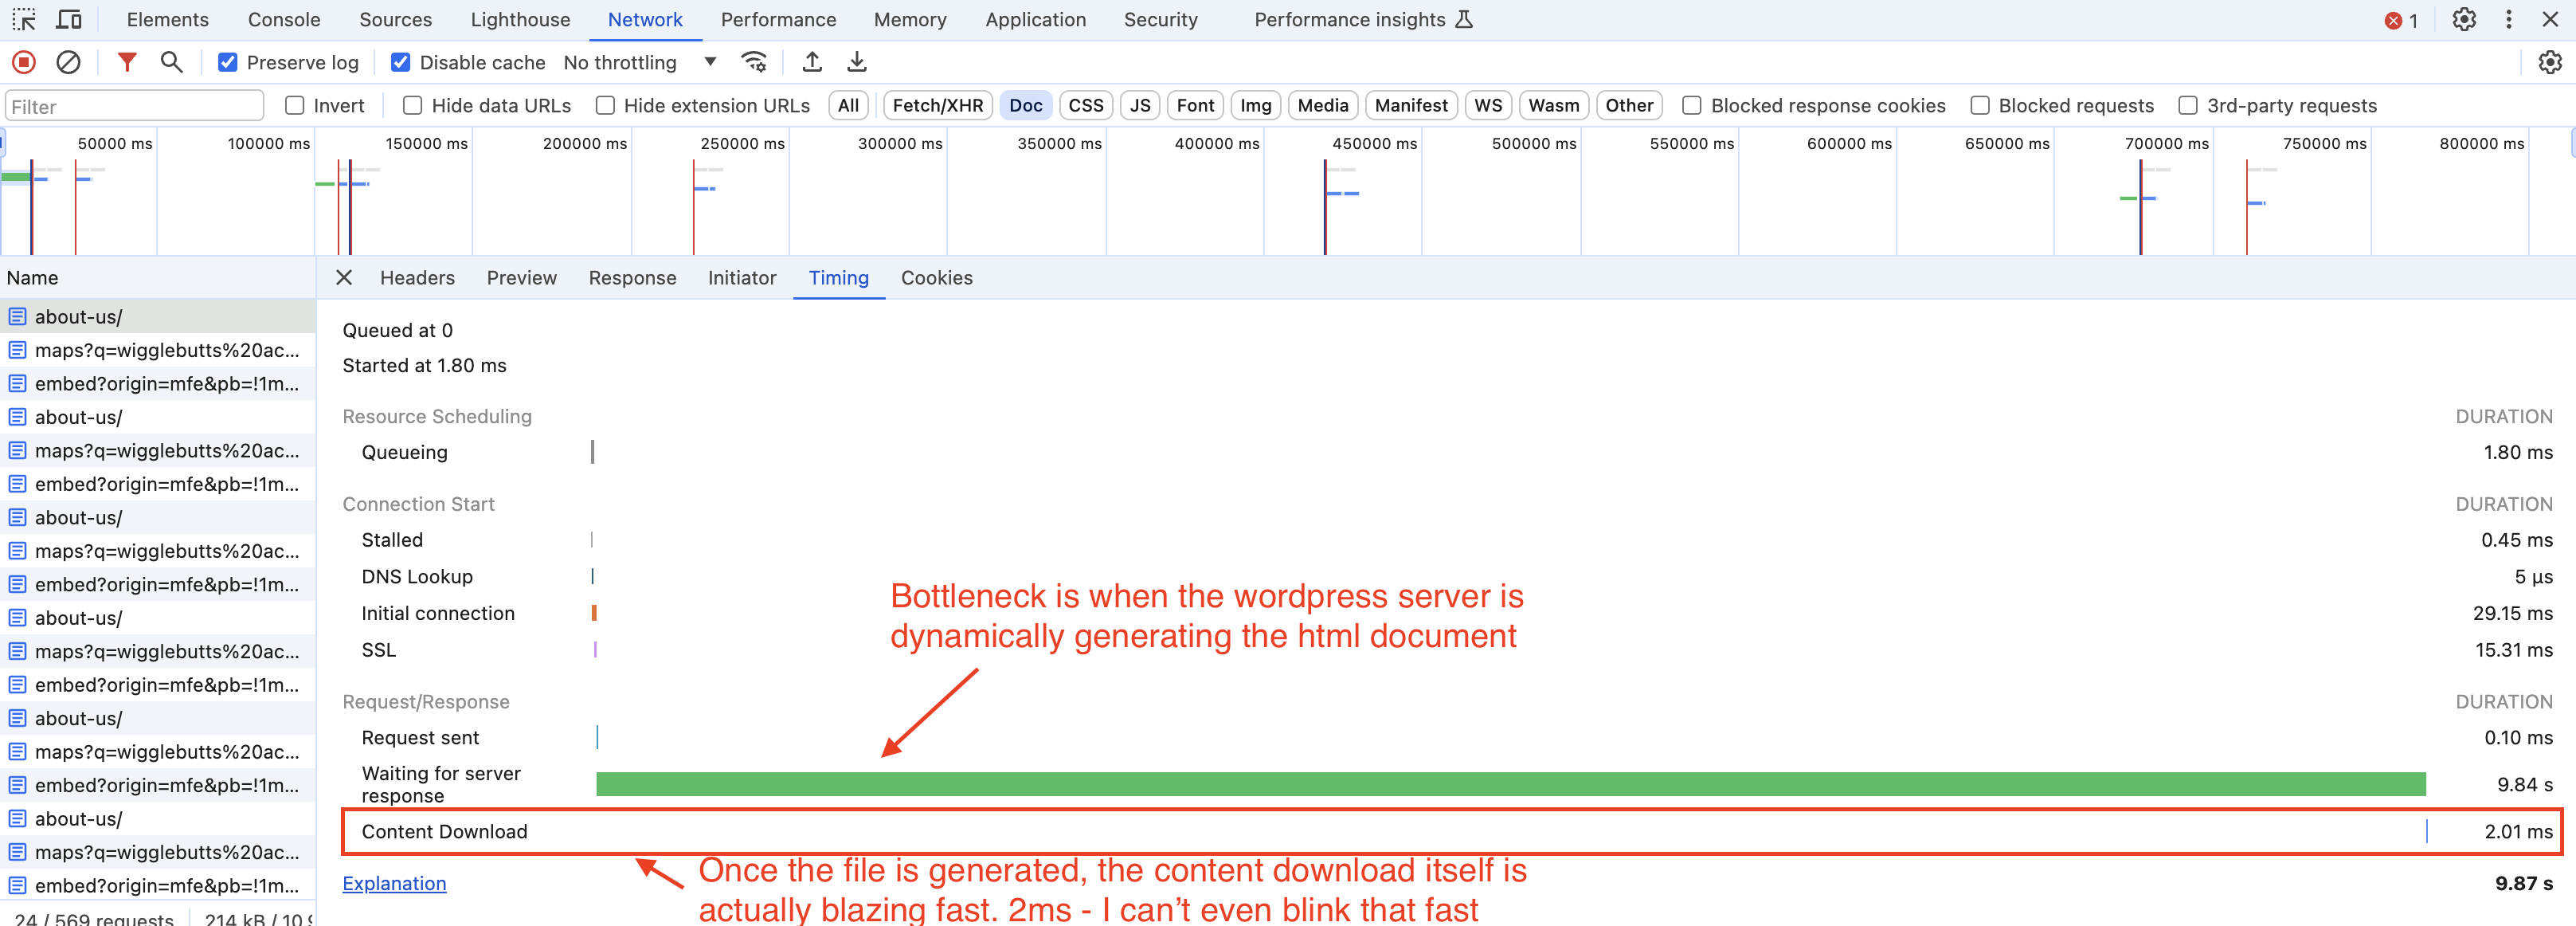
Once the page is generated, the actual download speed is actually blazing fast. Wtf 2ms, I can’t even blink that fast.
The Solution – Cache the static html doc
The solution – why don’t we save the html document, and just share it with users when they request for pages. Here comes static page server side html document caching (WP Super Cache is one solution).
This way, when a user tries to access the page – your wordpress website does not re-generates the html document again. We just share the previous document that has already been generated
Step-by-step using WP Super Cache
Let us take you through the step-by-step sequence of implementing the WP Super Cache. Idea is that you can just follow these steps and configure it for your wordpress site! Note: Happy to take any clarifications, and we’ll add additional details as subsequent sections
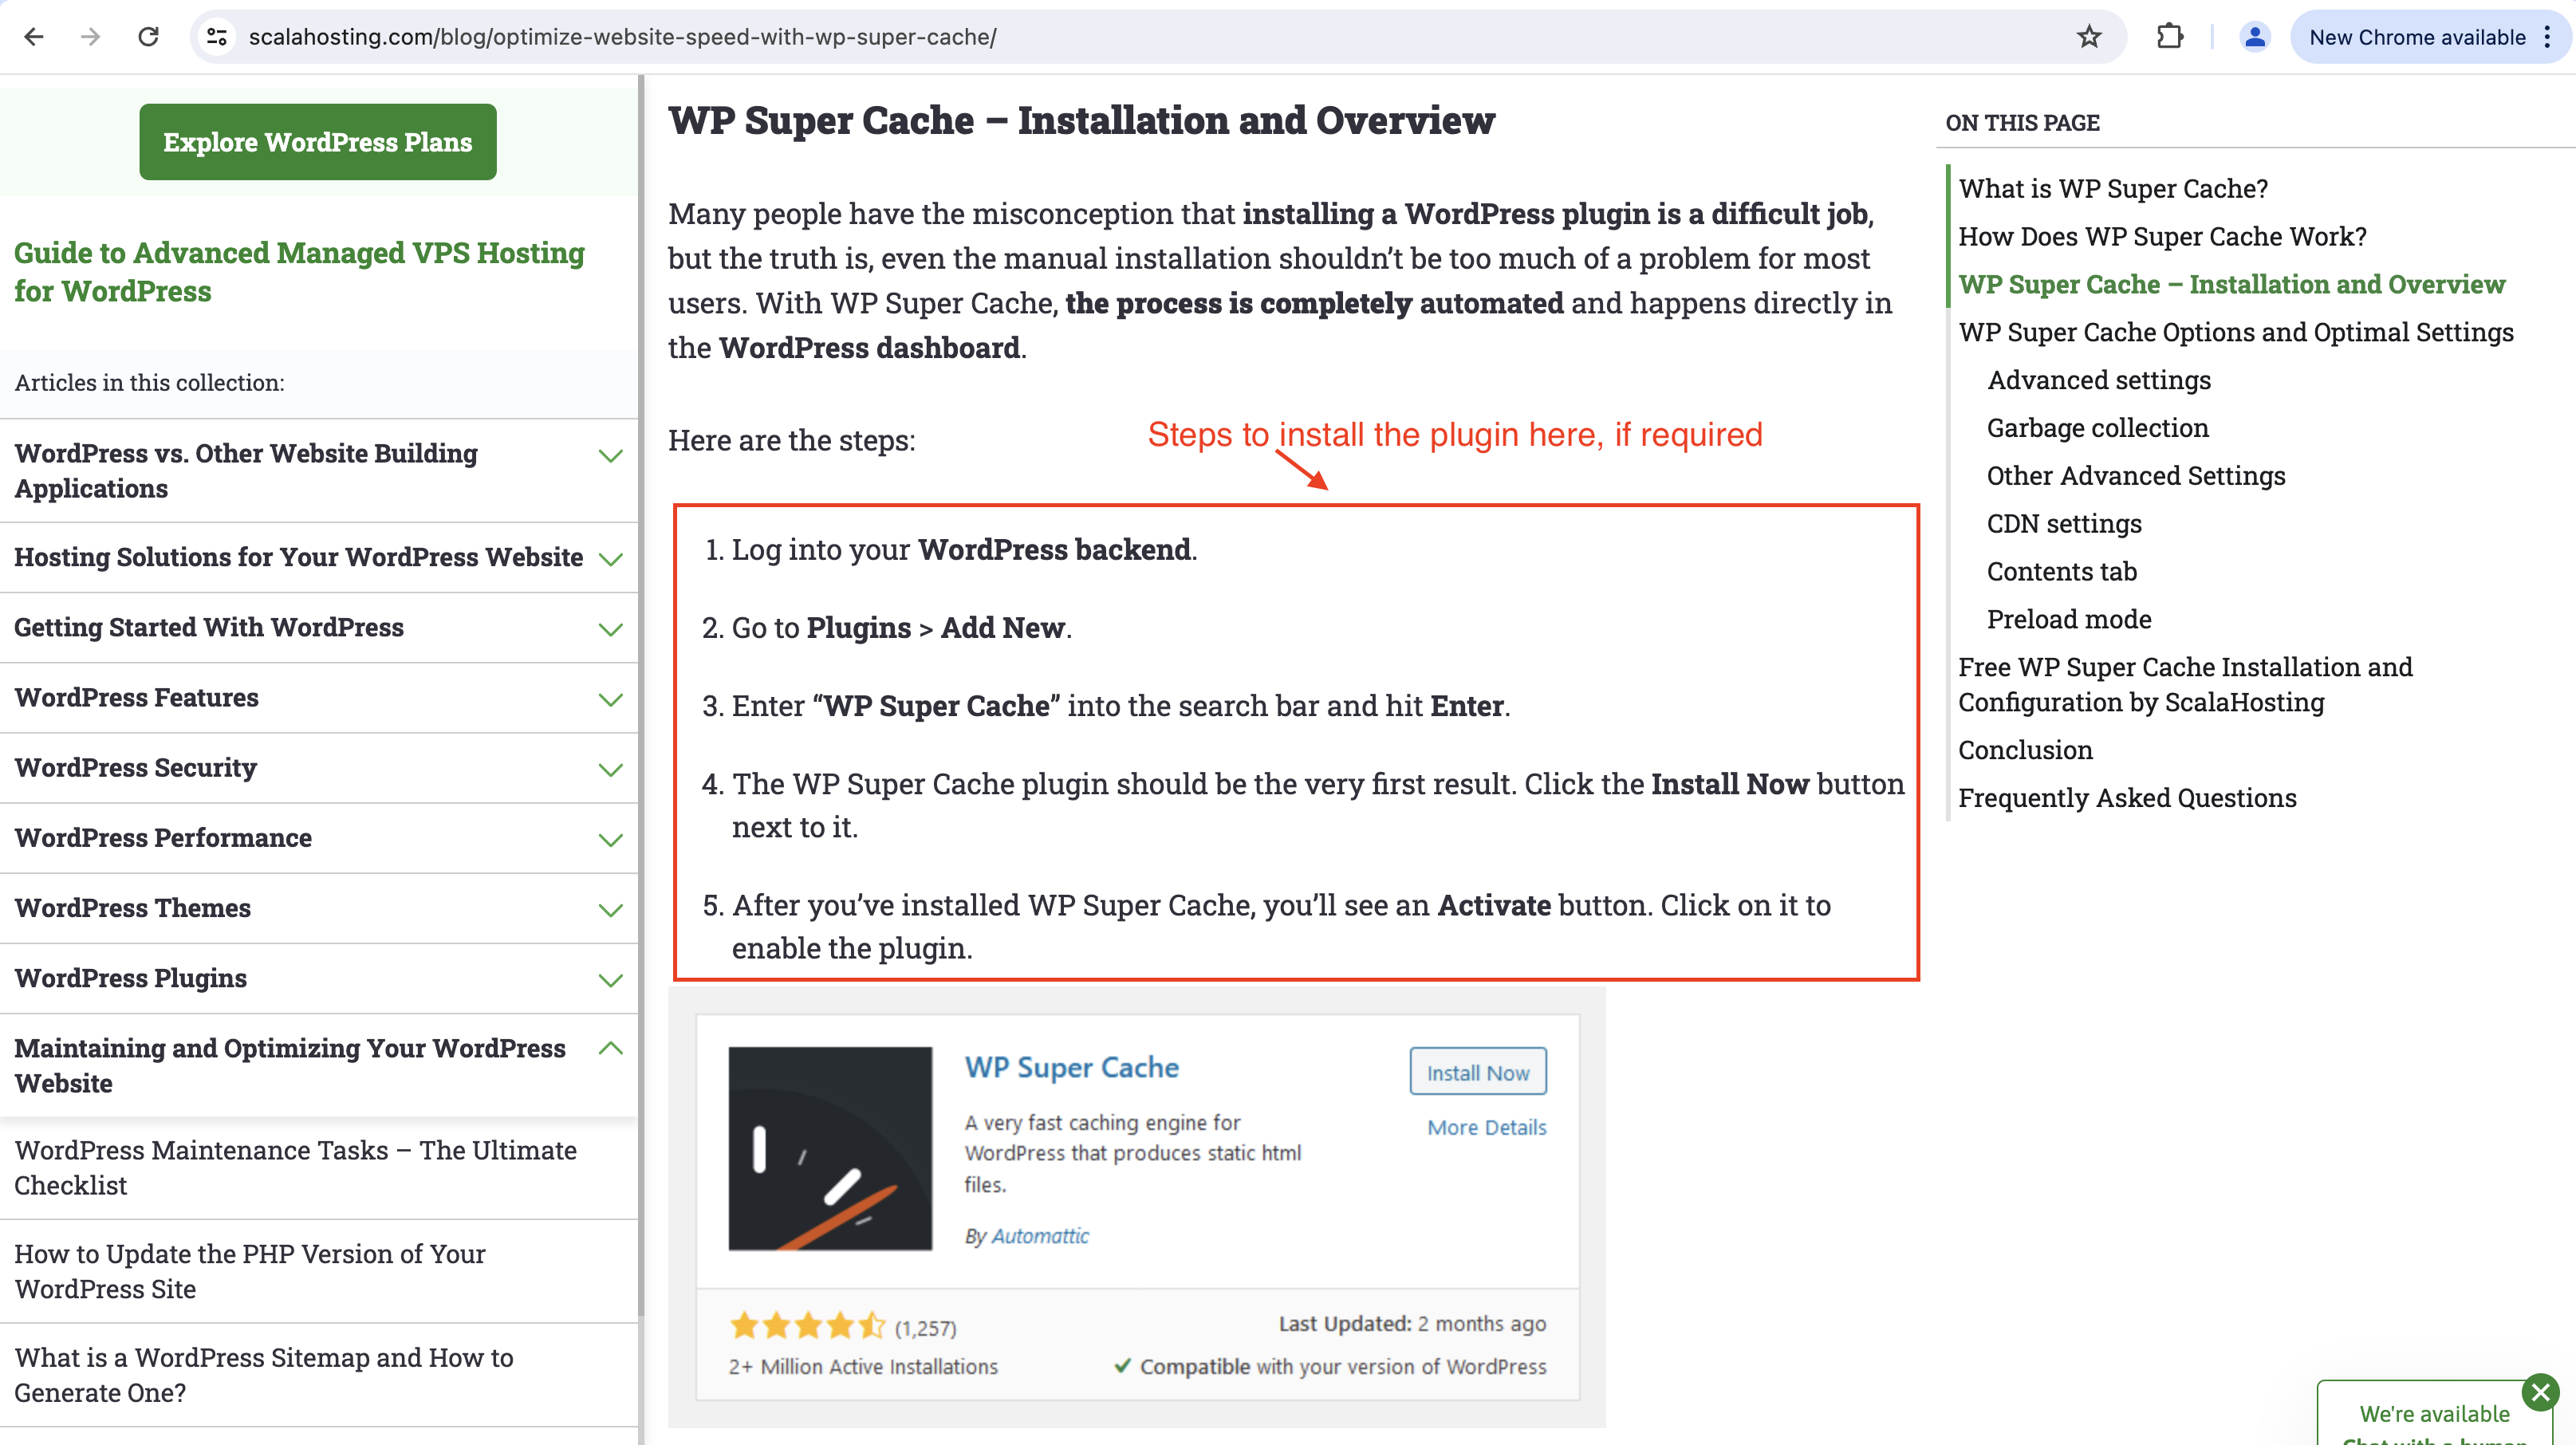
- First, install the WP Super Cache Plugin (No tutorial required for this one – but you can check out the steps to install a wordpress plugin here!)
- Then, we configure WP Super Cache – starting by toggling the cache settings to ON in the
Easytab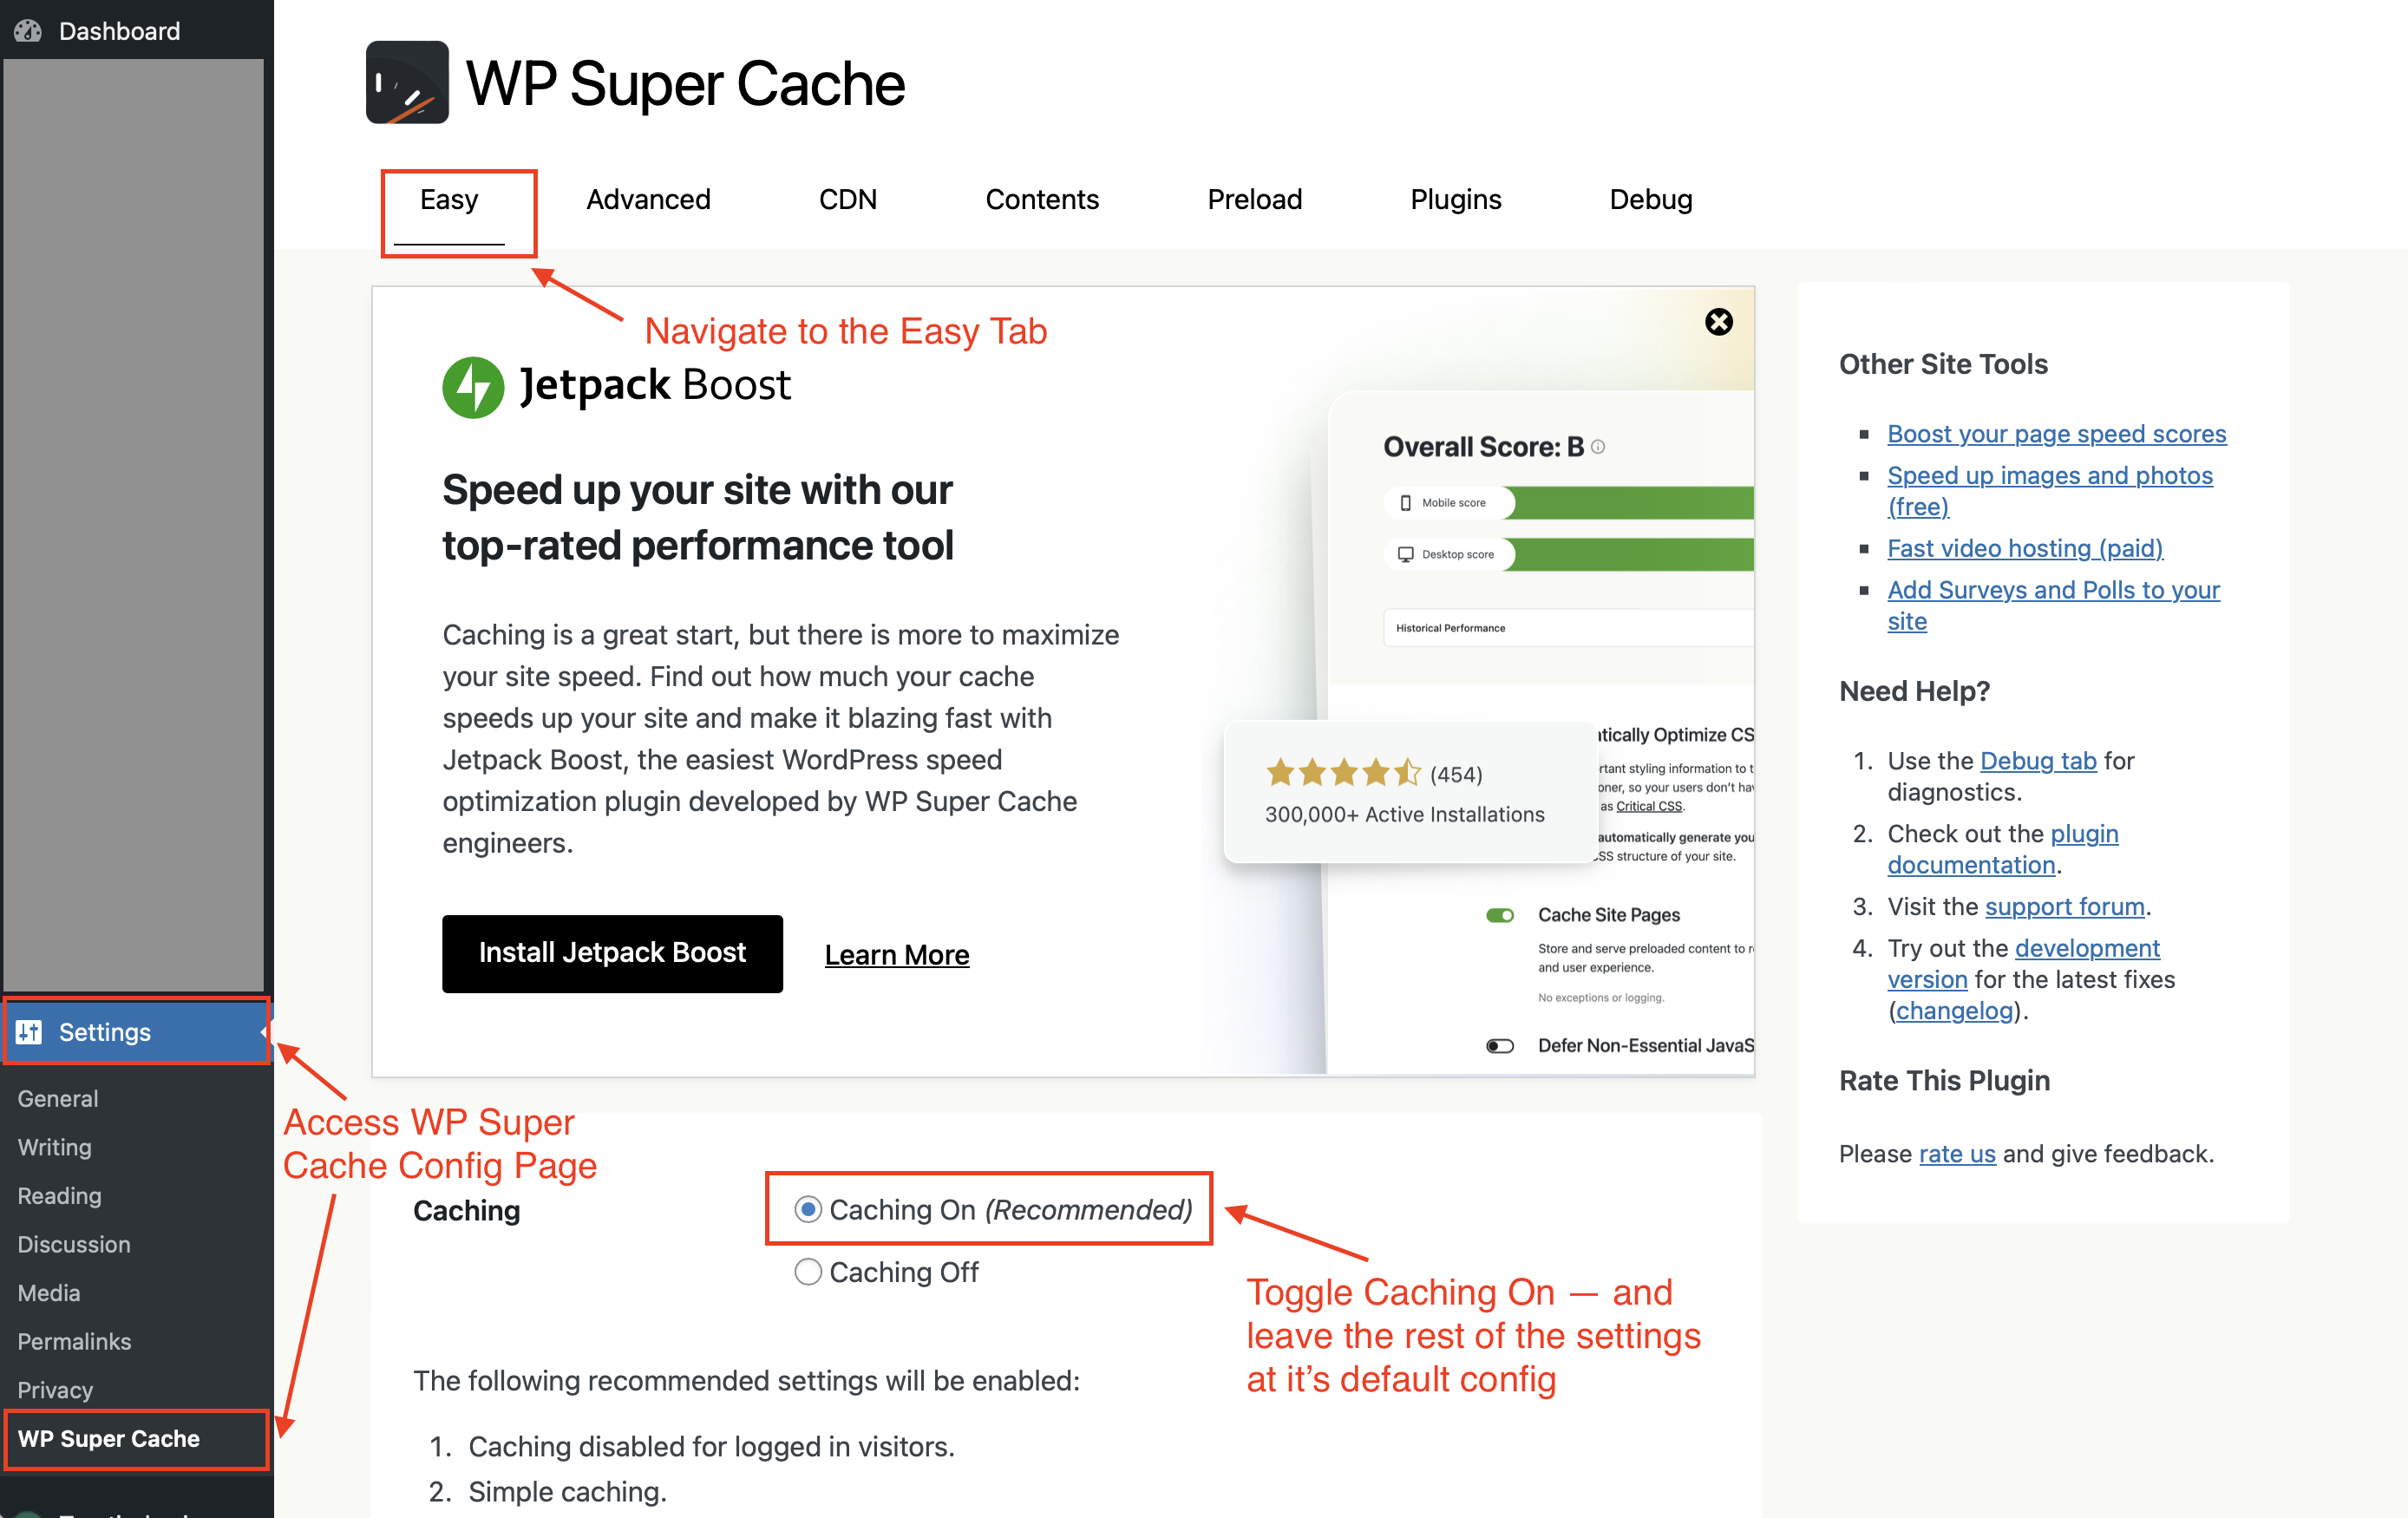
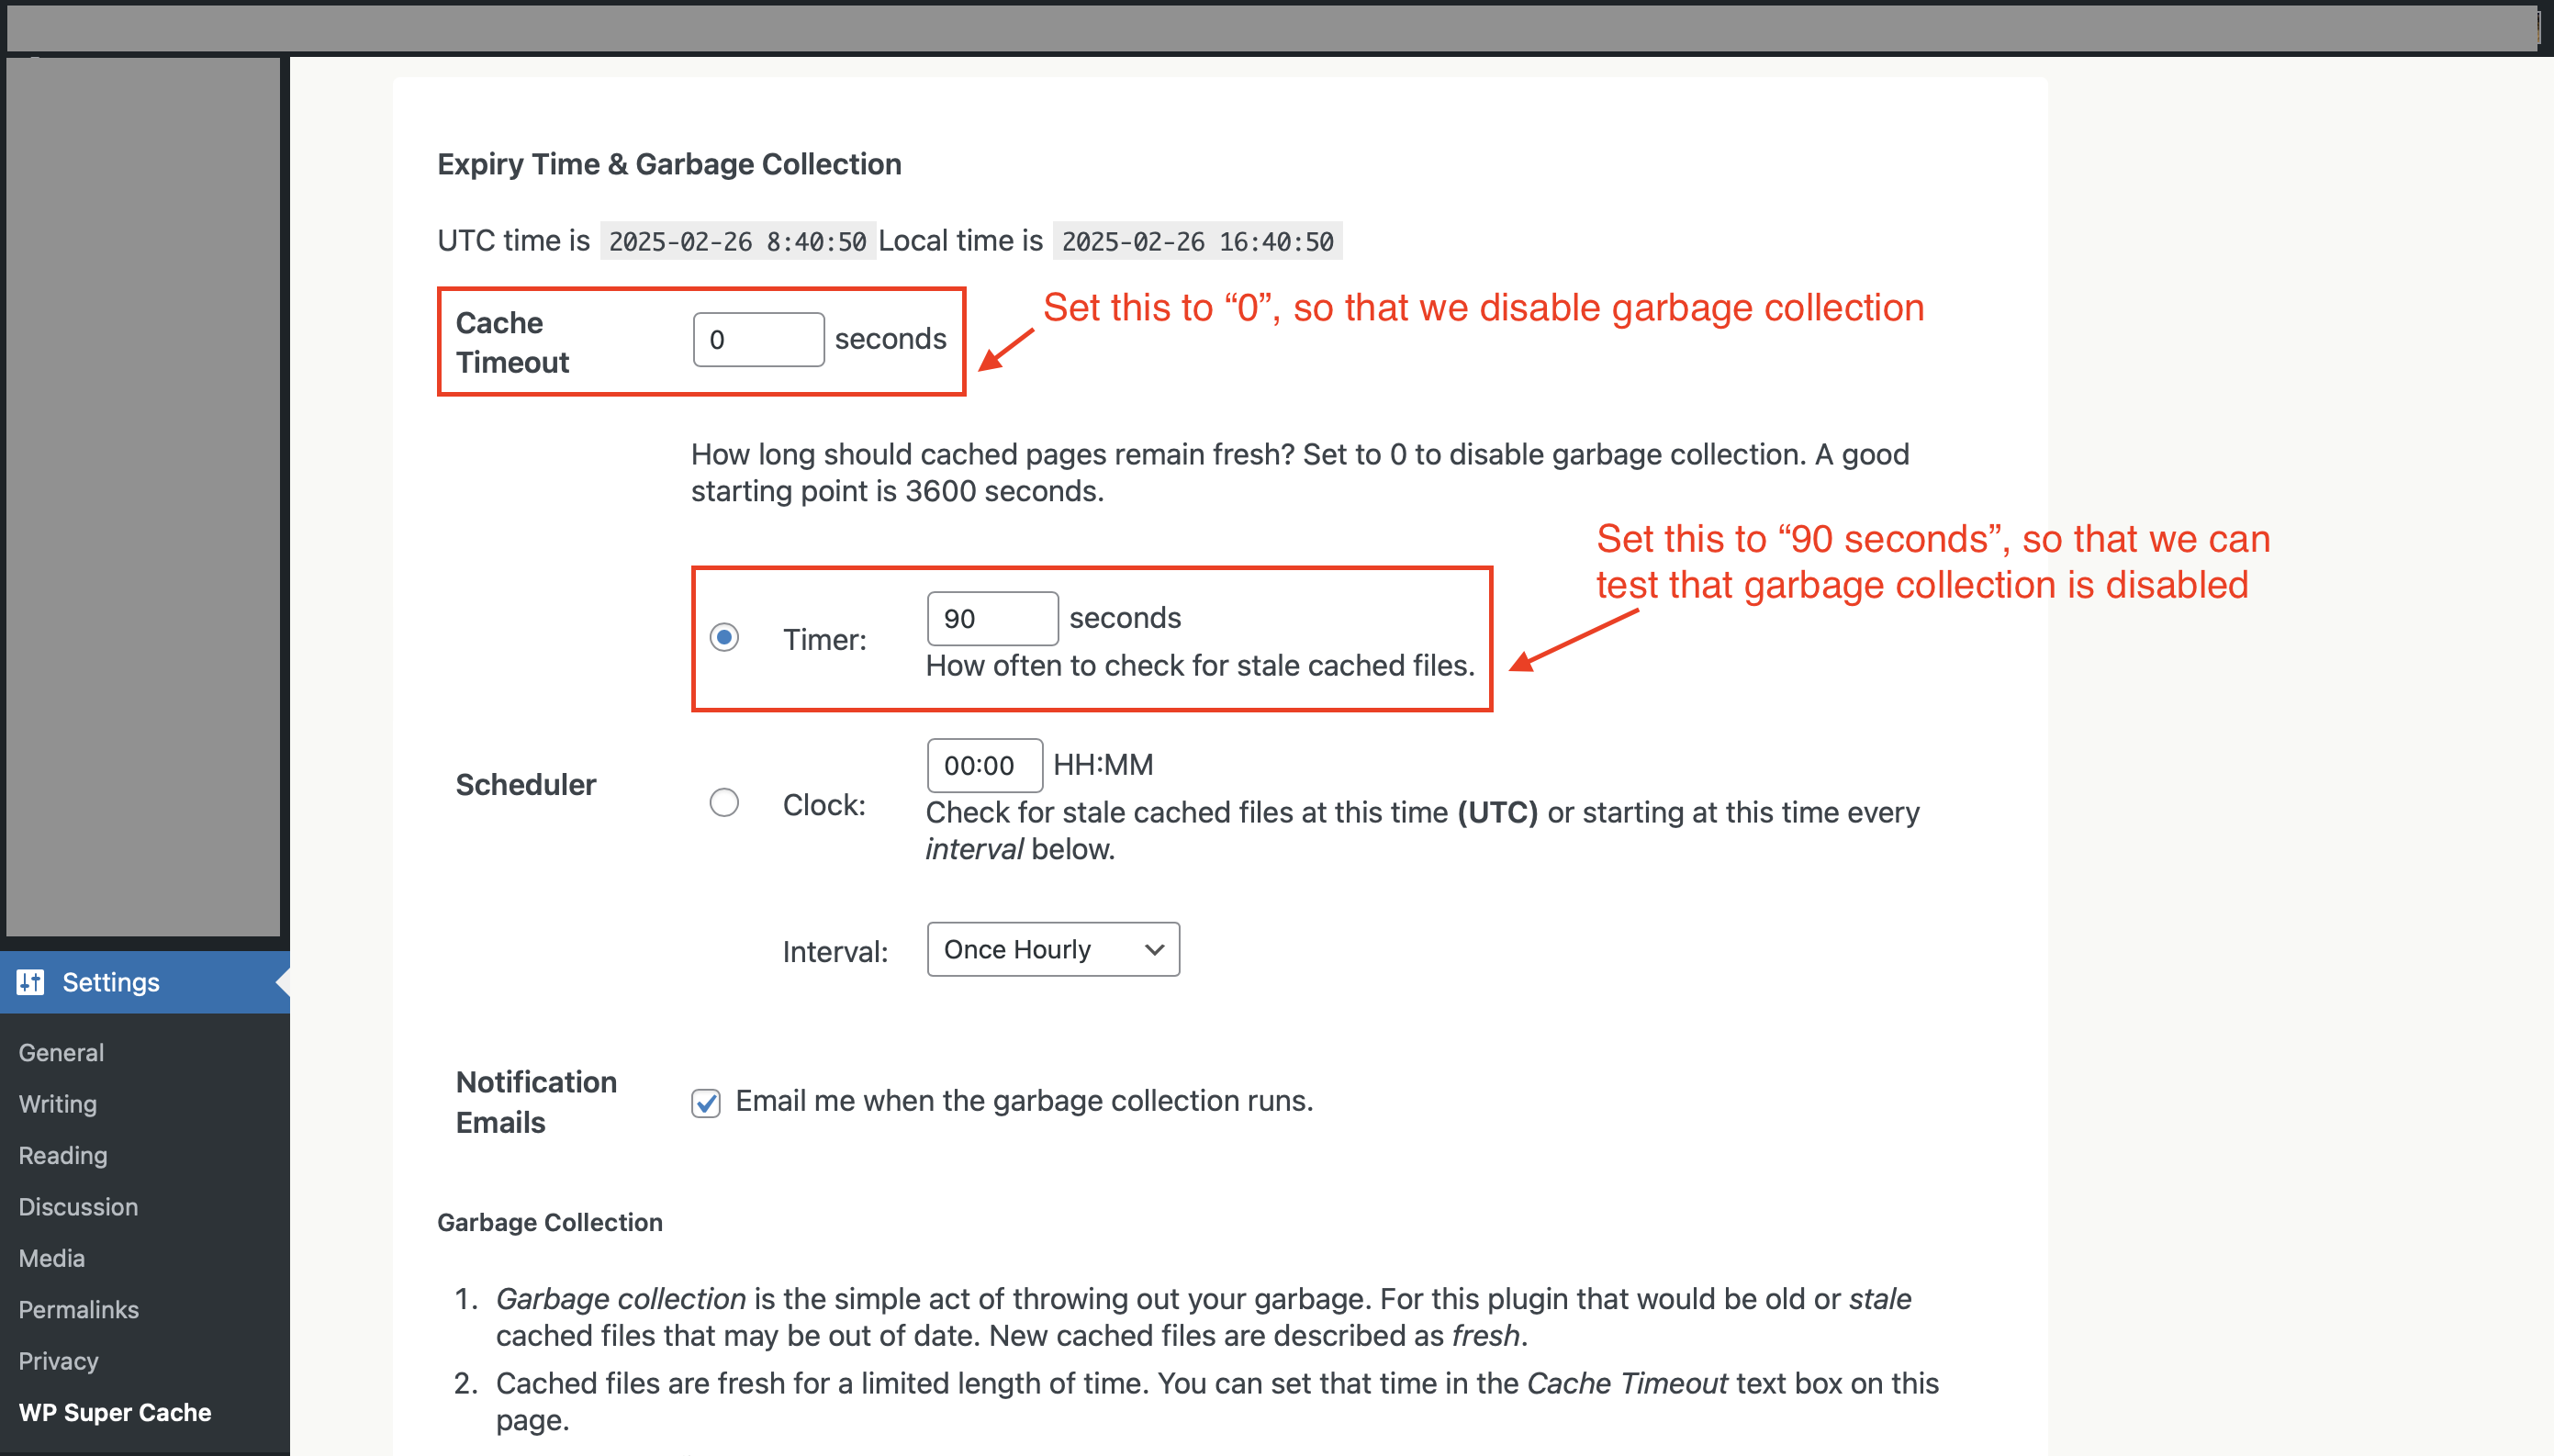
- Afterwhich, we configure the advanced tab to switch OFF the Garbage Collection feature. We also set the interval timing to 90 seconds so that it’s easy for us to test the switching OFF of the Garbage Collection
And that’s it – we now have a blazing fast site lol. It’s that simple? Yes it is!
Verifying that the Cache is Working
Let’s verify that the Cache is working. We’ll do that by testing the load speed of the site with and without Cache.
- First set the
Cache Timeoutto 30 Seconds. This will check and indicate that the cache is “stale” every 30 seconds. - Next, let’s access the site. The site should take some time to load, because Wordpress needs to generate the html document. See screenshot below for the load time of 10 seconds
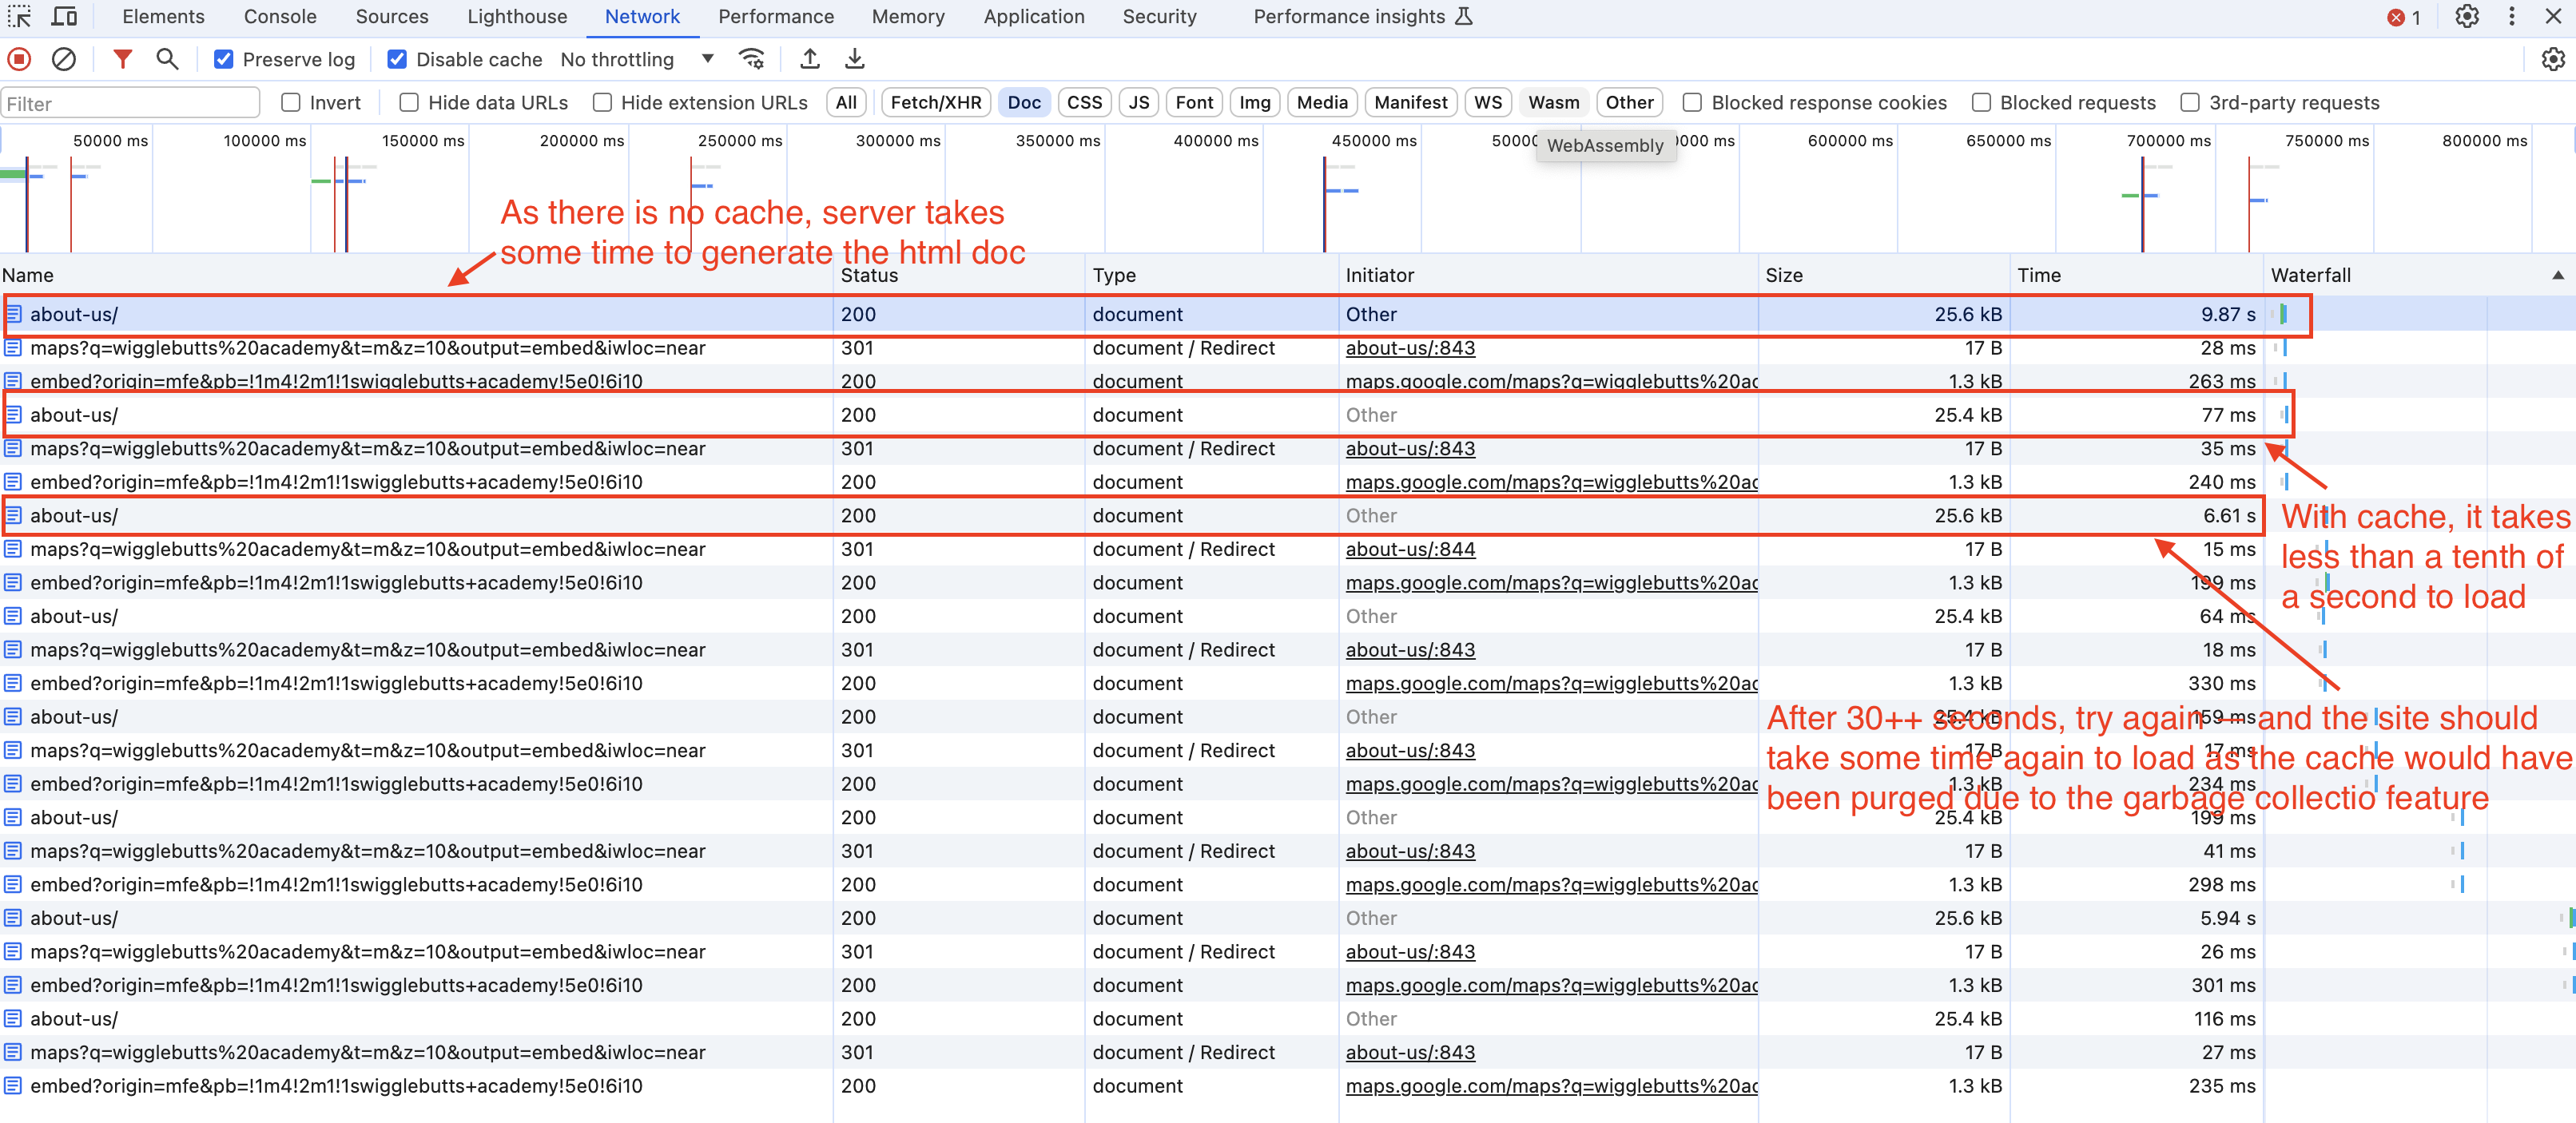
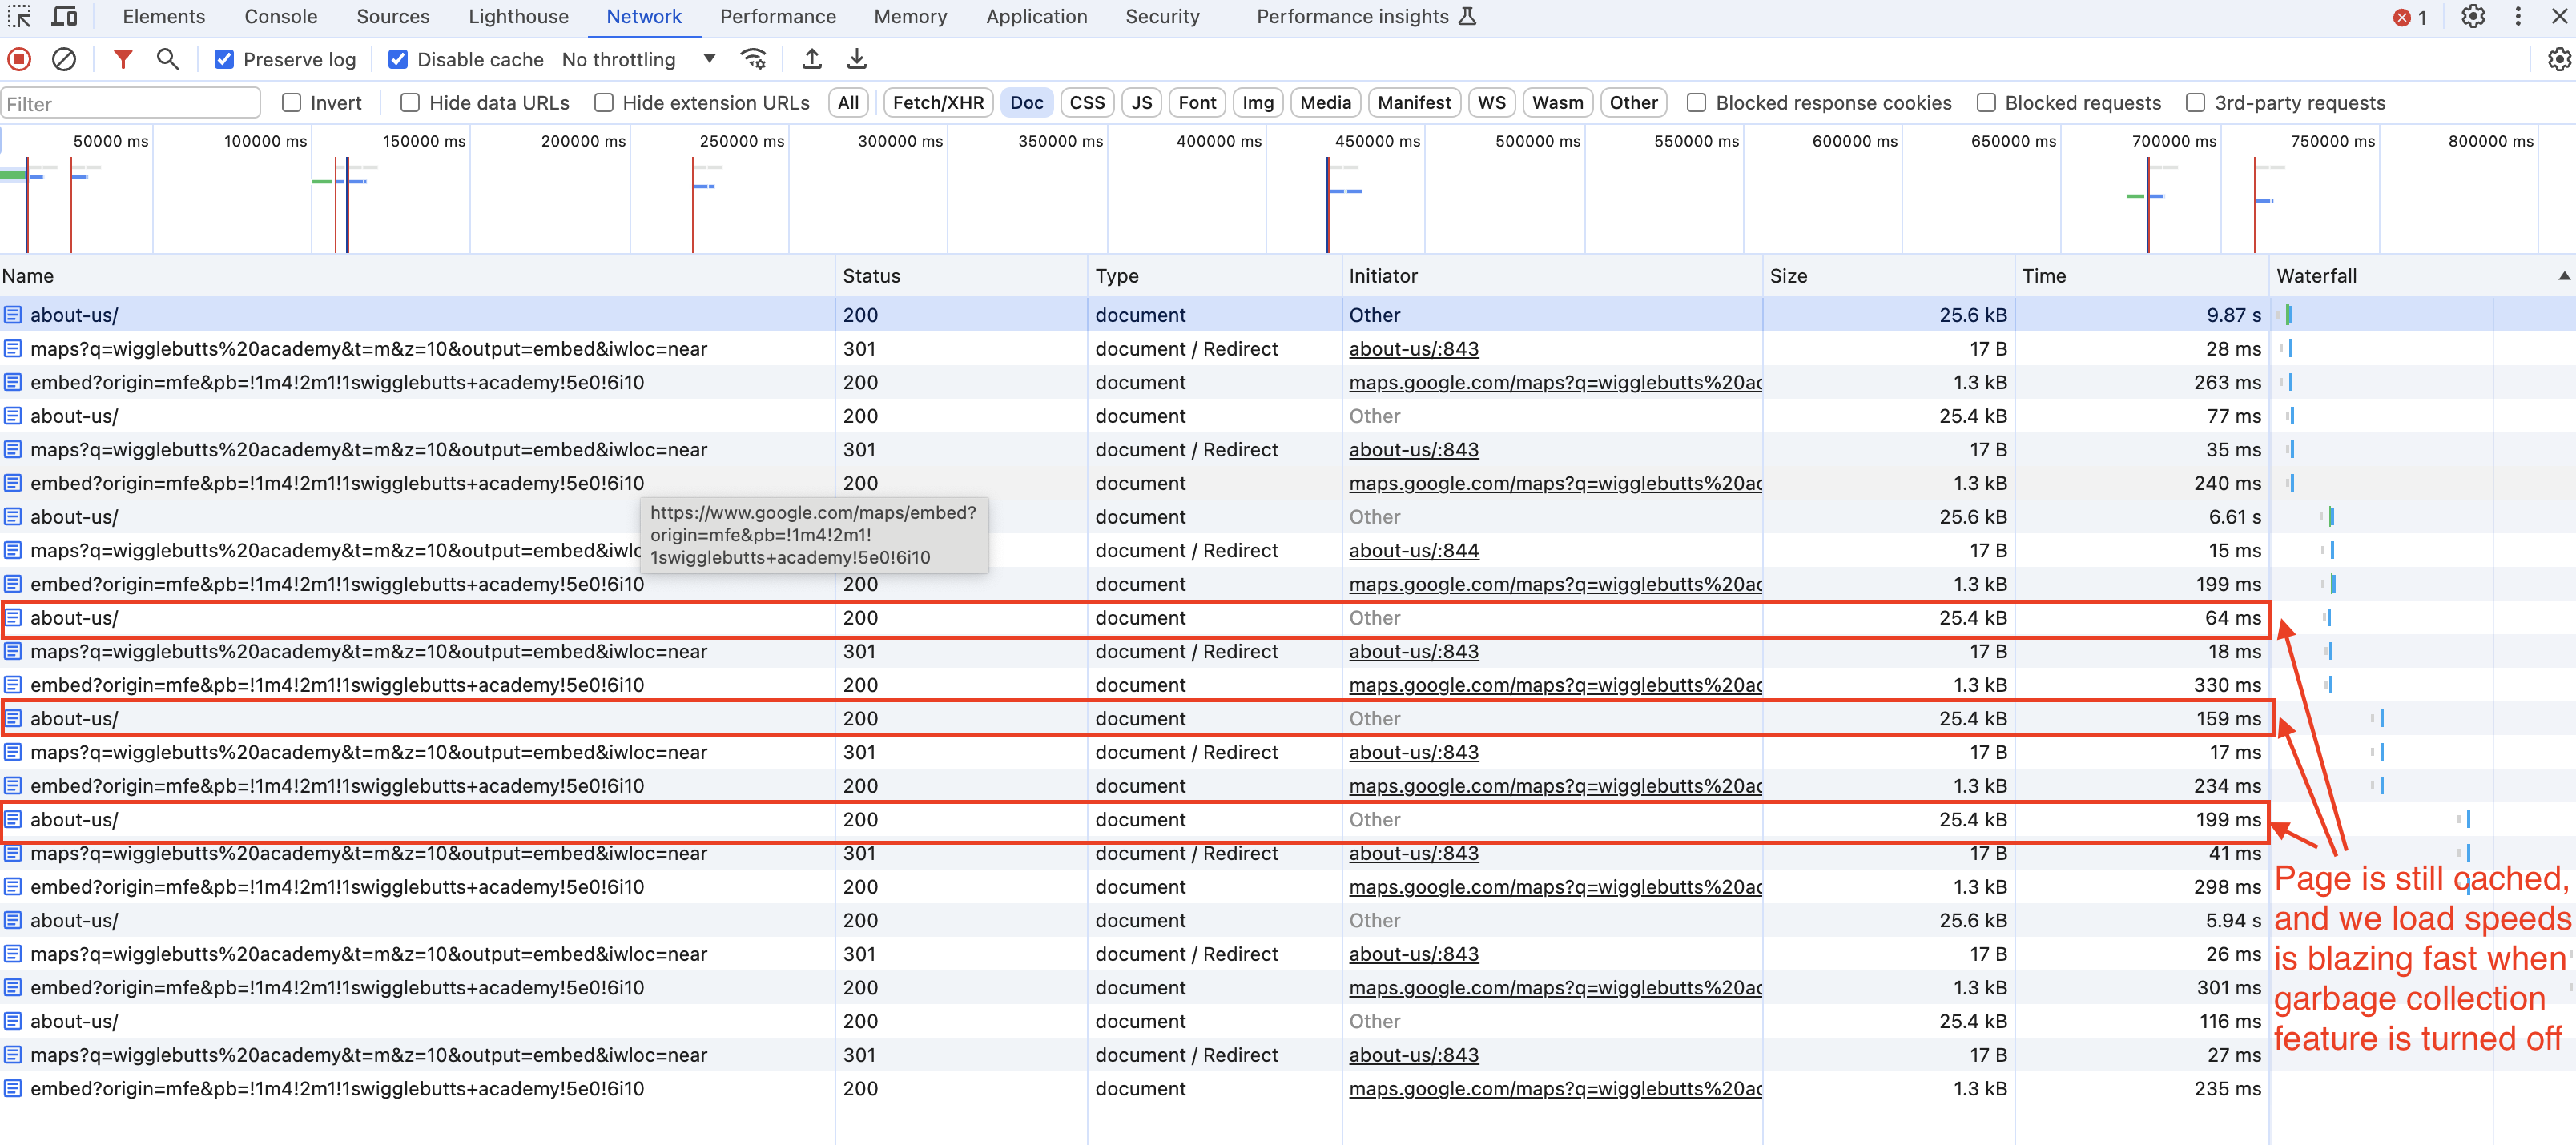
- From the above image, you can also see that the cache is getting purged every 30 seconds. We would also need to test disabling the garbage collection feature, and verify that the cache is never purged – see screenshot below, to see the cache that is stored permanently
How to Purge the Cache
Now that our site is blazing fast – we have to solve the final problem. If the cache is stored permanently, what happens when I actually need to update my site lol.
Easy – we just purge it manually! Access the Content tab, and hit Delete Cache. 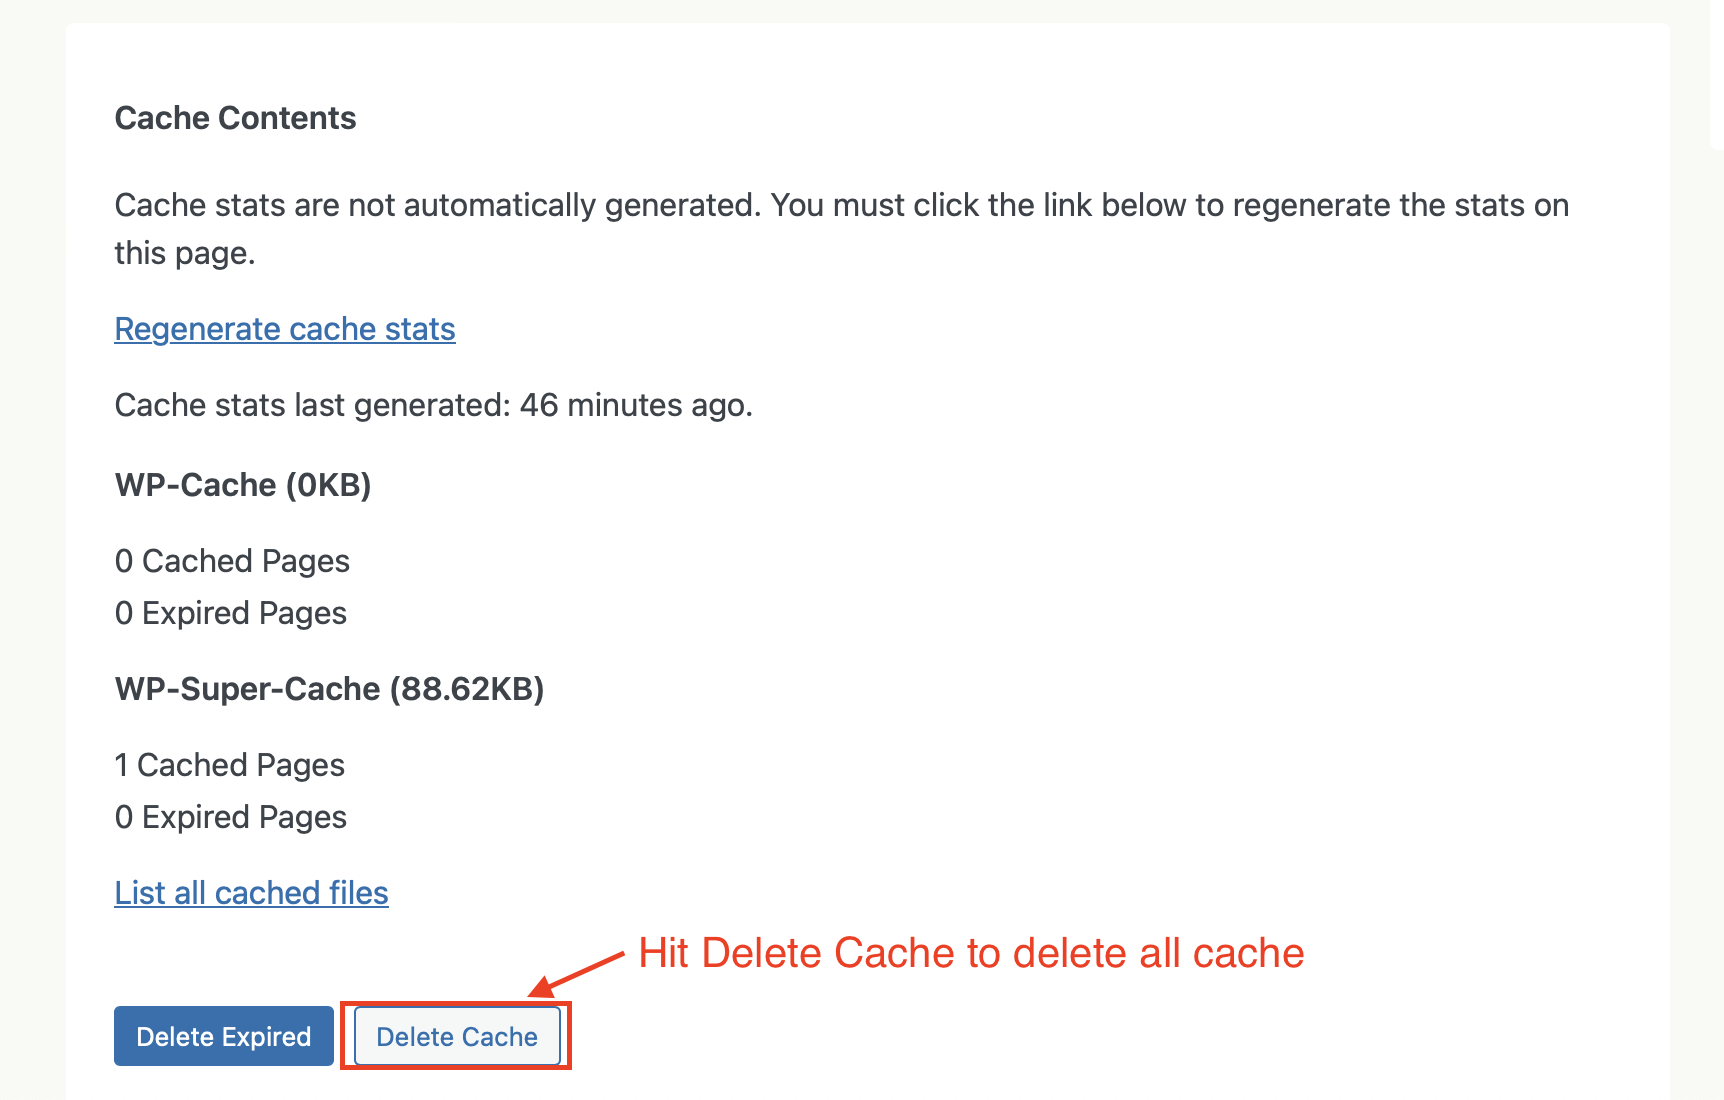
This would delete the cache, and as you can see from the screenshot below – the cache no longer exists and it takes some time for Wordpress to generate the page 
So we’ll just have to do this, everytime there is an update to the site!
We discuss further about how the cache is stored (the html doc) in the next section. This will make it clearer regarding what is actually being deleted or replaced when you purge your cache!
Where is the Cache stored
The cache is stored in the Wordpress files, normally in `public_html/wp-content/cache/supercache/
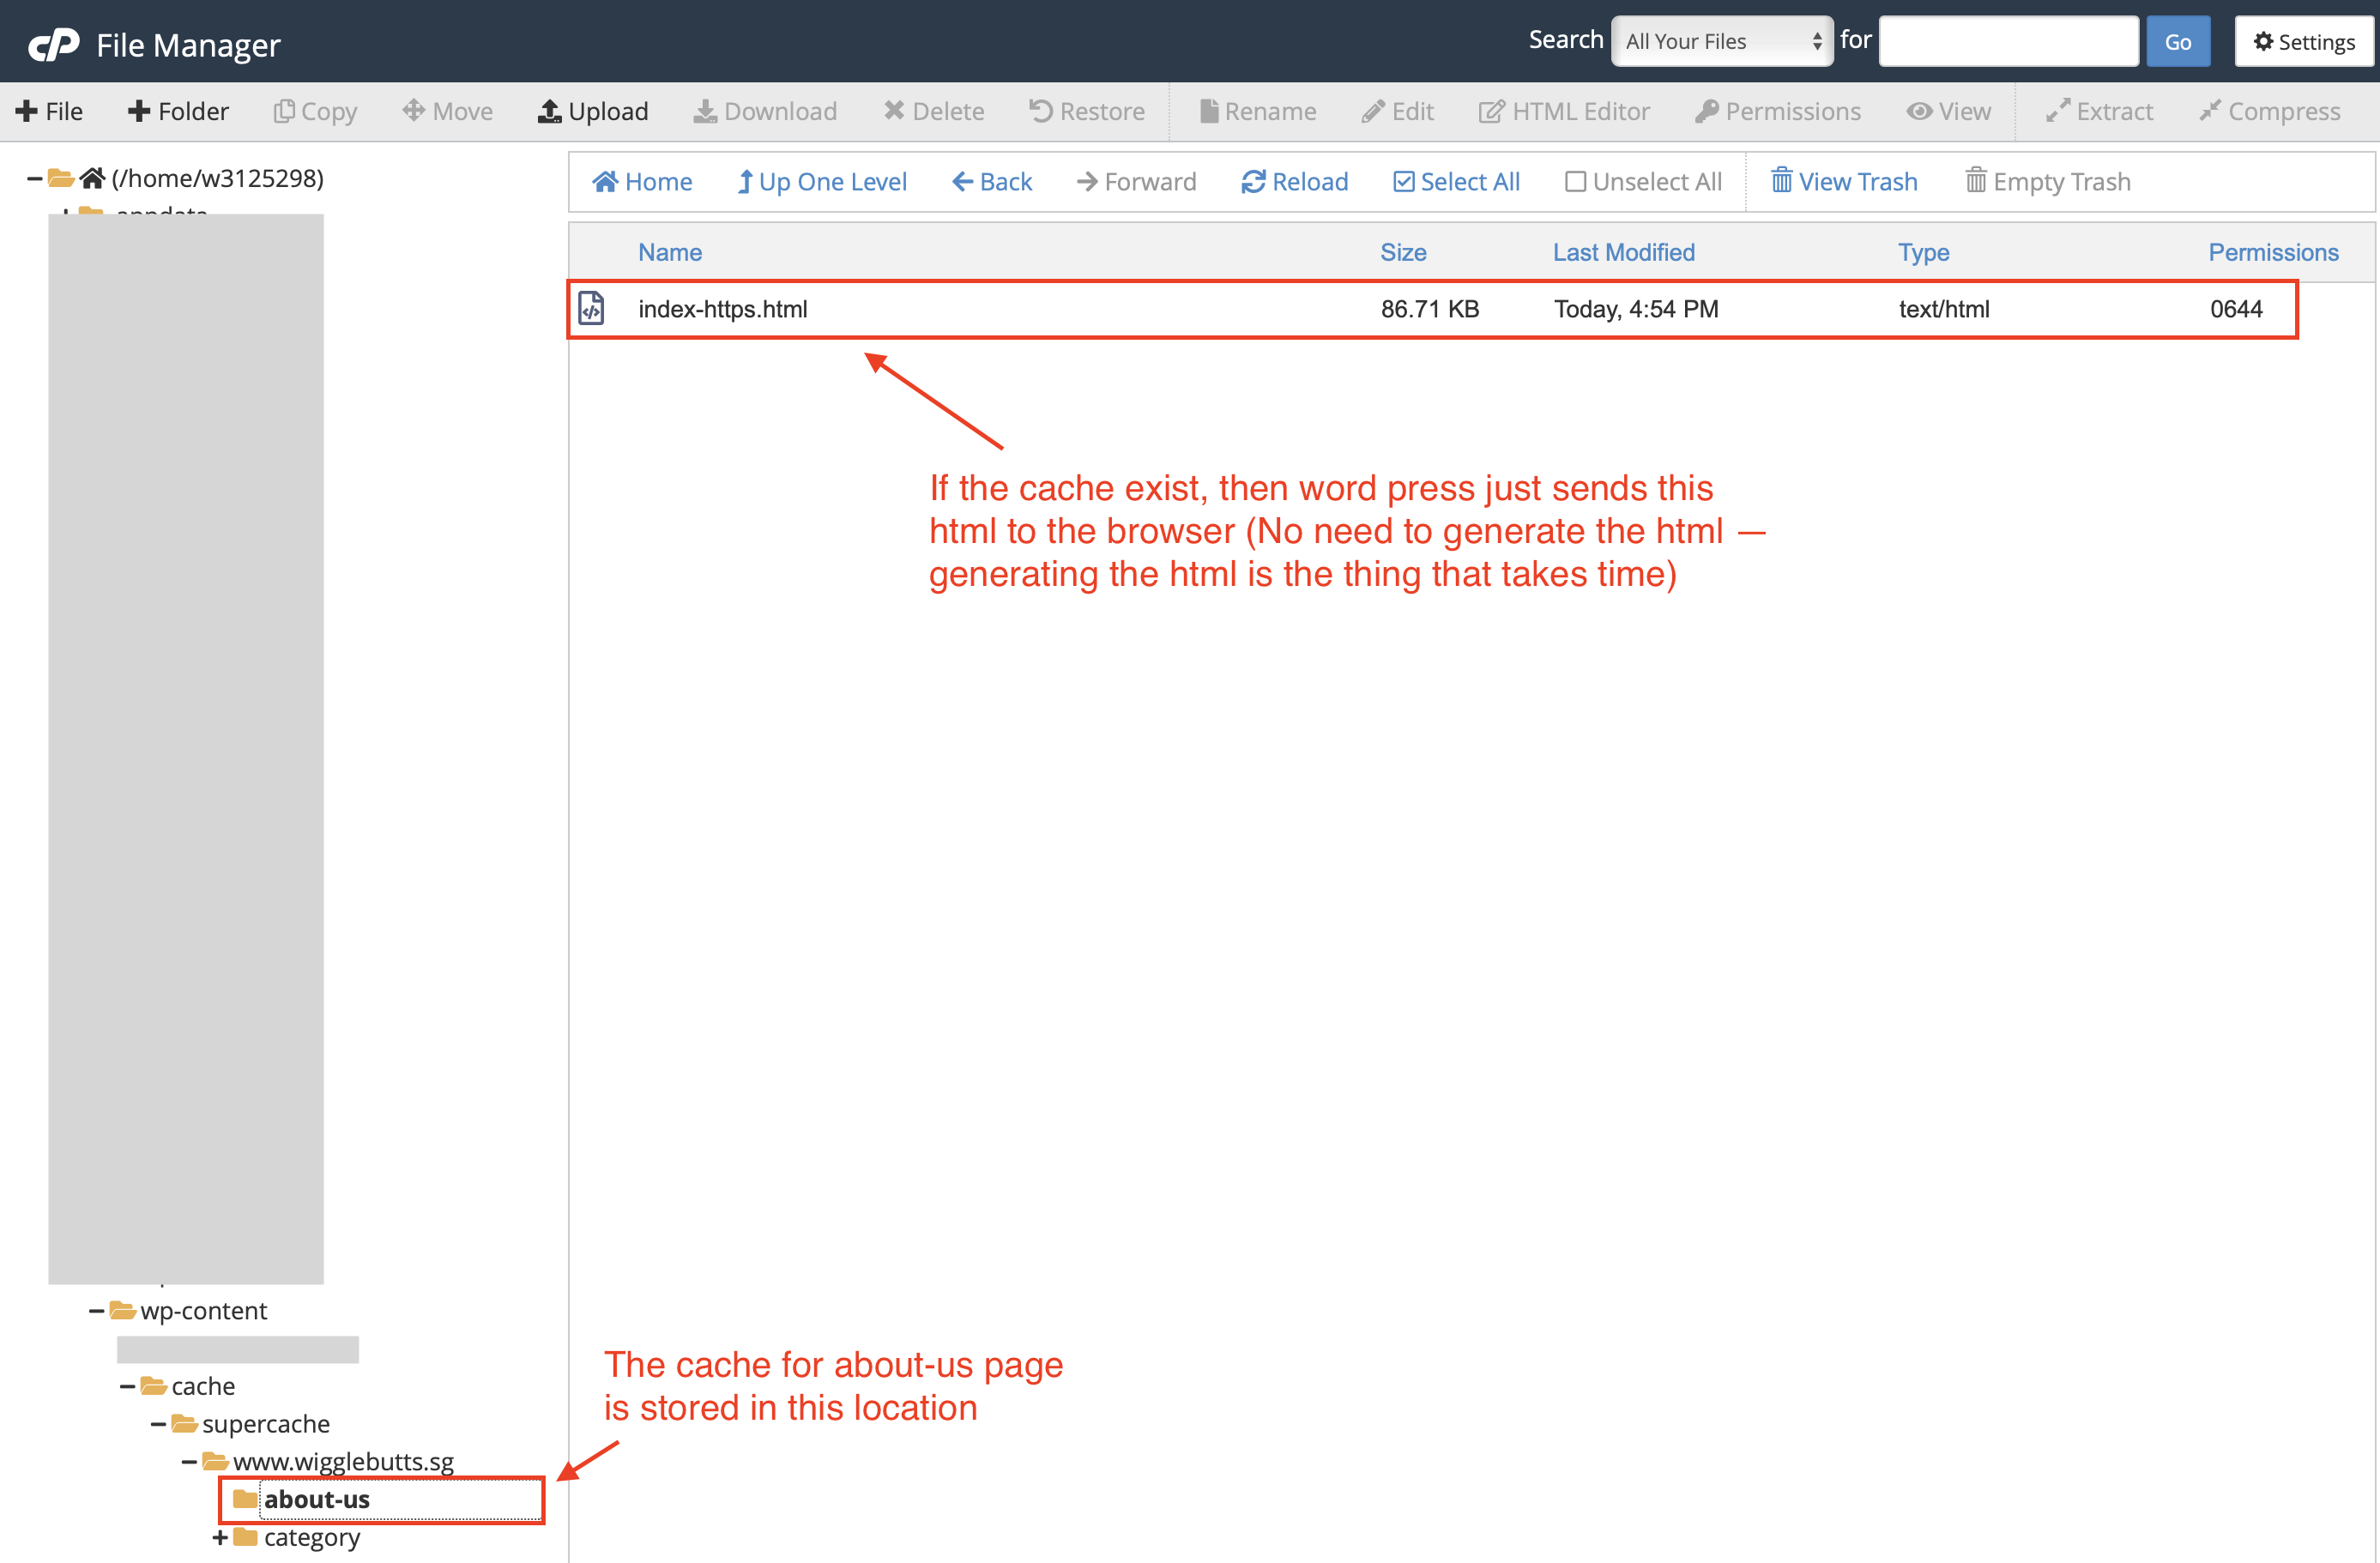
Notice that the html file is already stored in this location. When a user requests for the about-us page, Wordpress immediately sends this file. We don’t need to spend time generating the html file (since it’s already cached), and as previously discussed – generating the html was the time consuming part.
This should clarify how the cache is stored!
Easy Cache Setup vs Advanced Cache Setup
The easy cache setup actually uses php to find the cache files and serves it to the user. The advanced cache setup requires changes to the nginx configuration, to route the user accordingly to serve the relevant files that are cached.
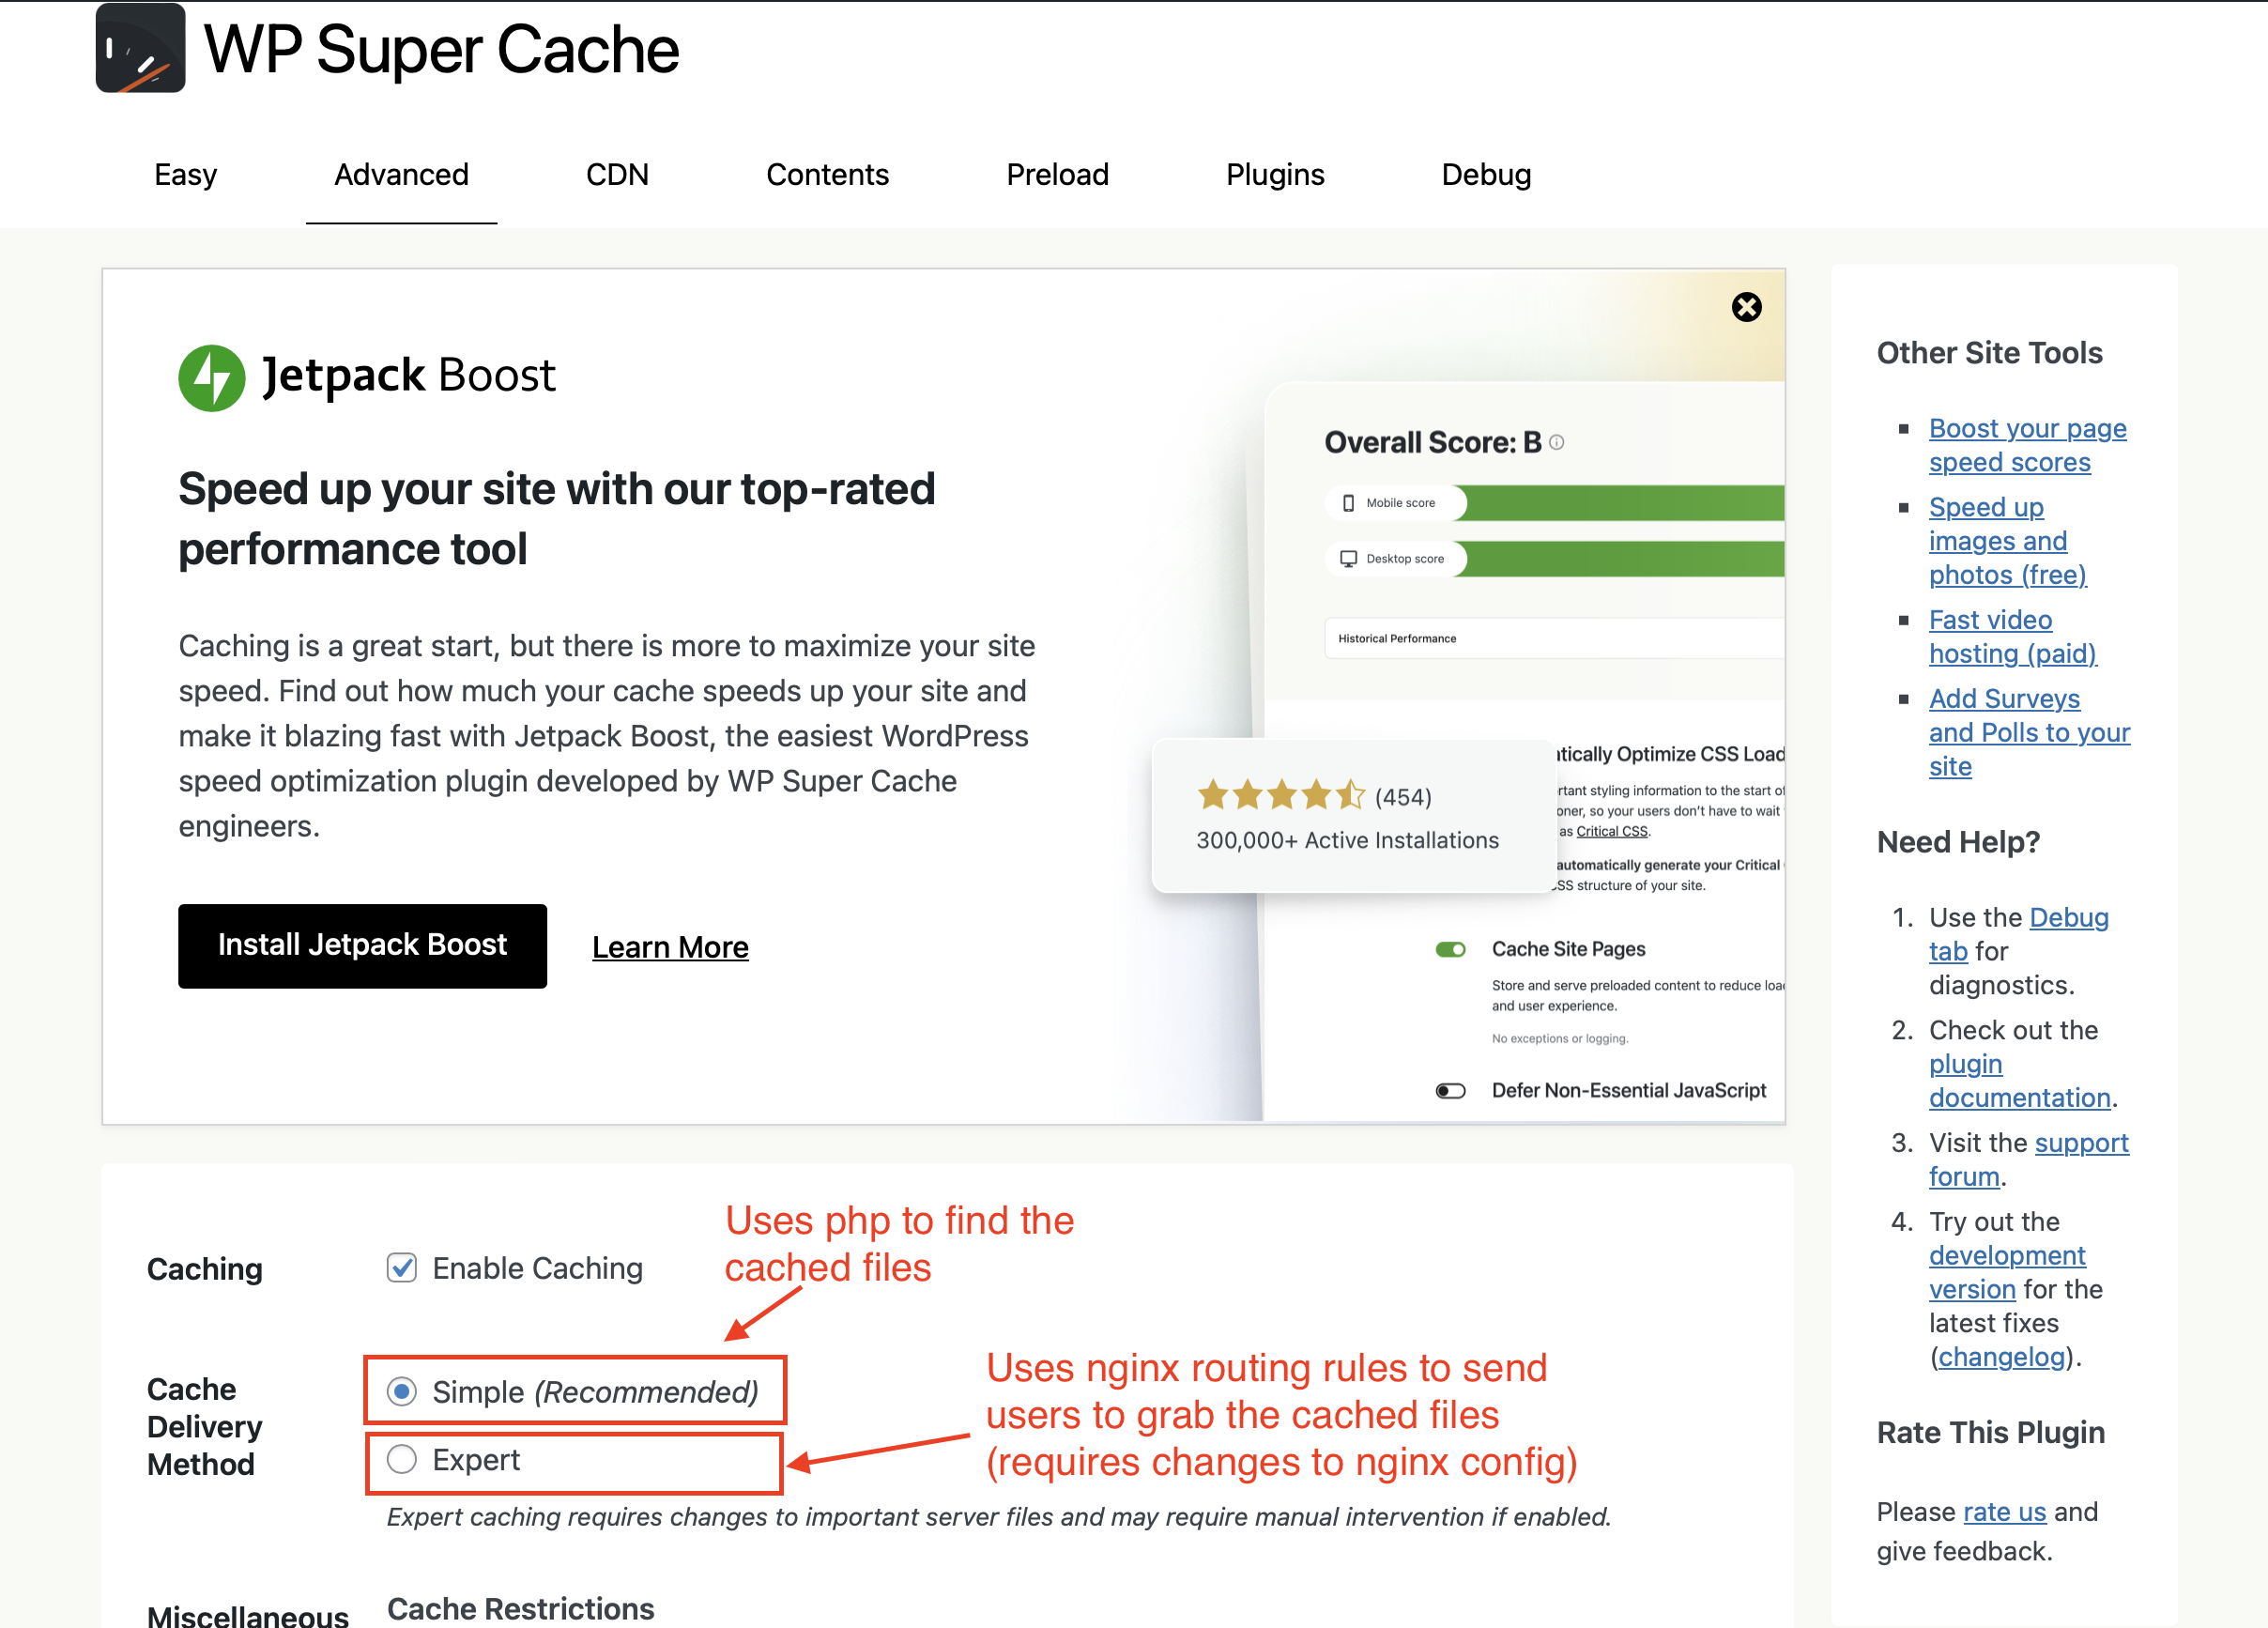
Although php (easy config) approach is supposedly less efficient – for most small scale websites, this is more than enough, and it reduces the cost overheads.
Advanced caching approach, requires additional server level configuration, as the routing is handled via the nginx server itself. Checkout the nginx config that we need to add for additional details:
server {
    # ...
    set $cache_uri $request_uri;

    # POST requests and urls with a query string should always go to PHP
    if ($request_method = POST) {
        set $cache_uri 'null cache';
    }
    if ($query_string != "") {
        set $cache_uri 'null cache';
    }

    # Don't cache uris containing the following segments
    if ($request_uri ~* "(/wp-admin/|/xmlrpc.php|/wp-(app|cron|login|register|mail).php|wp-.*.php|/feed/|index.php|wp-comments-popup.php|wp-links-opml.php|wp-locations.php|sitemap(_index)?.xml|[a-z0-9_-]+-sitemap([0-9]+)?.xml)") {
        set $cache_uri 'null cache';
    }

    # Don't use the cache for logged in users or recent commenters
    if ($http_cookie ~* "comment_author|wordpress_[a-f0-9]+|wp-postpass|wordpress_logged_in") {
        set $cache_uri 'null cache';
    }

    location / {
        try_files /wp-content/cache/supercache/$http_host/$cache_uri/index-https.html $uri $uri/ /index.php$is_args$args;
    }
}
Full article regarding this configuration can be found here!
So we simply use the easy cache setup! Using this setup, we will not receive the return header specifing a cache Hit. So we have to verify using the manual tests that were previously mentioned.
Results
All the damn pages are now loading within a fraction of a second ;). How sick is that! 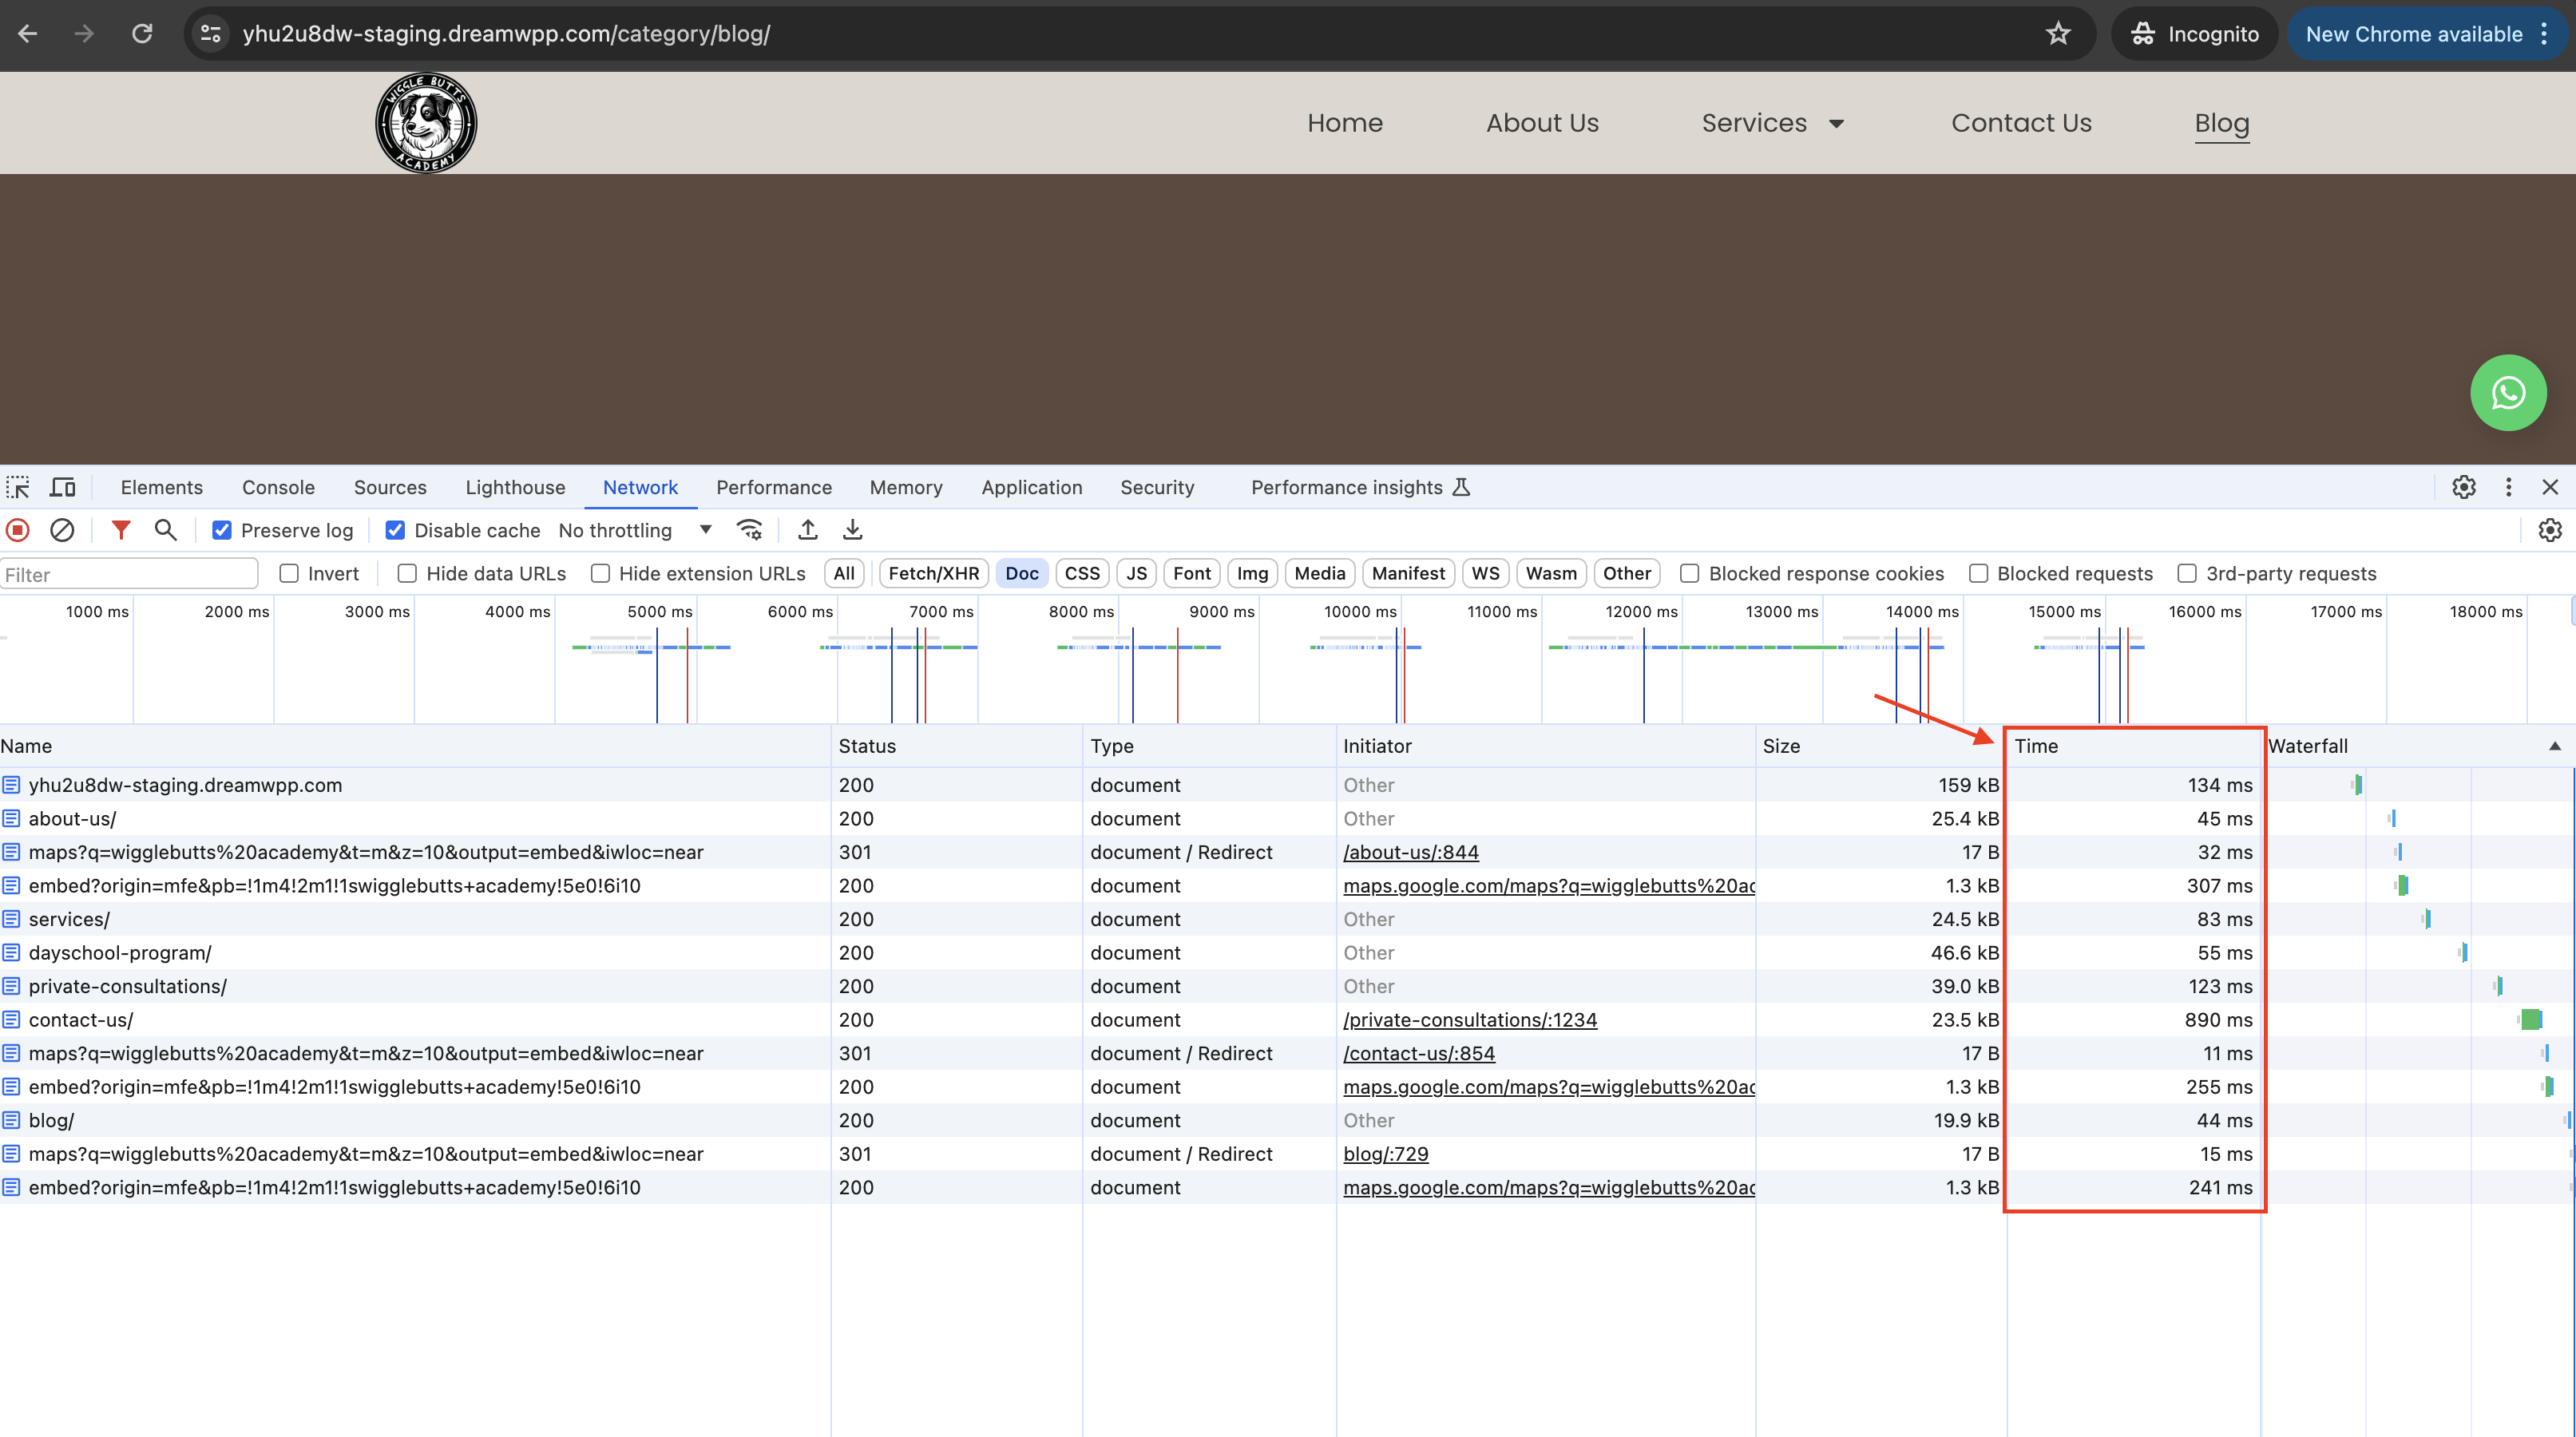
Thank You, Conclusion
That’s all folks! Step-by-step approach, tried and tested wordpress caching site. Try it out, and let us know if you have any issues ^^ !