Updating WordPress Plugins!
Updating WordPress plugins is crucial for maintaining the security and performance of your site. However, it can also be a risky business. A poorly-executed update can potentially break vital functionalities and lead to issues on your live production site. In the tech world, we often say “test in production is a practice that is difficult to defend.” Based on my own personal pitfalls that I have faced, I’ve decided to list down the steps that I’ve taken to ensure that the plugins are safely updated in my production site. It aims to help you confidently update your plugins without the worry of impacting your live site. I hope it assists you as much as it did me.
Testing in Action: A Detailed Walkthrough
To ensure that your WordPress site remains secure and operational, it’s important to first test whatever you plan to do in a location that is not your actual production site. Here’s how I do it step by step.
Backup Production Files and Database
Initiating a backup of your production WordPress site’s files and database is the first and most critical step in the update process. This serves as a safety net, allowing you to restore your website to its previous state if something goes awry during the update process.
I use PLESK for my server management, and it provides a convenient option to back up the site in just a few clicks. A screenshot of my PLESK console dashboard can be seen below: 
In the PLESK dashboard, we can initiate a backup for our production site: 
Screenshot of the successful completion of the backup process: 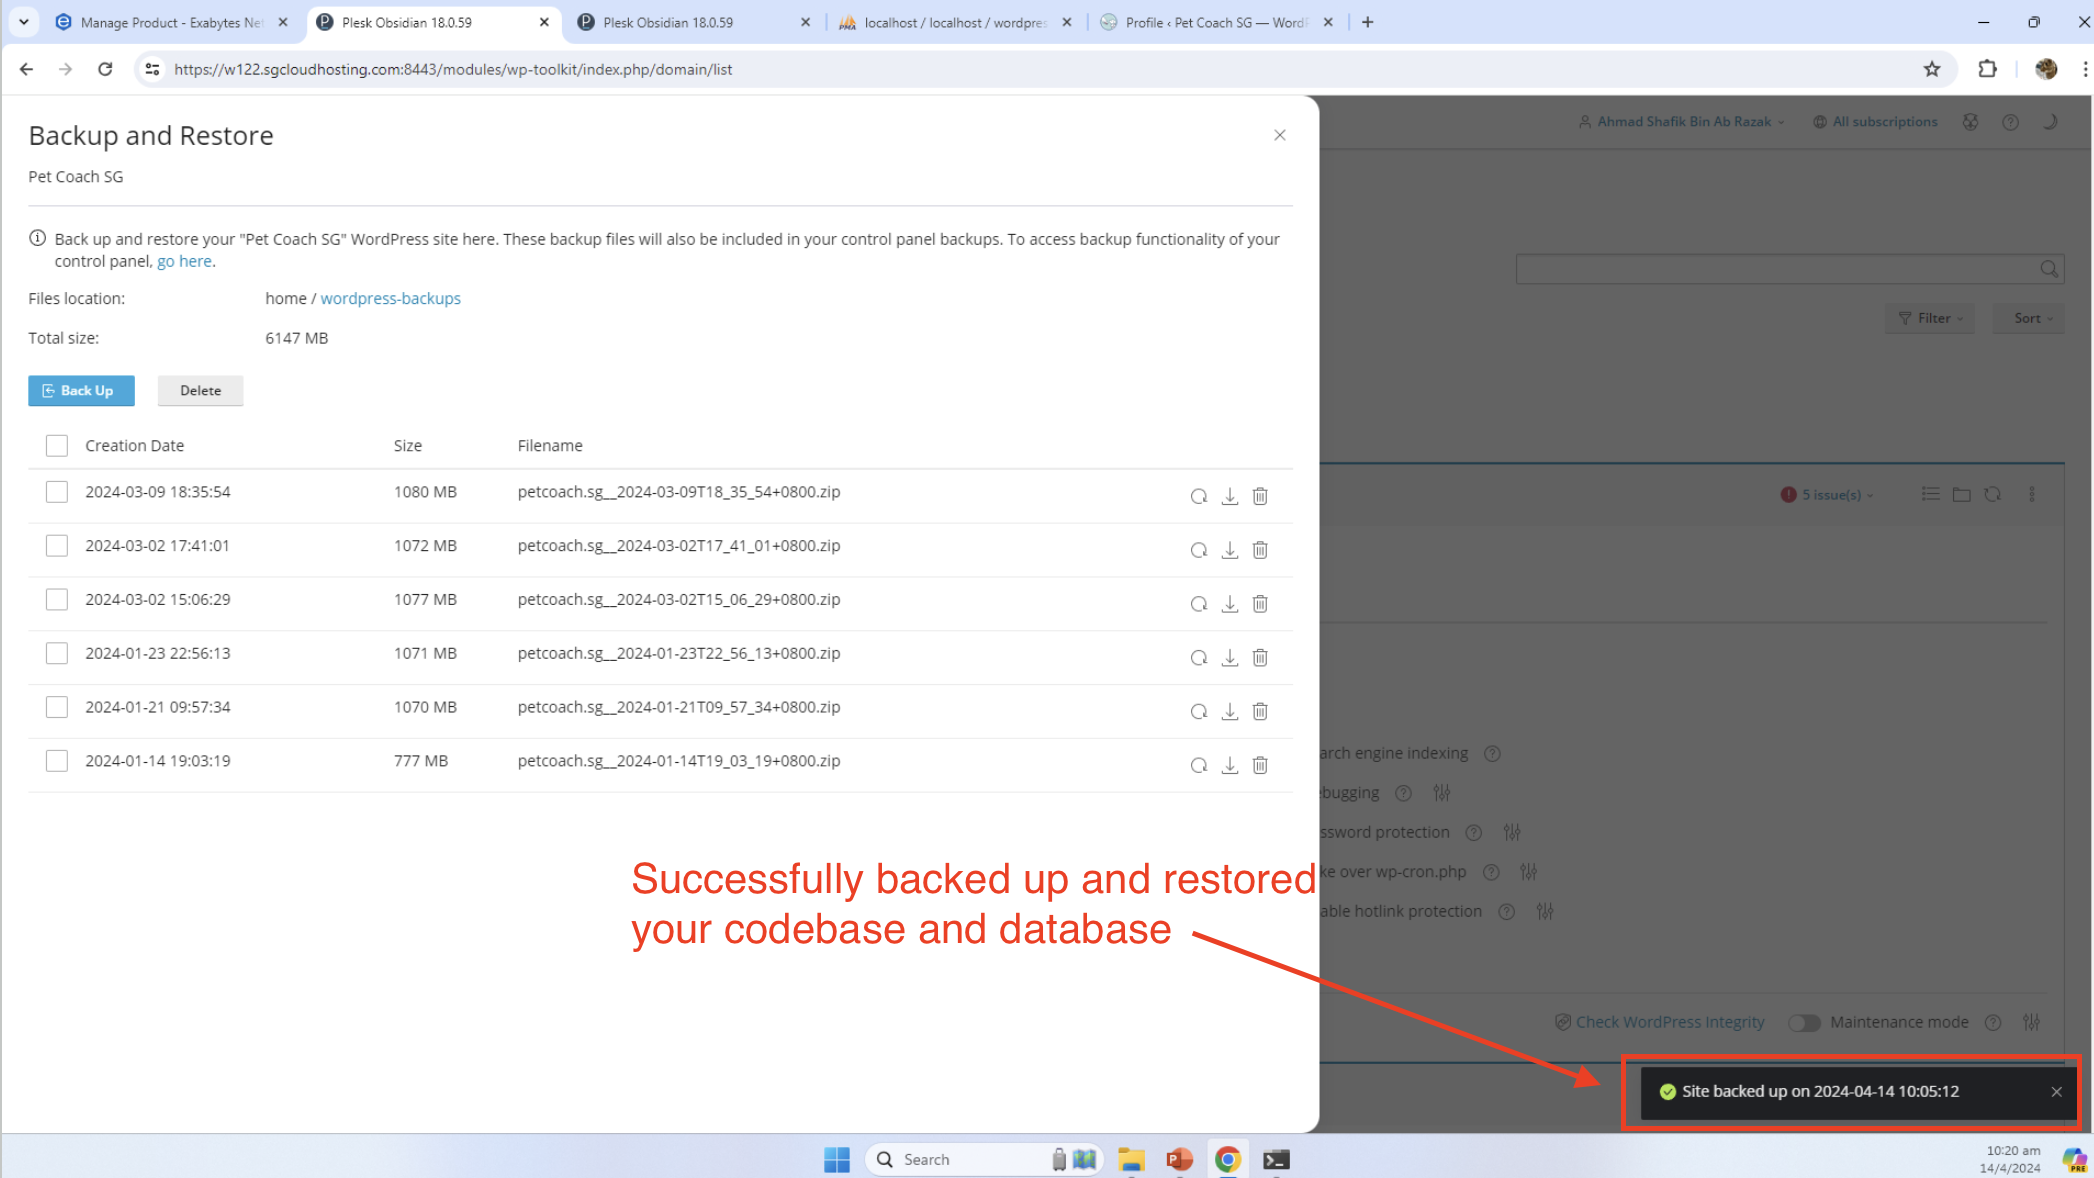
Once initiated, it creates a snapshot of the entire codebase and the database, which can then be used for a local restoration strored in a WLS LAMP stack. We can see this for ourselves by downloading the backup files and inspecting what is actually being backed up!
Plesk console allows for us to download the backup files: 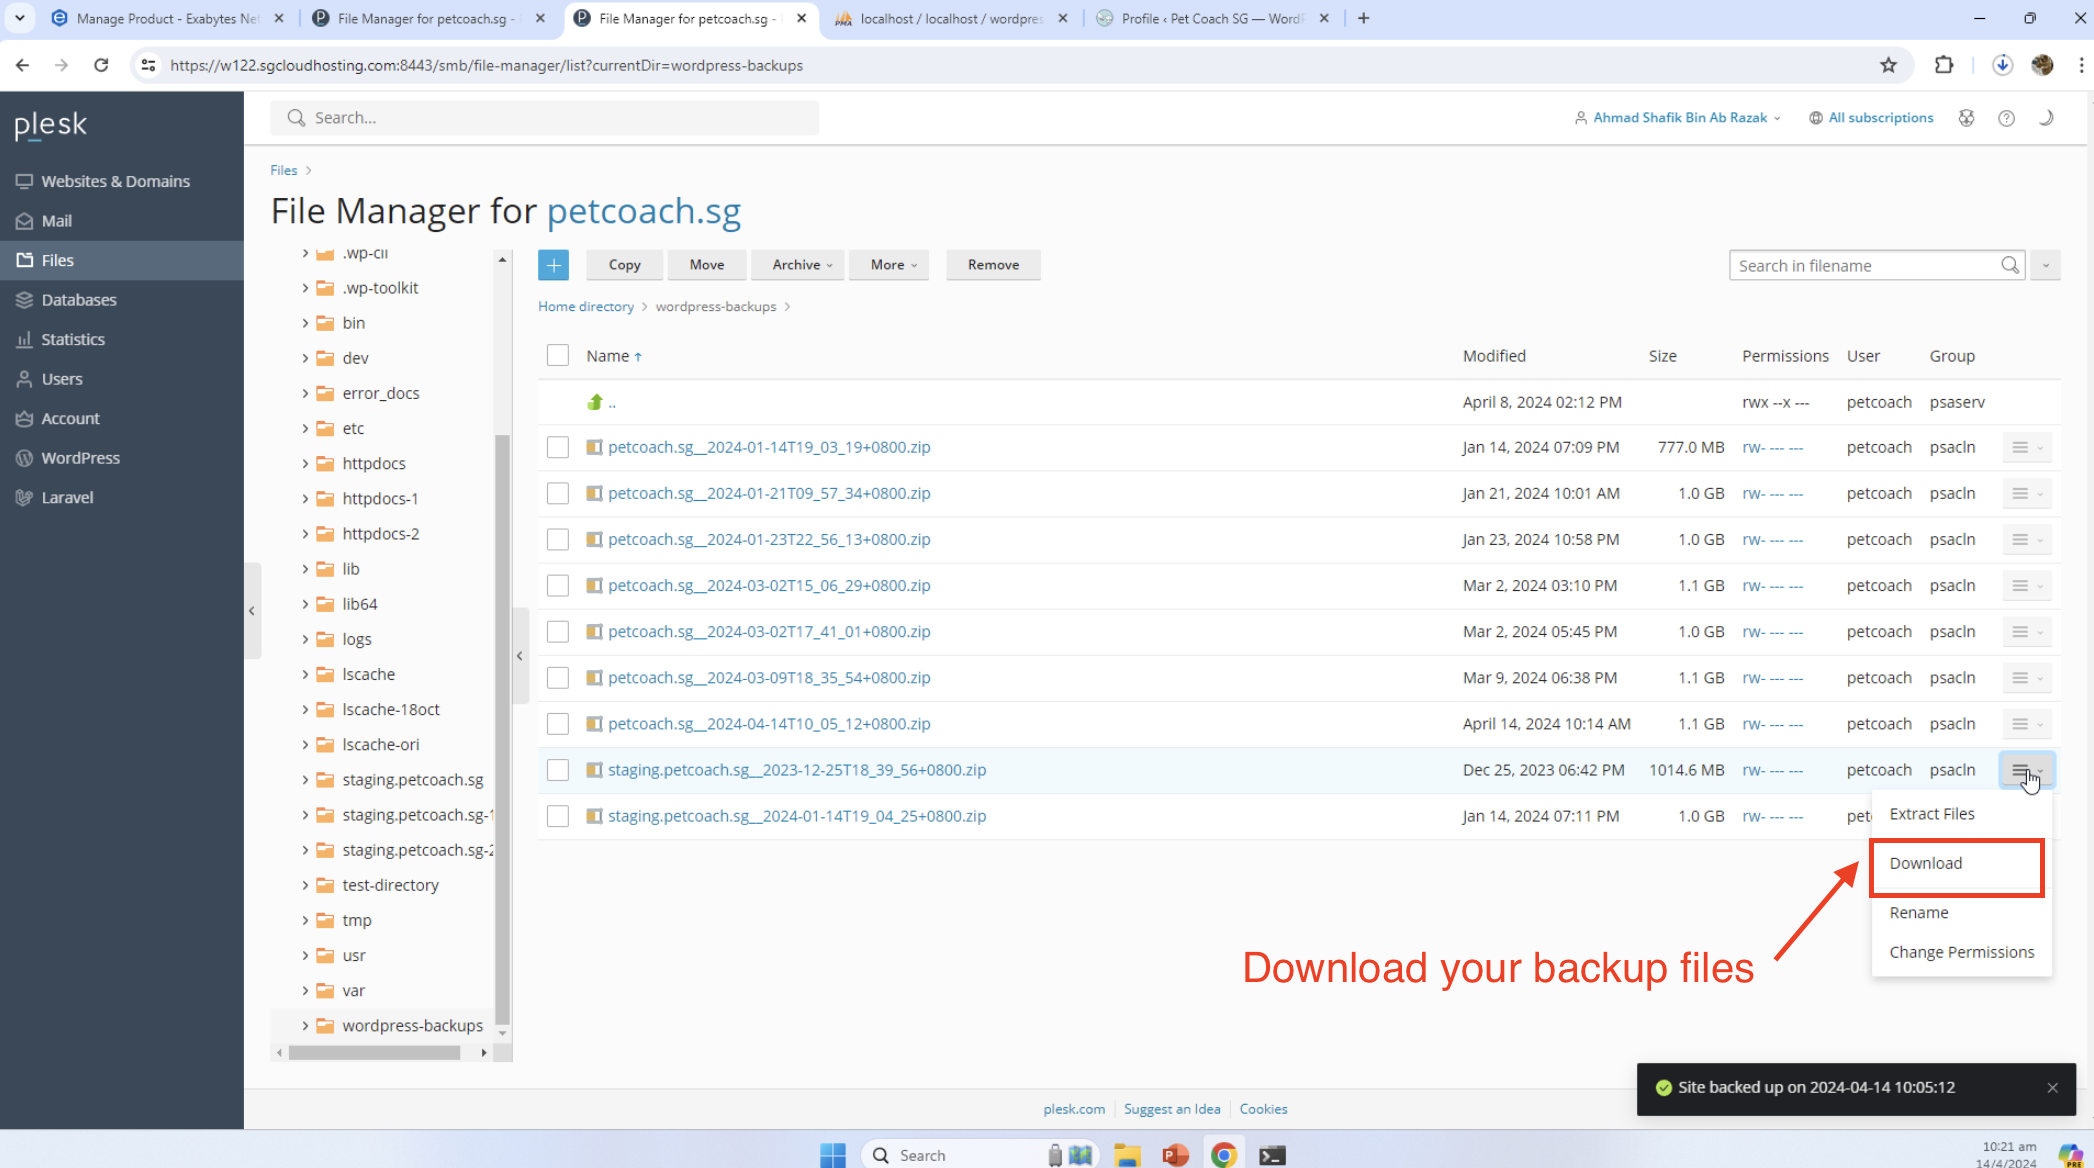
Inspecting the files that we downloaded, we can see that the sqldump.sql is the database export, and the files folder contains all our production wordpress installation files: 
Now that we’ve inspected the backup files, the next step is actually to restore these files into our local machine, so that we can do some testing.
The Local Experience
The detailed steps on how you can proceed to restore the production database and codebase into your local apache set-up would be created in a separate article.
Next, you restore the backed-up codebase and database to your local environment. This step ensures that you are testing the update on an exact replica of your live site without affecting the production environment.
See a screenshot of our production database backup restored into our local environment: 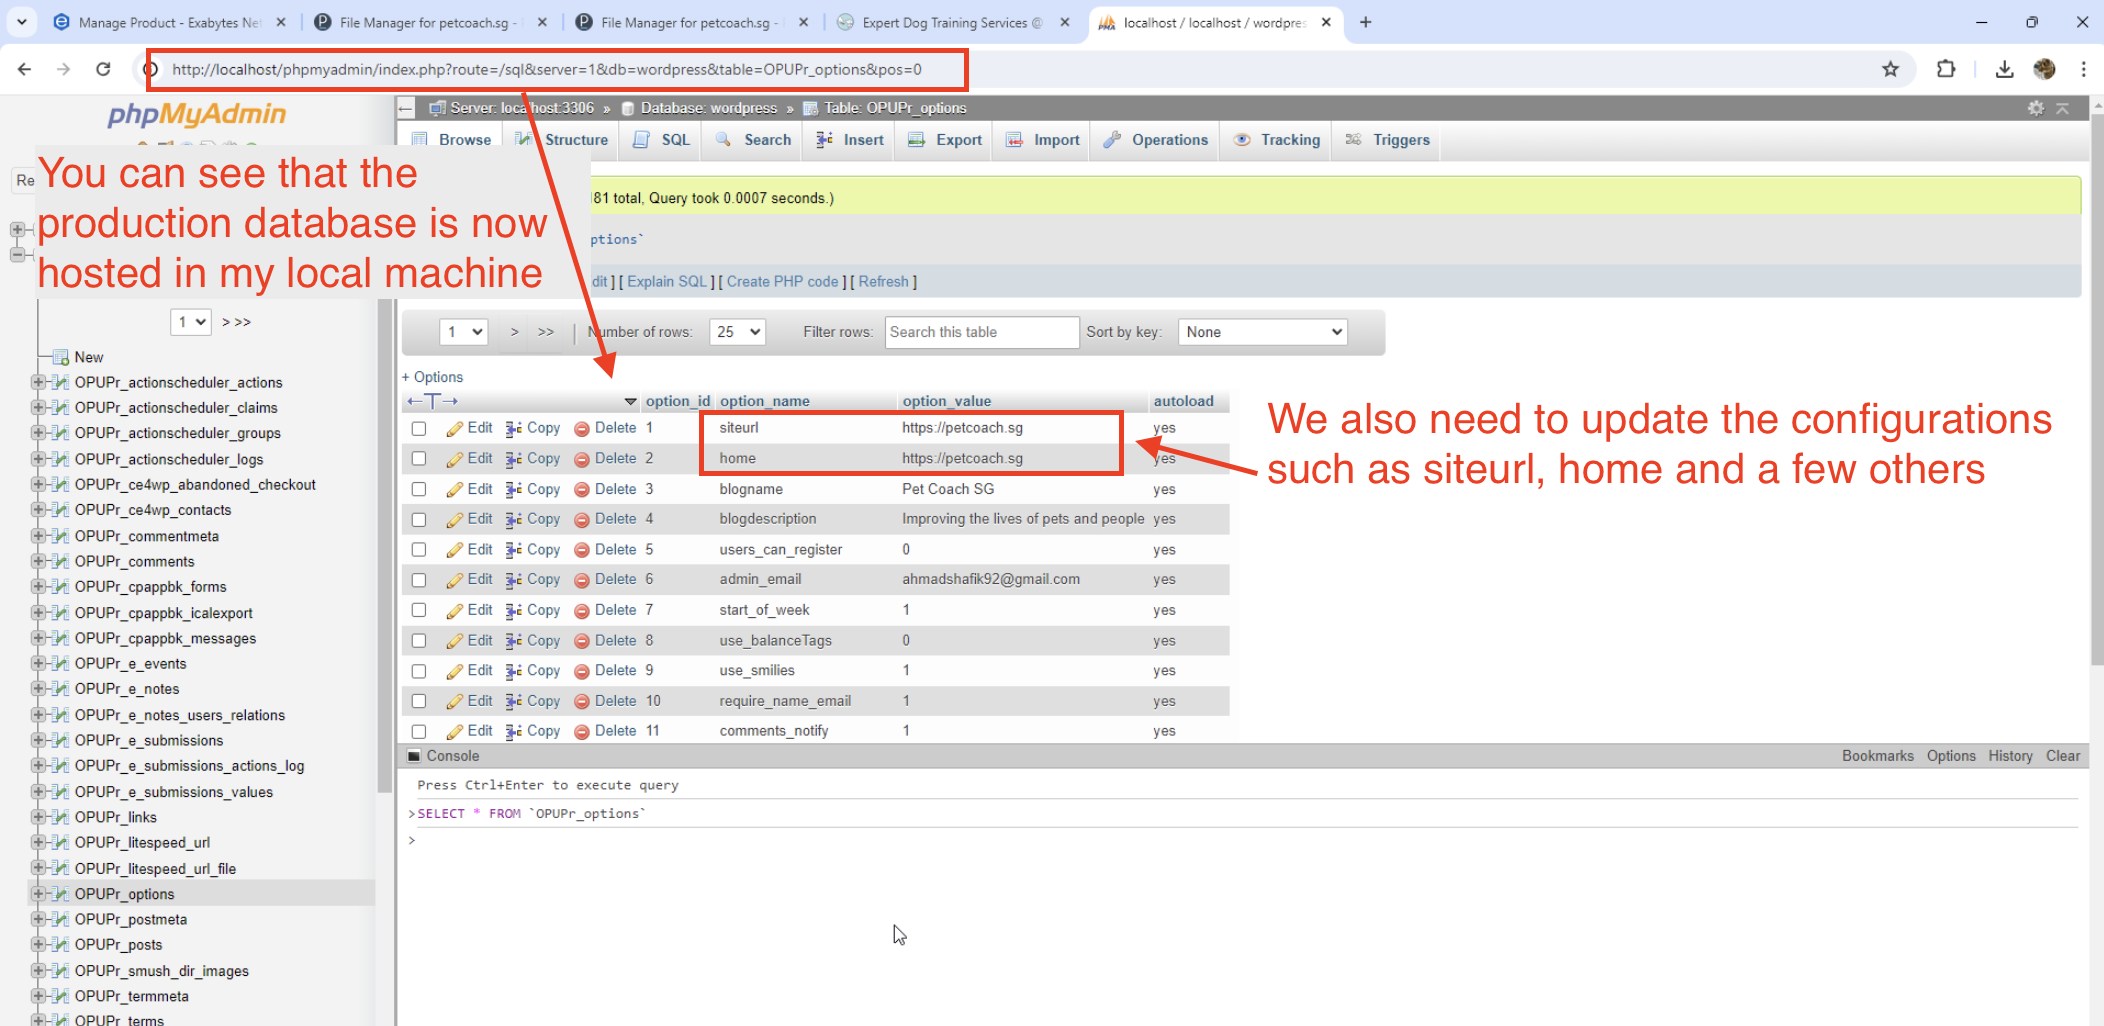
You’ll need to update configurations in your local WordPress installation, such as the site URL and any environment-specific settings. Once done, you can proceed to update the plugins and test the site to confirm everything still functions as expected.
See a screenshot of successfully accessing our site on localhost once all the settings has been configured locally: 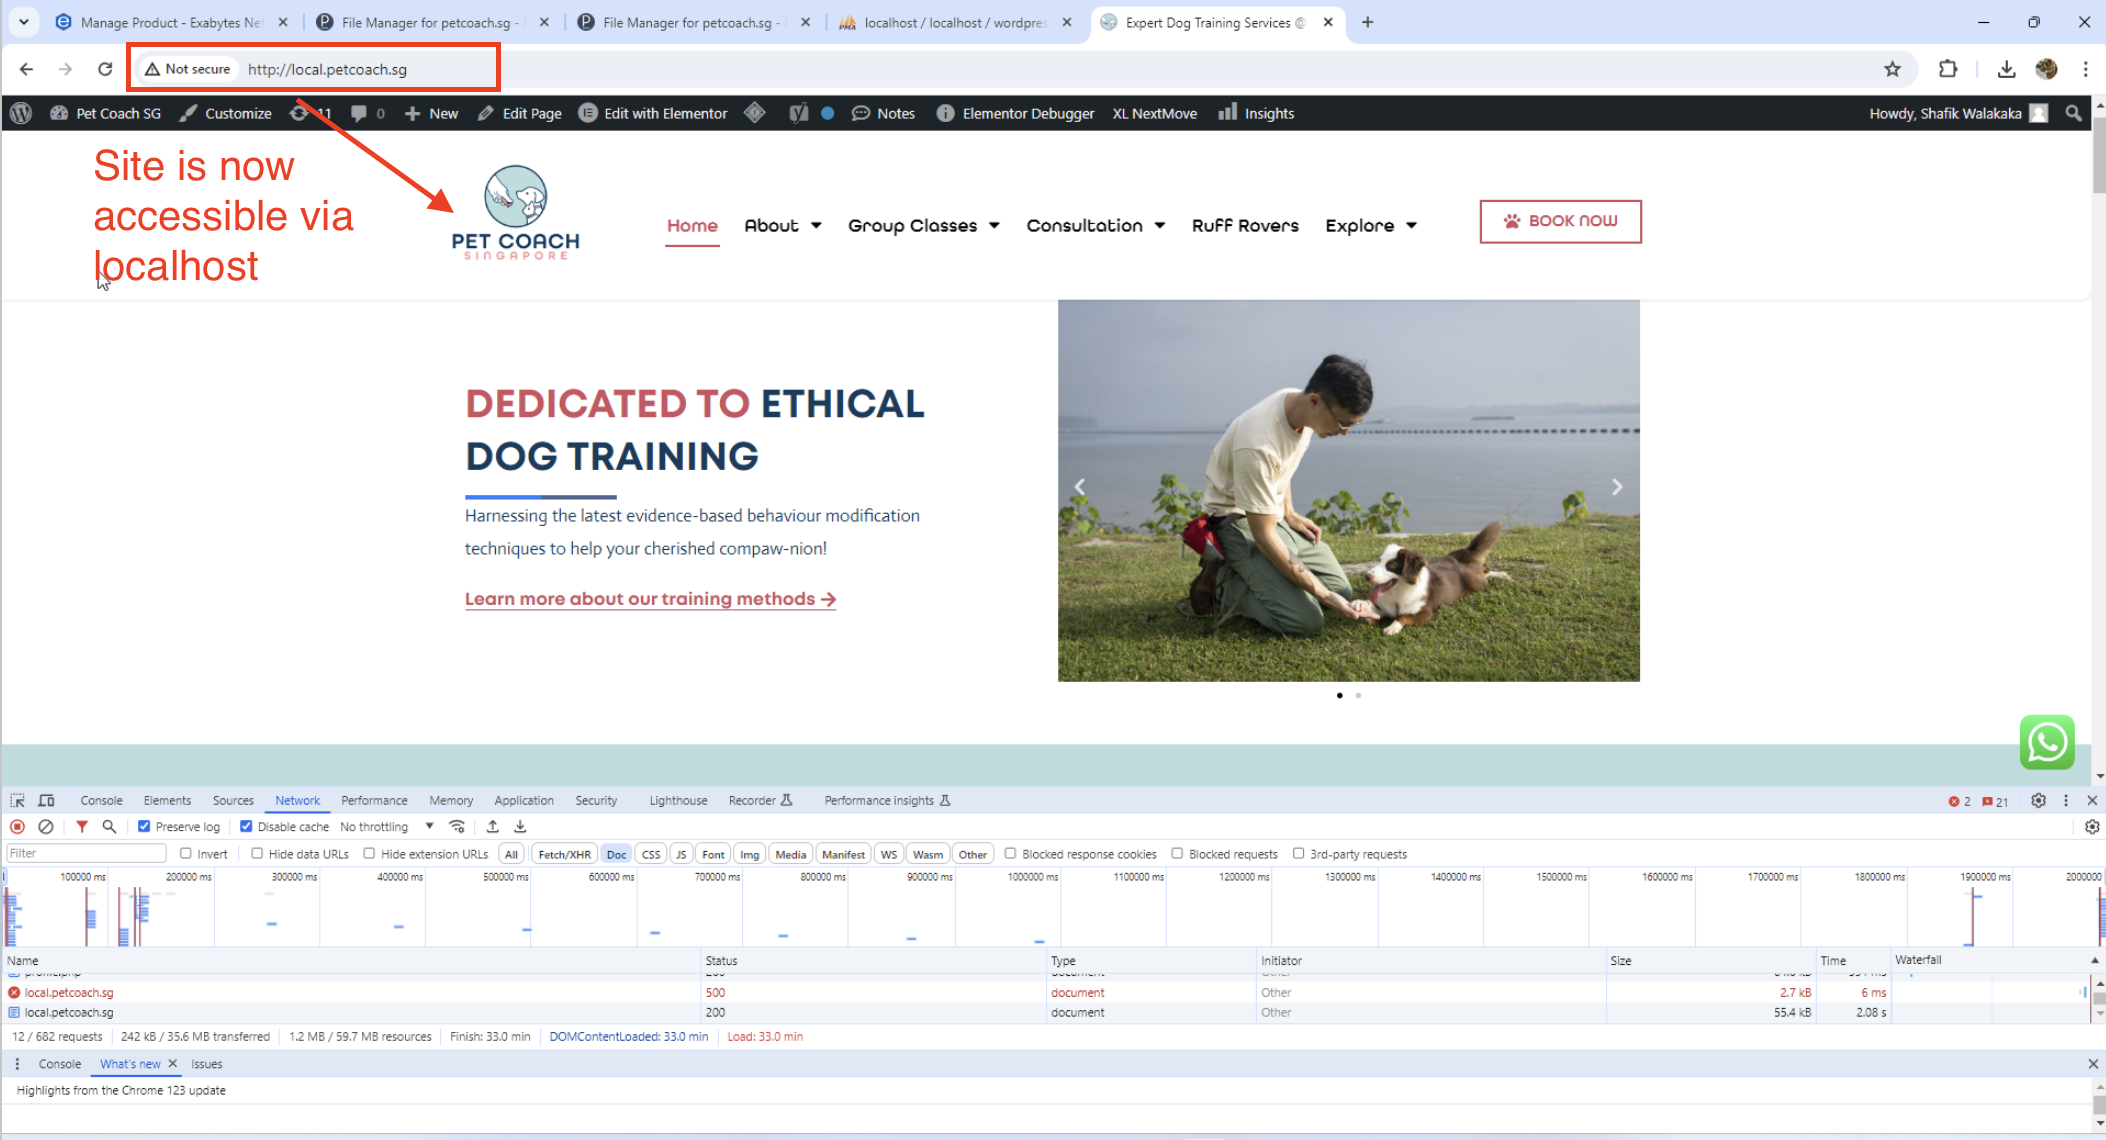
Screenshot of us updating all the damned plugins - there are always so many updates ><: 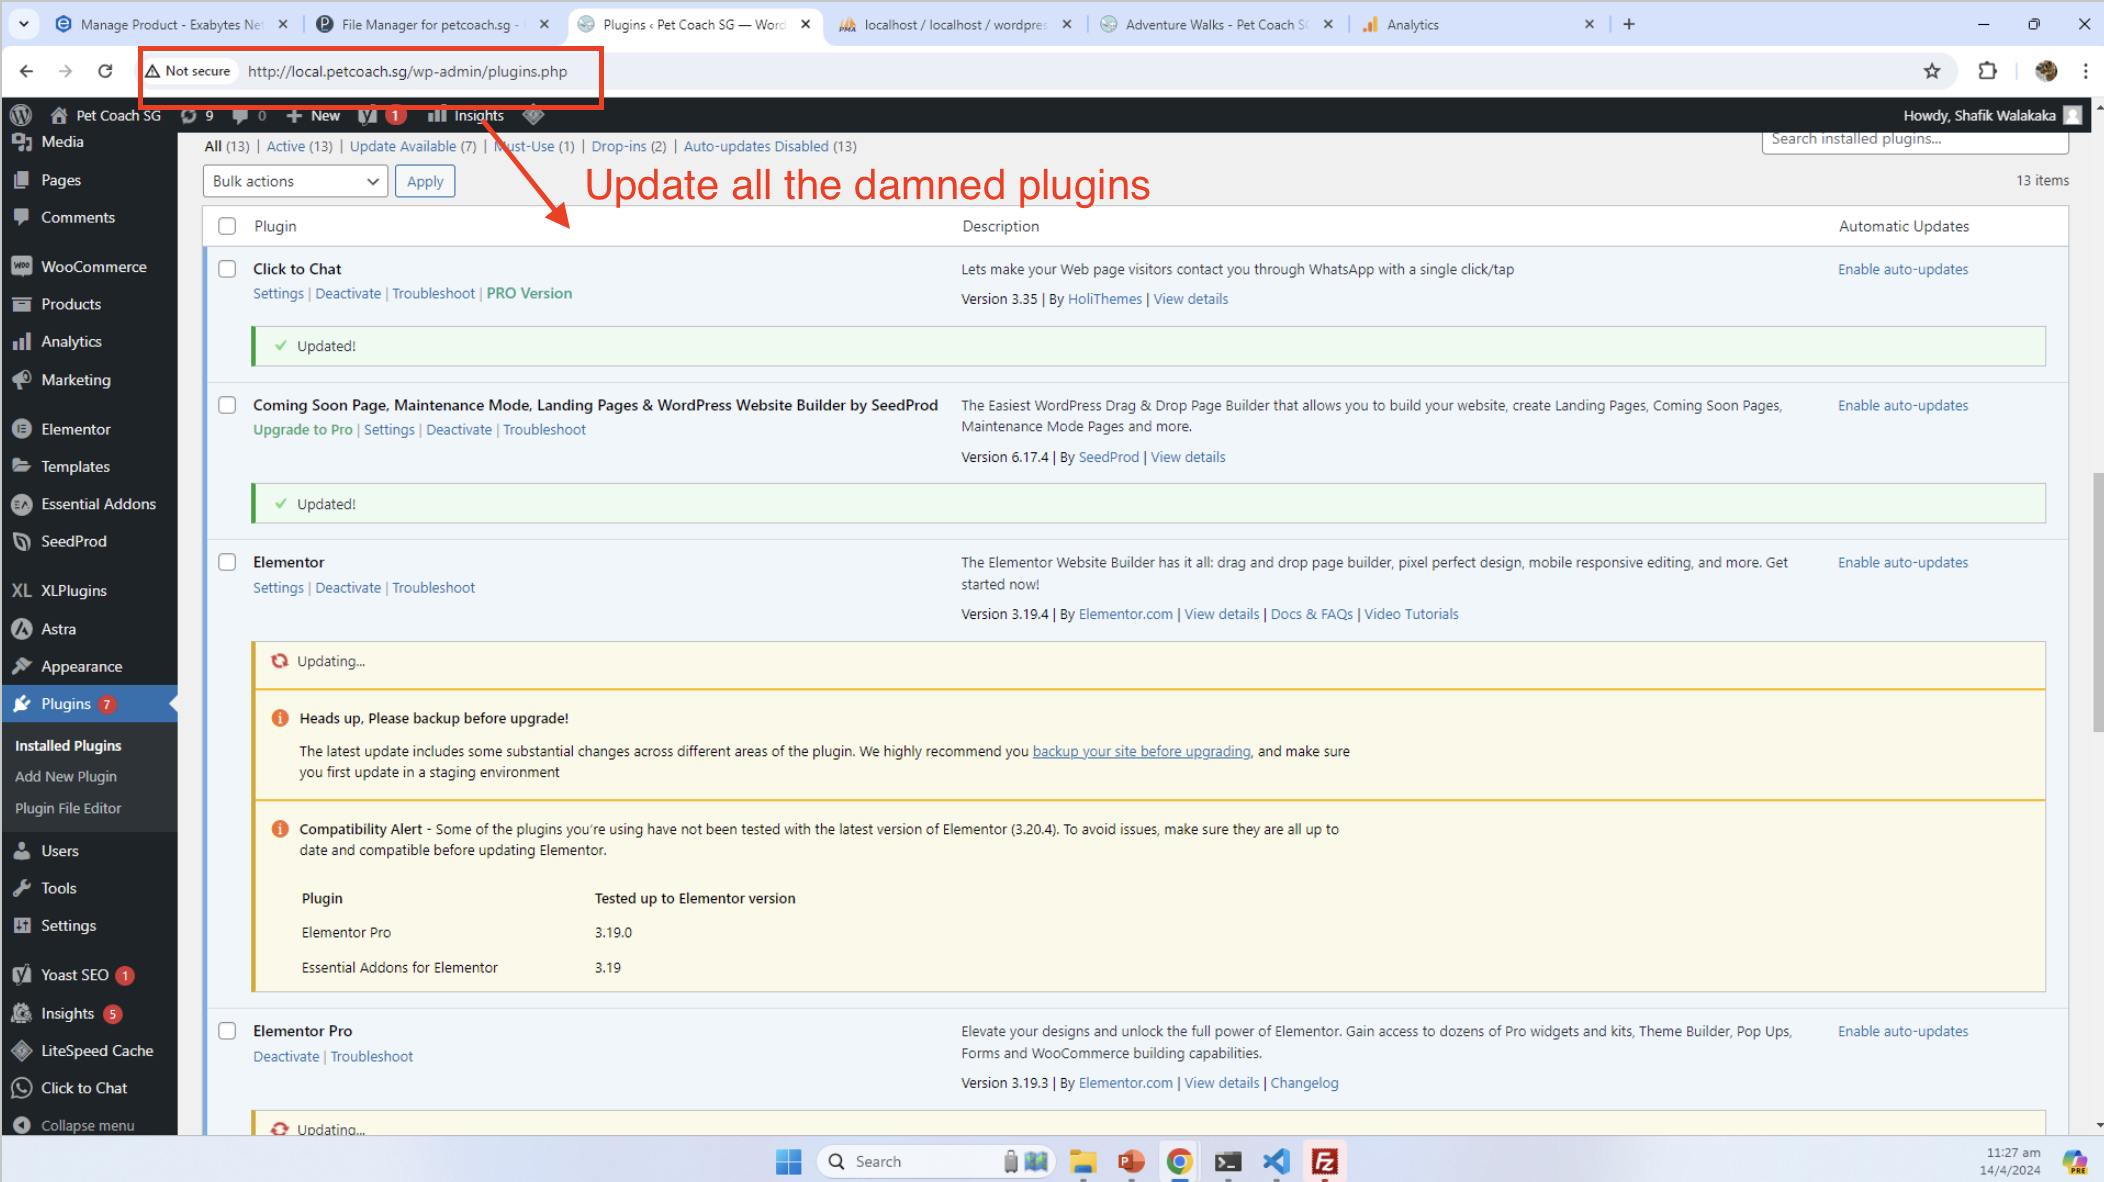
After that, we’ll need to sanity check the full website and hope no features break. Know that sometimes, shit does break – so please test: 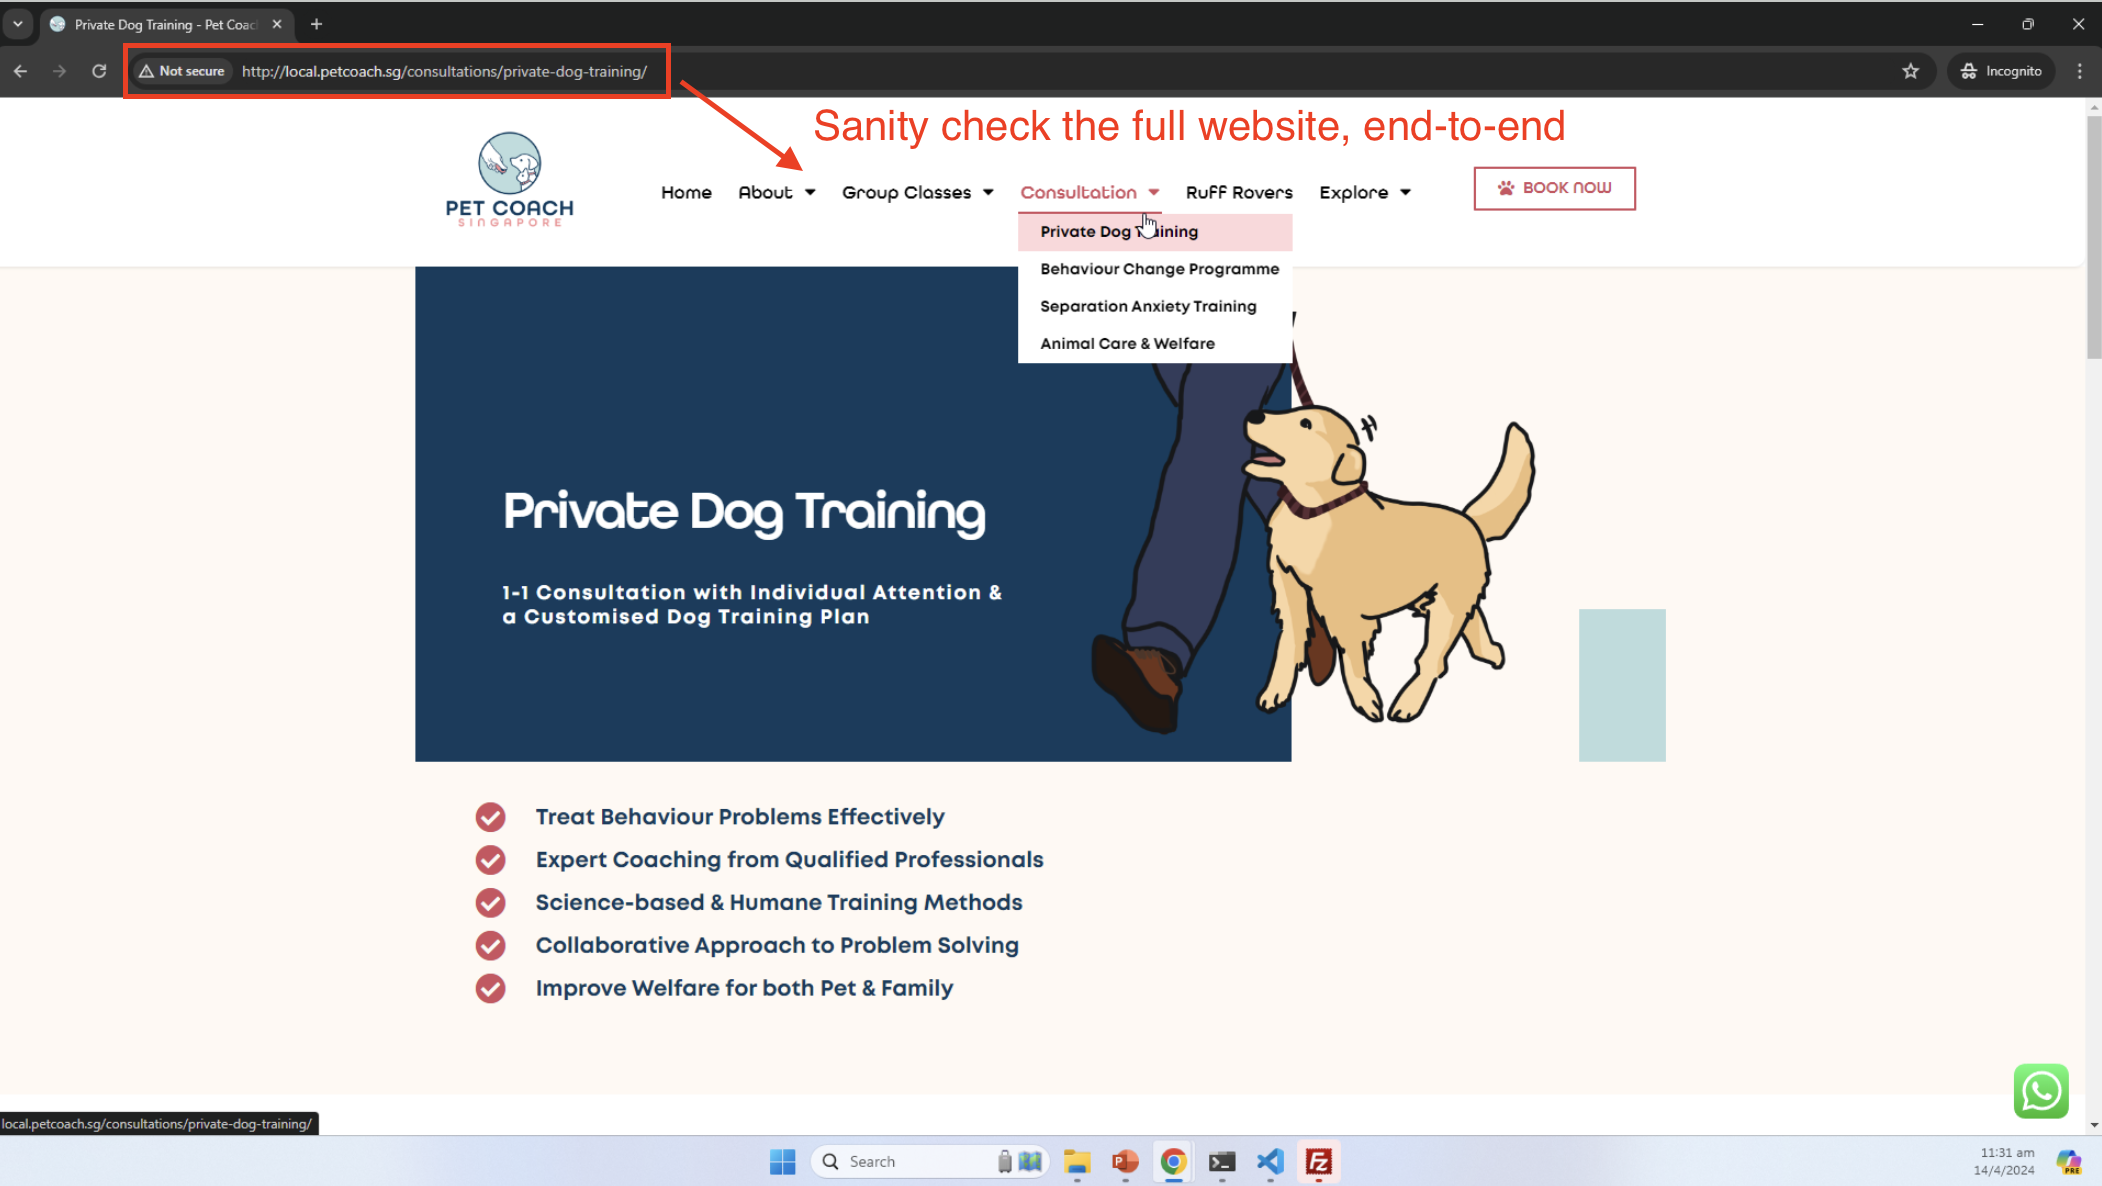
Moving to the UAT (User Acceptance Testing)
After confirming that the update works correctly in your local setup, it’s time to move on to the User Acceptance Testing (UAT) environment. The UAT environment may have slight differences, such as server settings and permissions, which you’ll need to adjust accordingly.
The UAT environment is also hosted in the UAT servers, and not locally on our machine. We need to restore the production codebase and database into UAT as well (so that the testing of the updates mimics updating the production version of the site). This part feels a bit like moving houses, where you’ve got to pack up all your precious belongings—in this case, your codebase and database—and shift them over to a new place, hoping nothing breaks in transit.
I usually go about this using Filezilla because, honestly, it feels like using a familiar old tool from the garage that never lets you down. You’ll be transferring all those files you’ve just updated and tested over to the UAT servers. 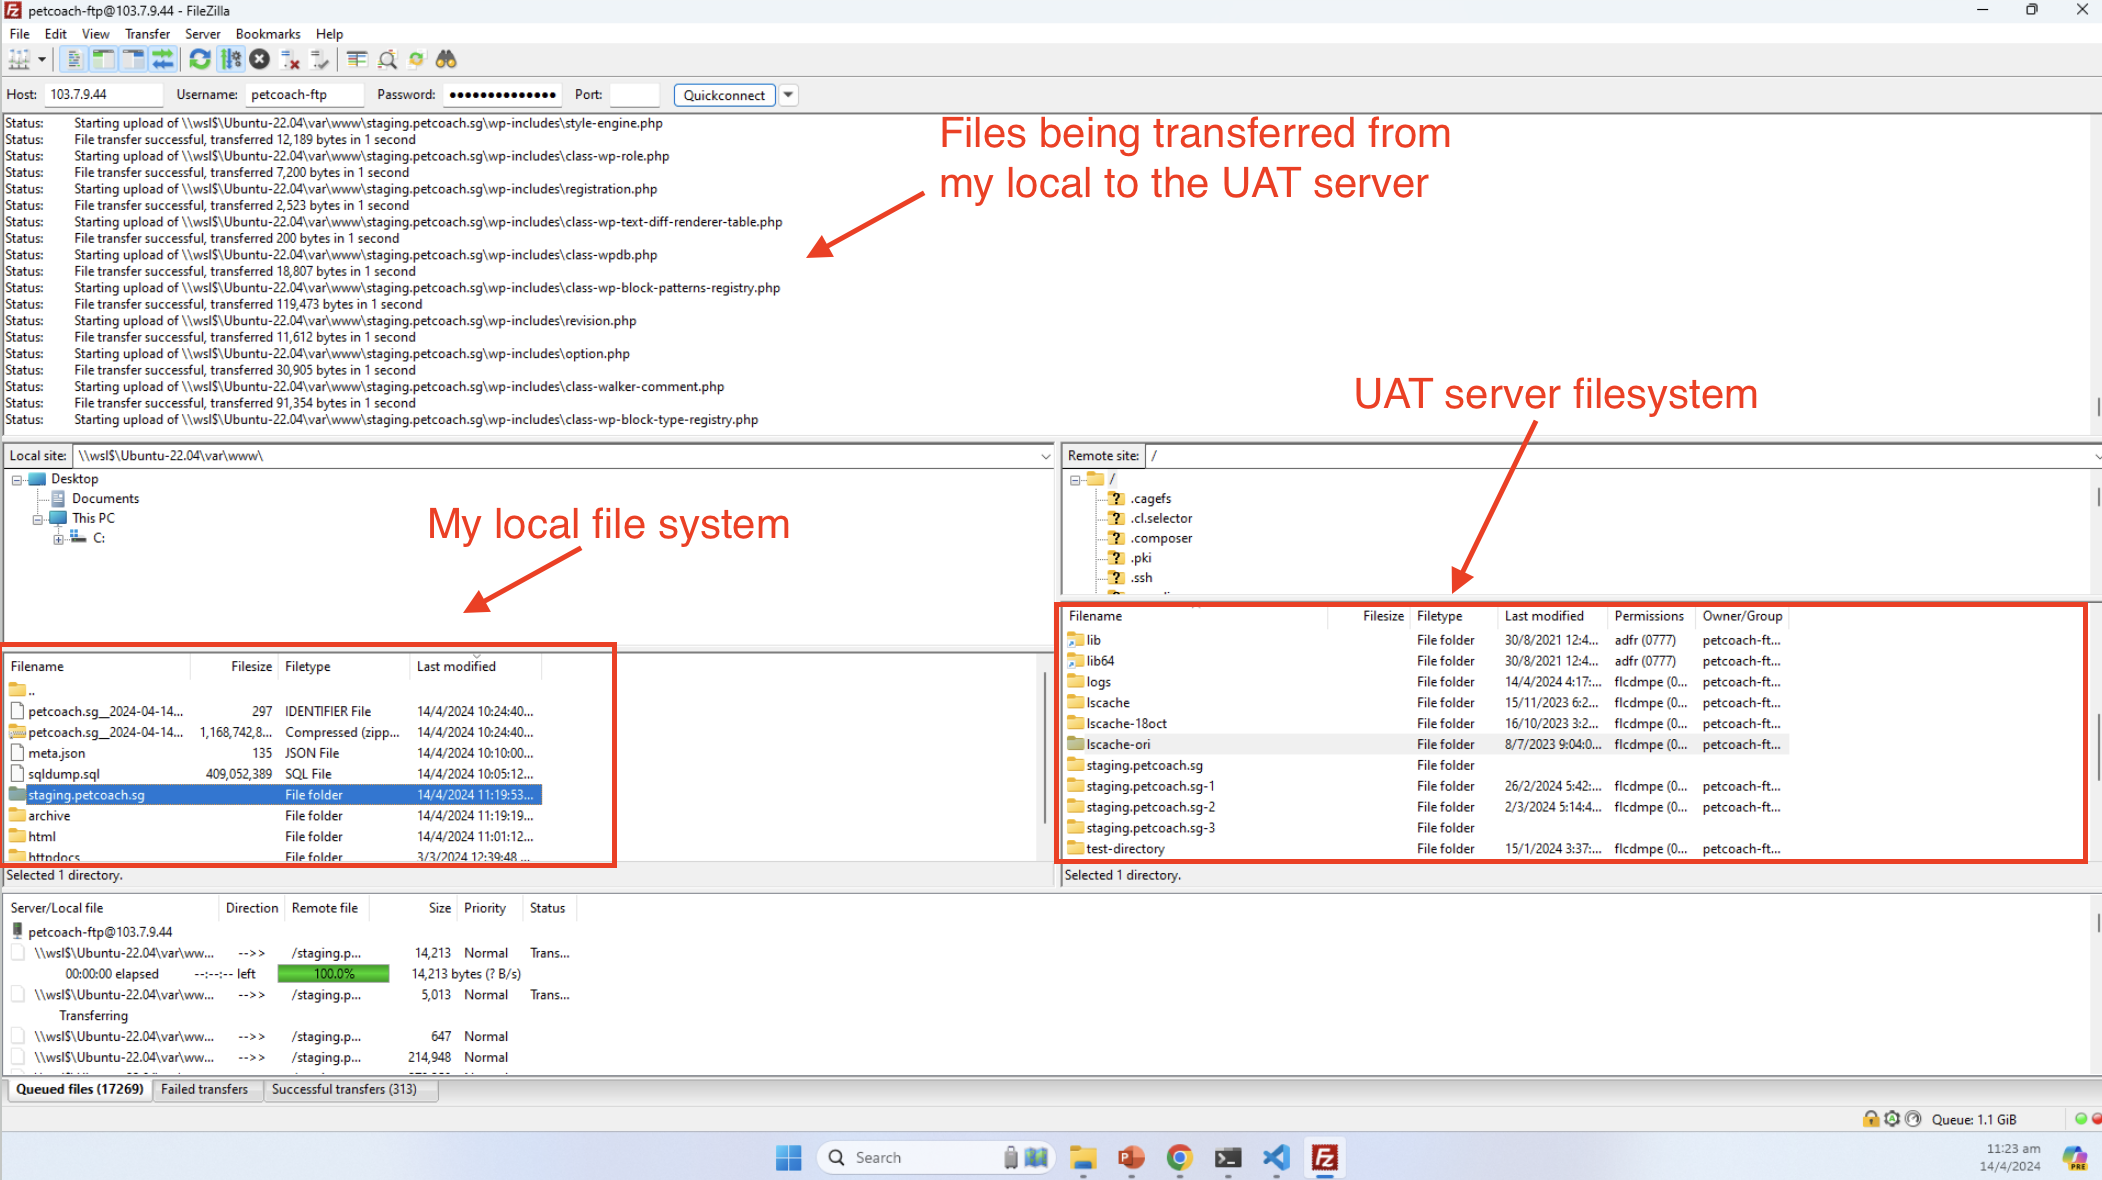
Remember to also restore the database so that we are testing on a version of the application that is the exact replicate of the production snapshot. Plesk allows for us to import an sql dump, see the following screenshot: 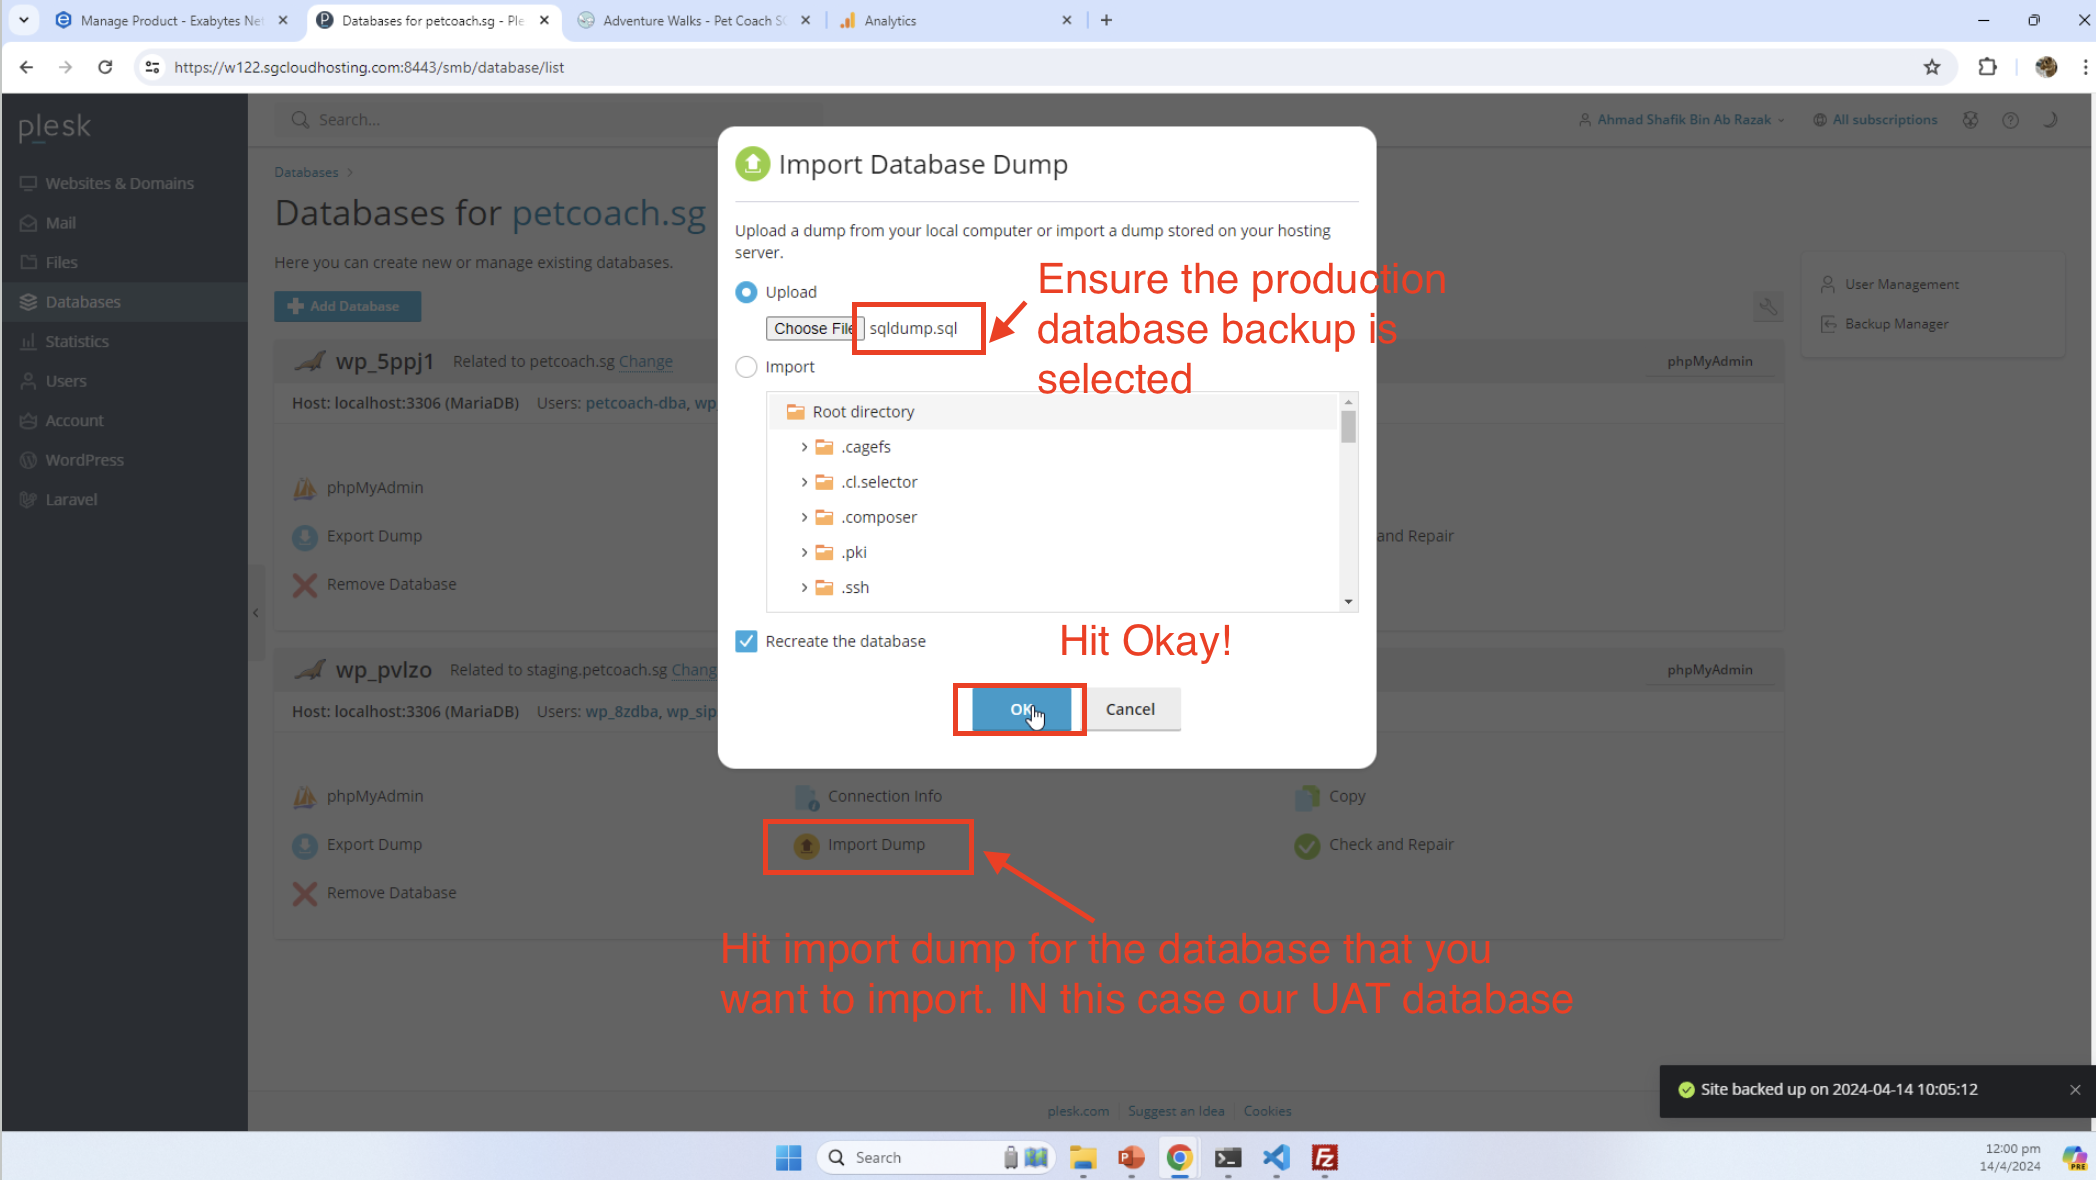
Then you repeat the steps to update the configuration in the database, and codebase, and test access to the site. See screenshot for updating the siteurl and home records in the options table to specify the UAT URL. For our case, it’s staging.petcoach.sg: 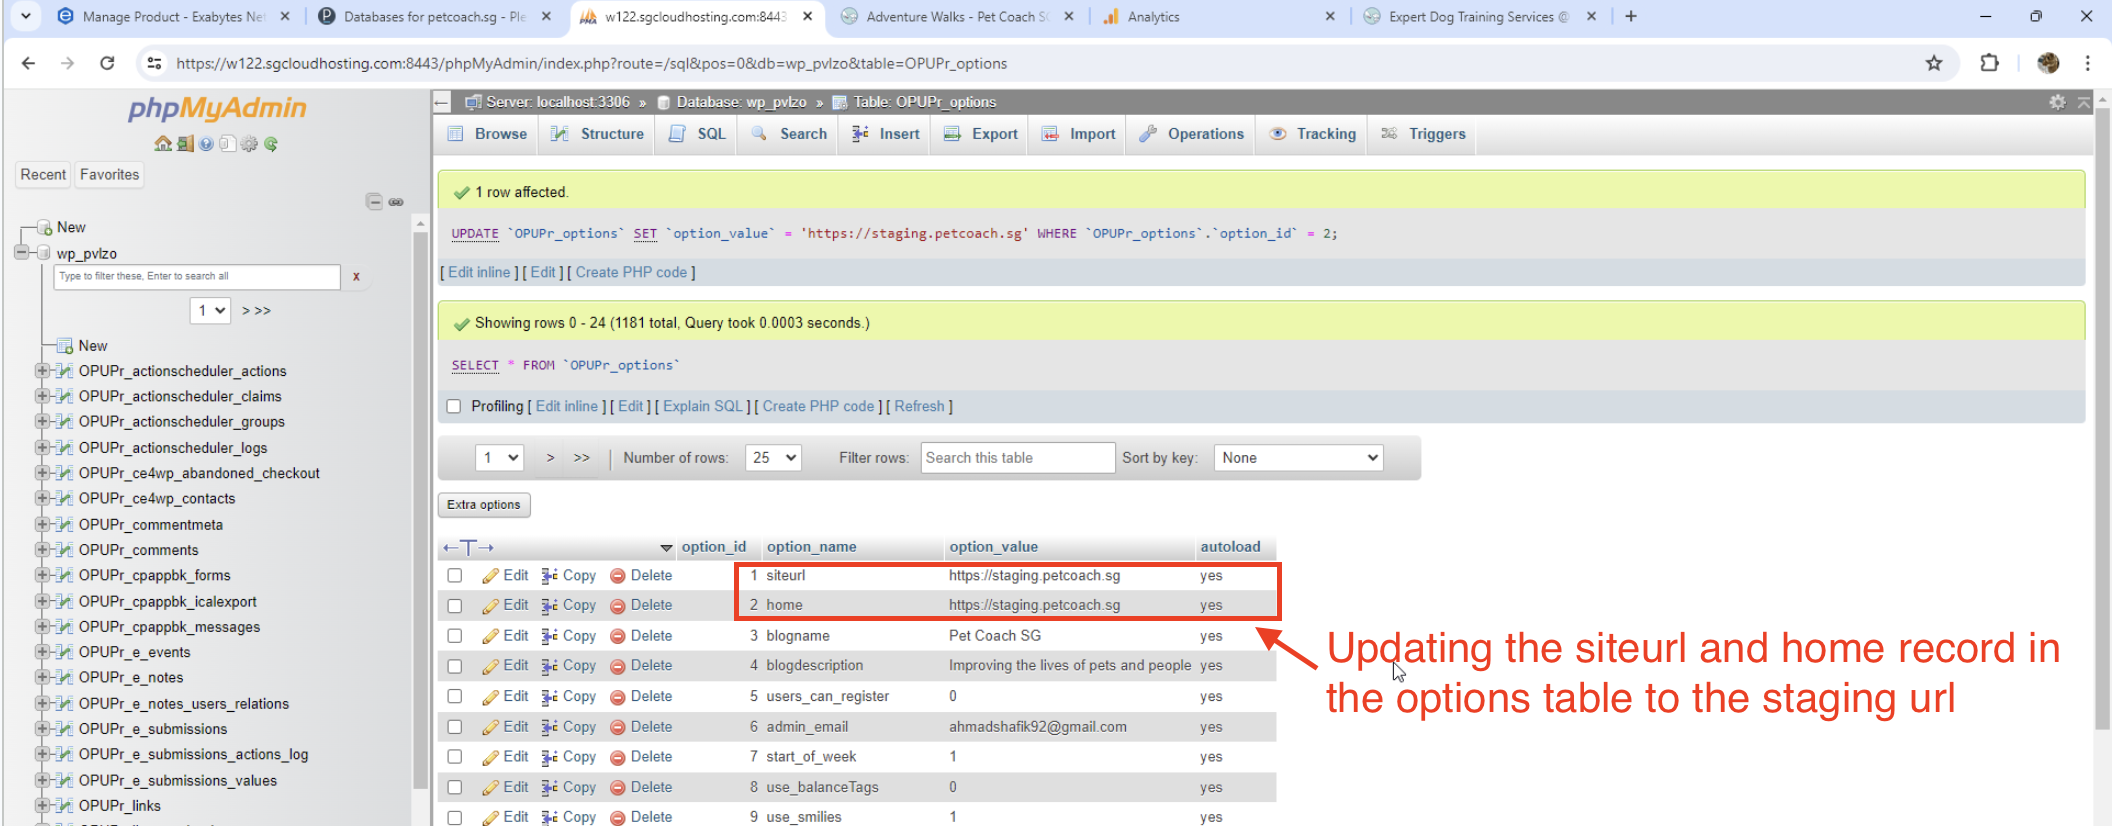
Again, update the plugins and thoroughly check that all functionalities are intact after the update in the UAT environment. Exact same steps as what was done in your local environment, but in UAT instead: 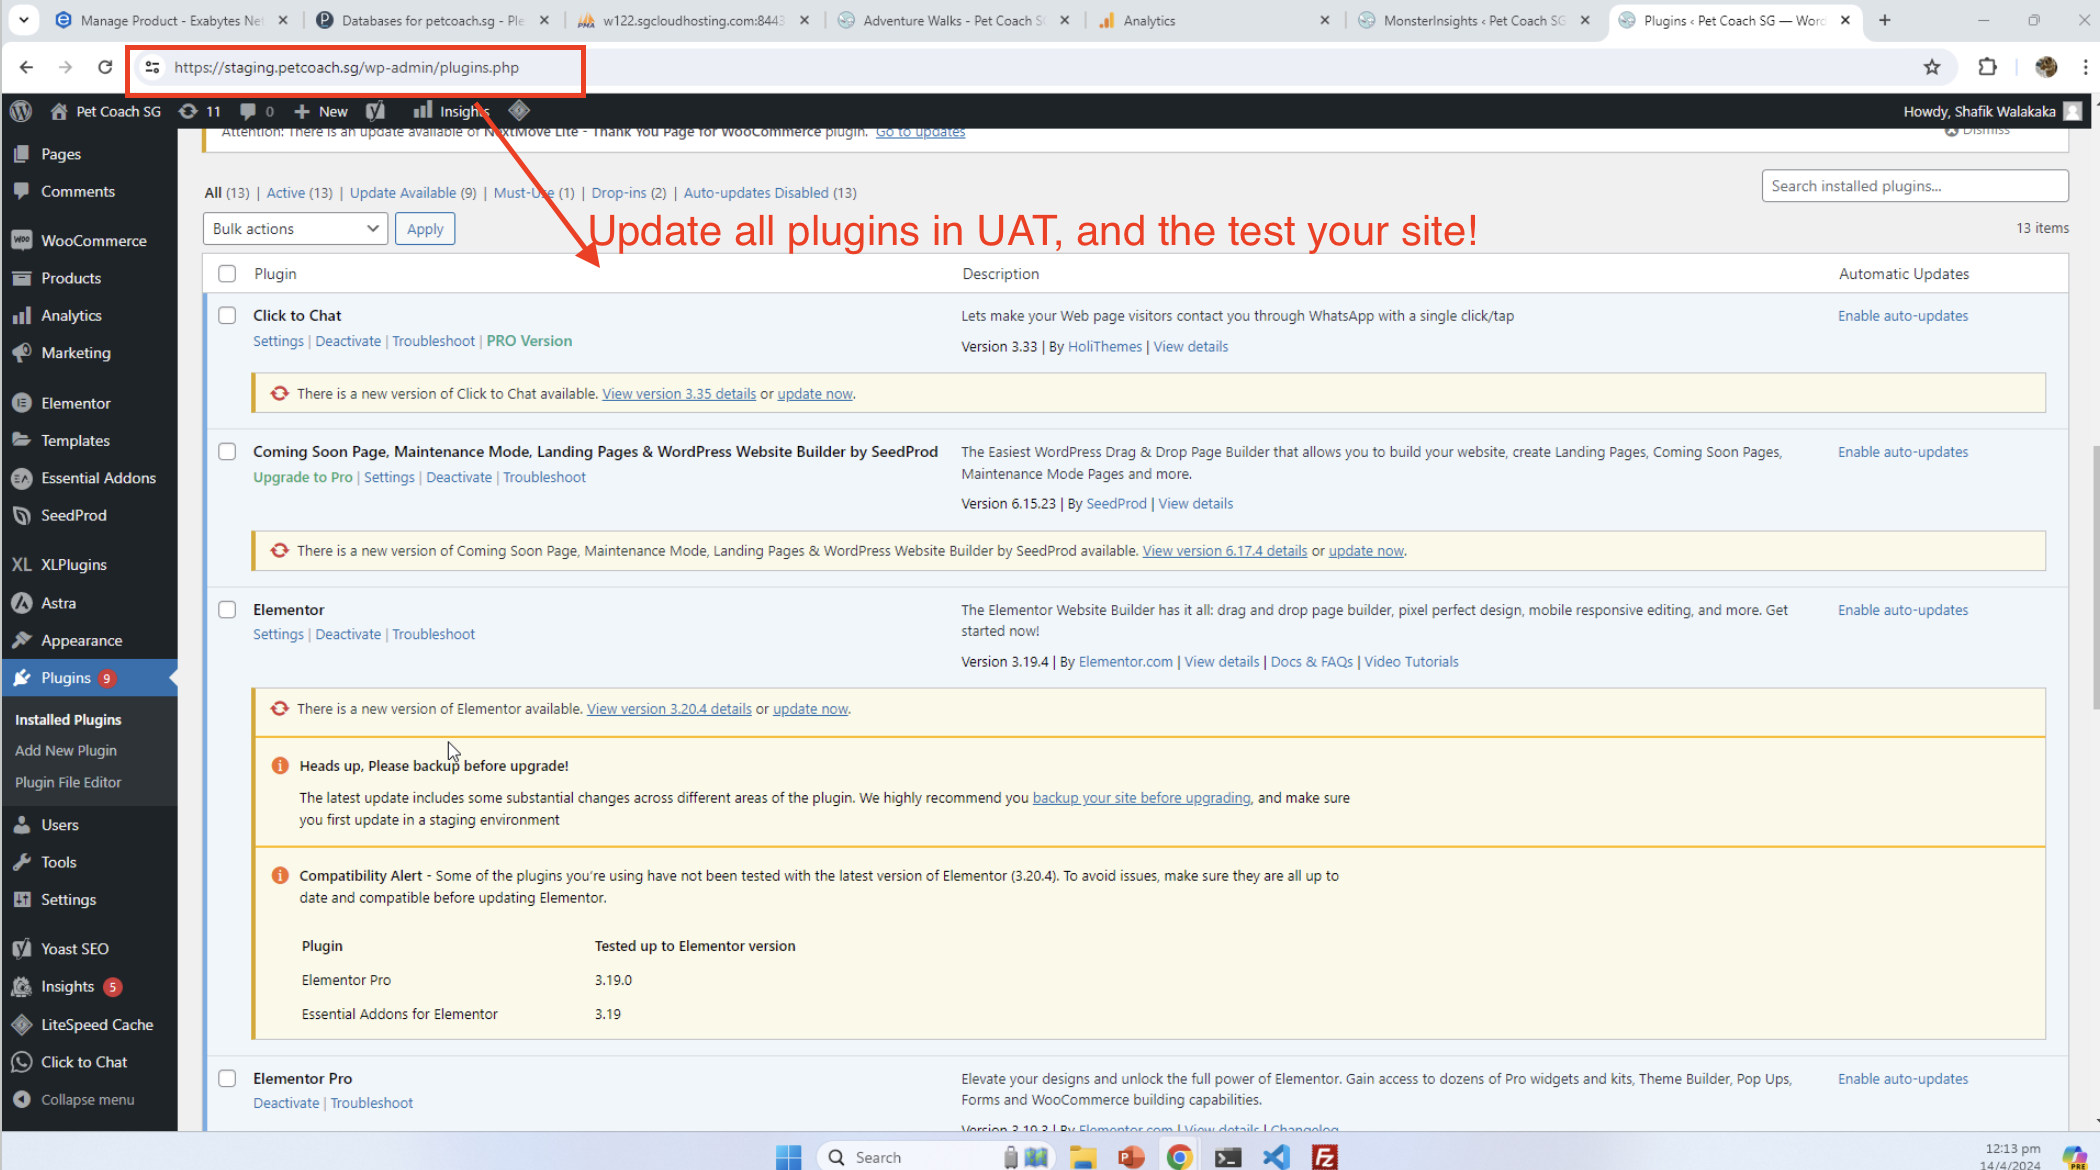
Test your UAT site, and fingers crossed nothing breaks: 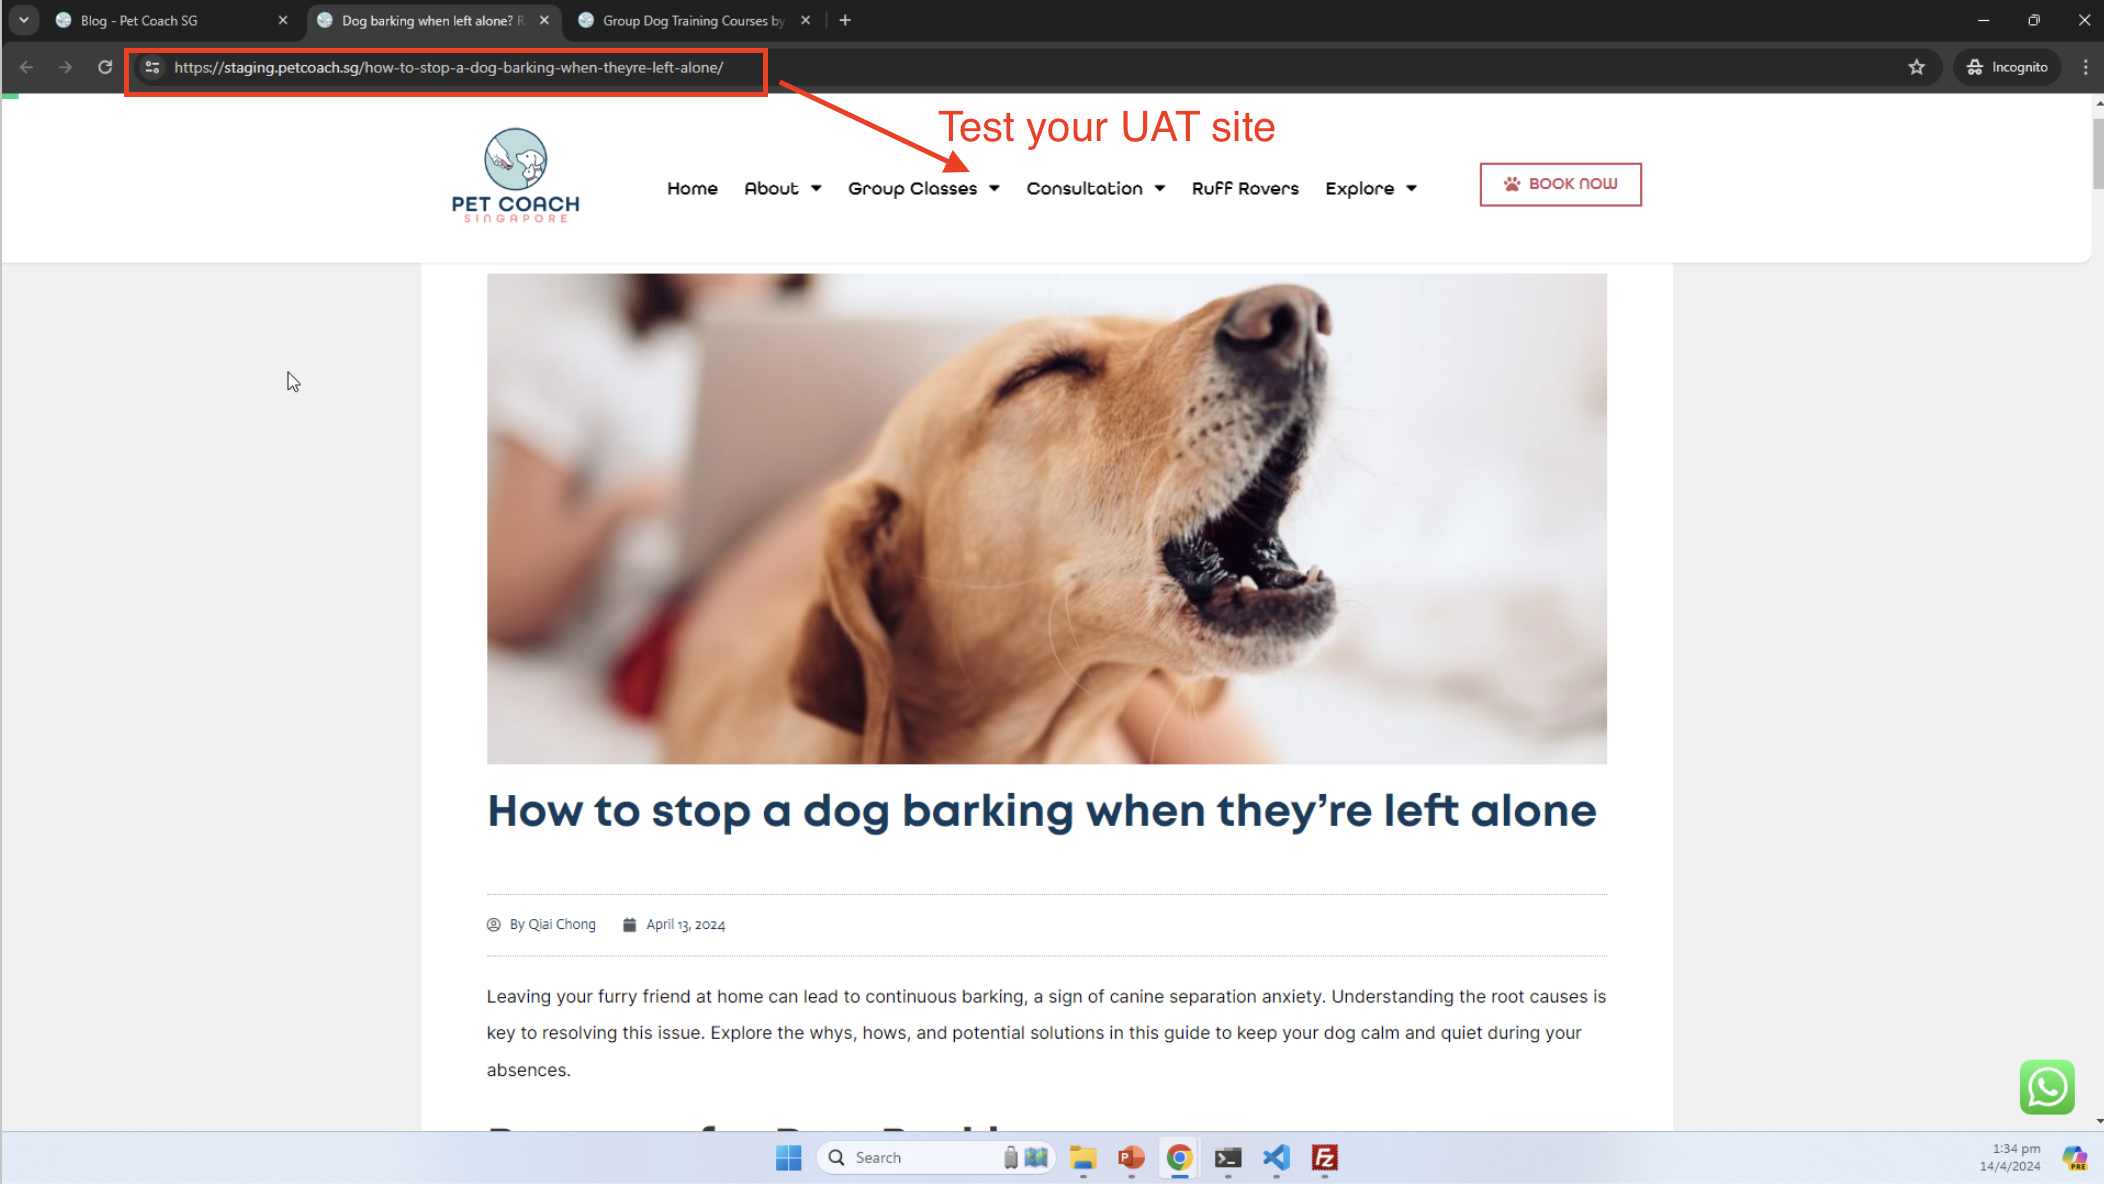
The Final Step: Updating the Production Site
There is no need to restore the production database or codebase because the production environment is the true source.
If the updates are successful in the UAT, you can now confidently proceed with updating the plugins on your live production site. This should be a straightforward process (similar to what you have already done in UAT ane SIT), and you’ll want to perform an extensive test on your live site to guarantee that everything is working as it should.
Troubleshooting Common Update Issues
Even with a robust testing process, issues can still occur. Here’s how to troubleshoot some common problems that may arise during the update process.
Environment Differences
Differences between the local environment and UAT or production environments can cause unexpected issues after a plugin update. Check server settings, PHP versions, and .htaccess file configurations to ensure that they align with the production environment.
For example, your wp-config.php files contains credentials required to access your database, and which database you will be referencing for your environment. When restoring codebase, ensure to update the wp-config.php, else your site will not be able to access your database: 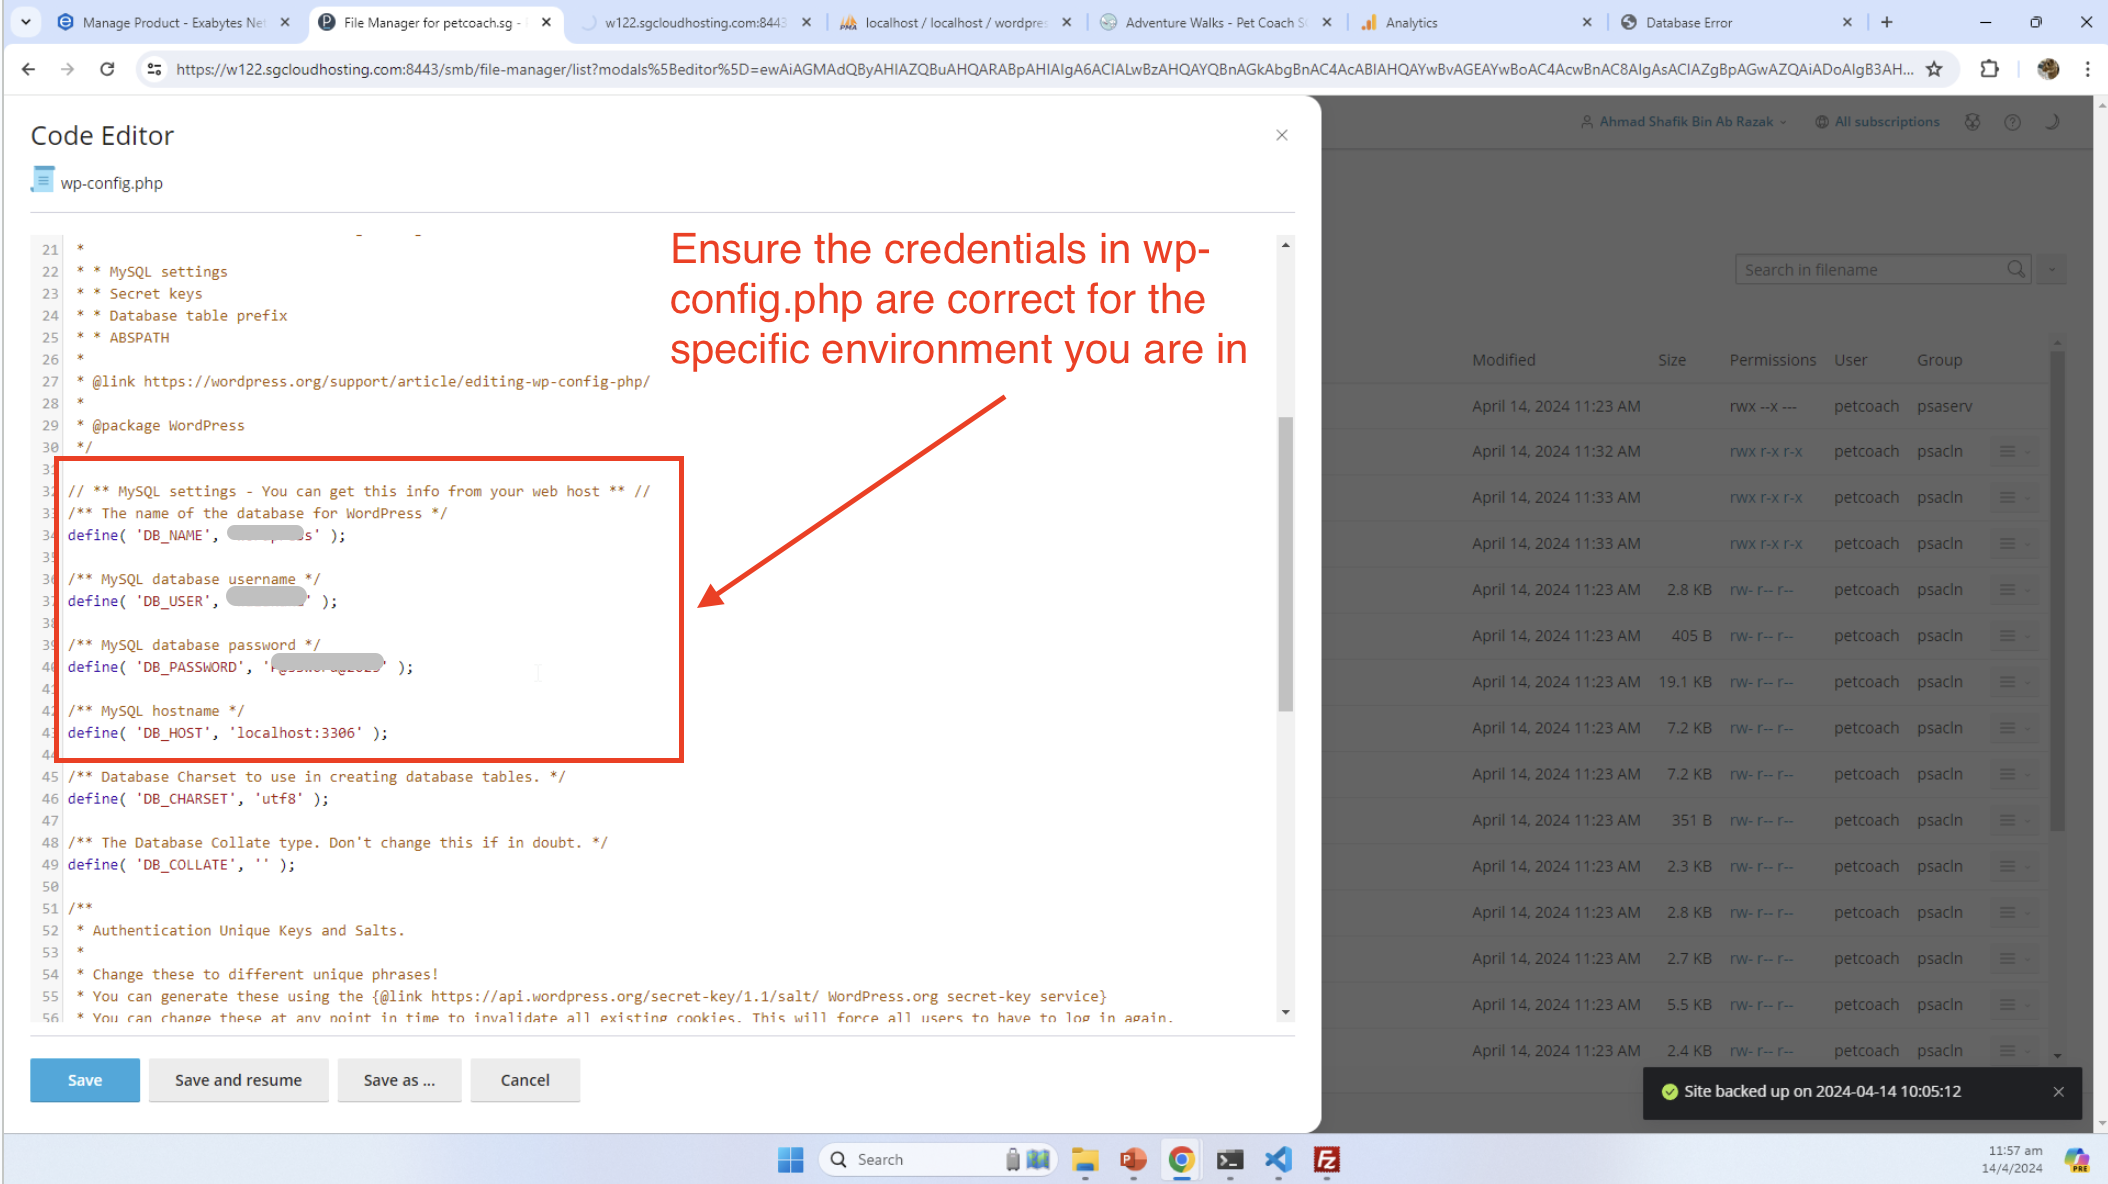
Cache-related Glitches
Litespeed cache is only available if you are using Litespeed server. If you are using nginx or apache, then you will need to explore different caching options.
Caching can be a blessing for load times but a curse during updates when it serves outdated content. For our WordPress project, we use LiteSpeed cache to server-side cache the html documents so that our WordPress servers do not have to keep regenerating them on every request. Before concluding that an update has broken something, ensure that you clear the cache and regenerate any cached items such as CSS files.
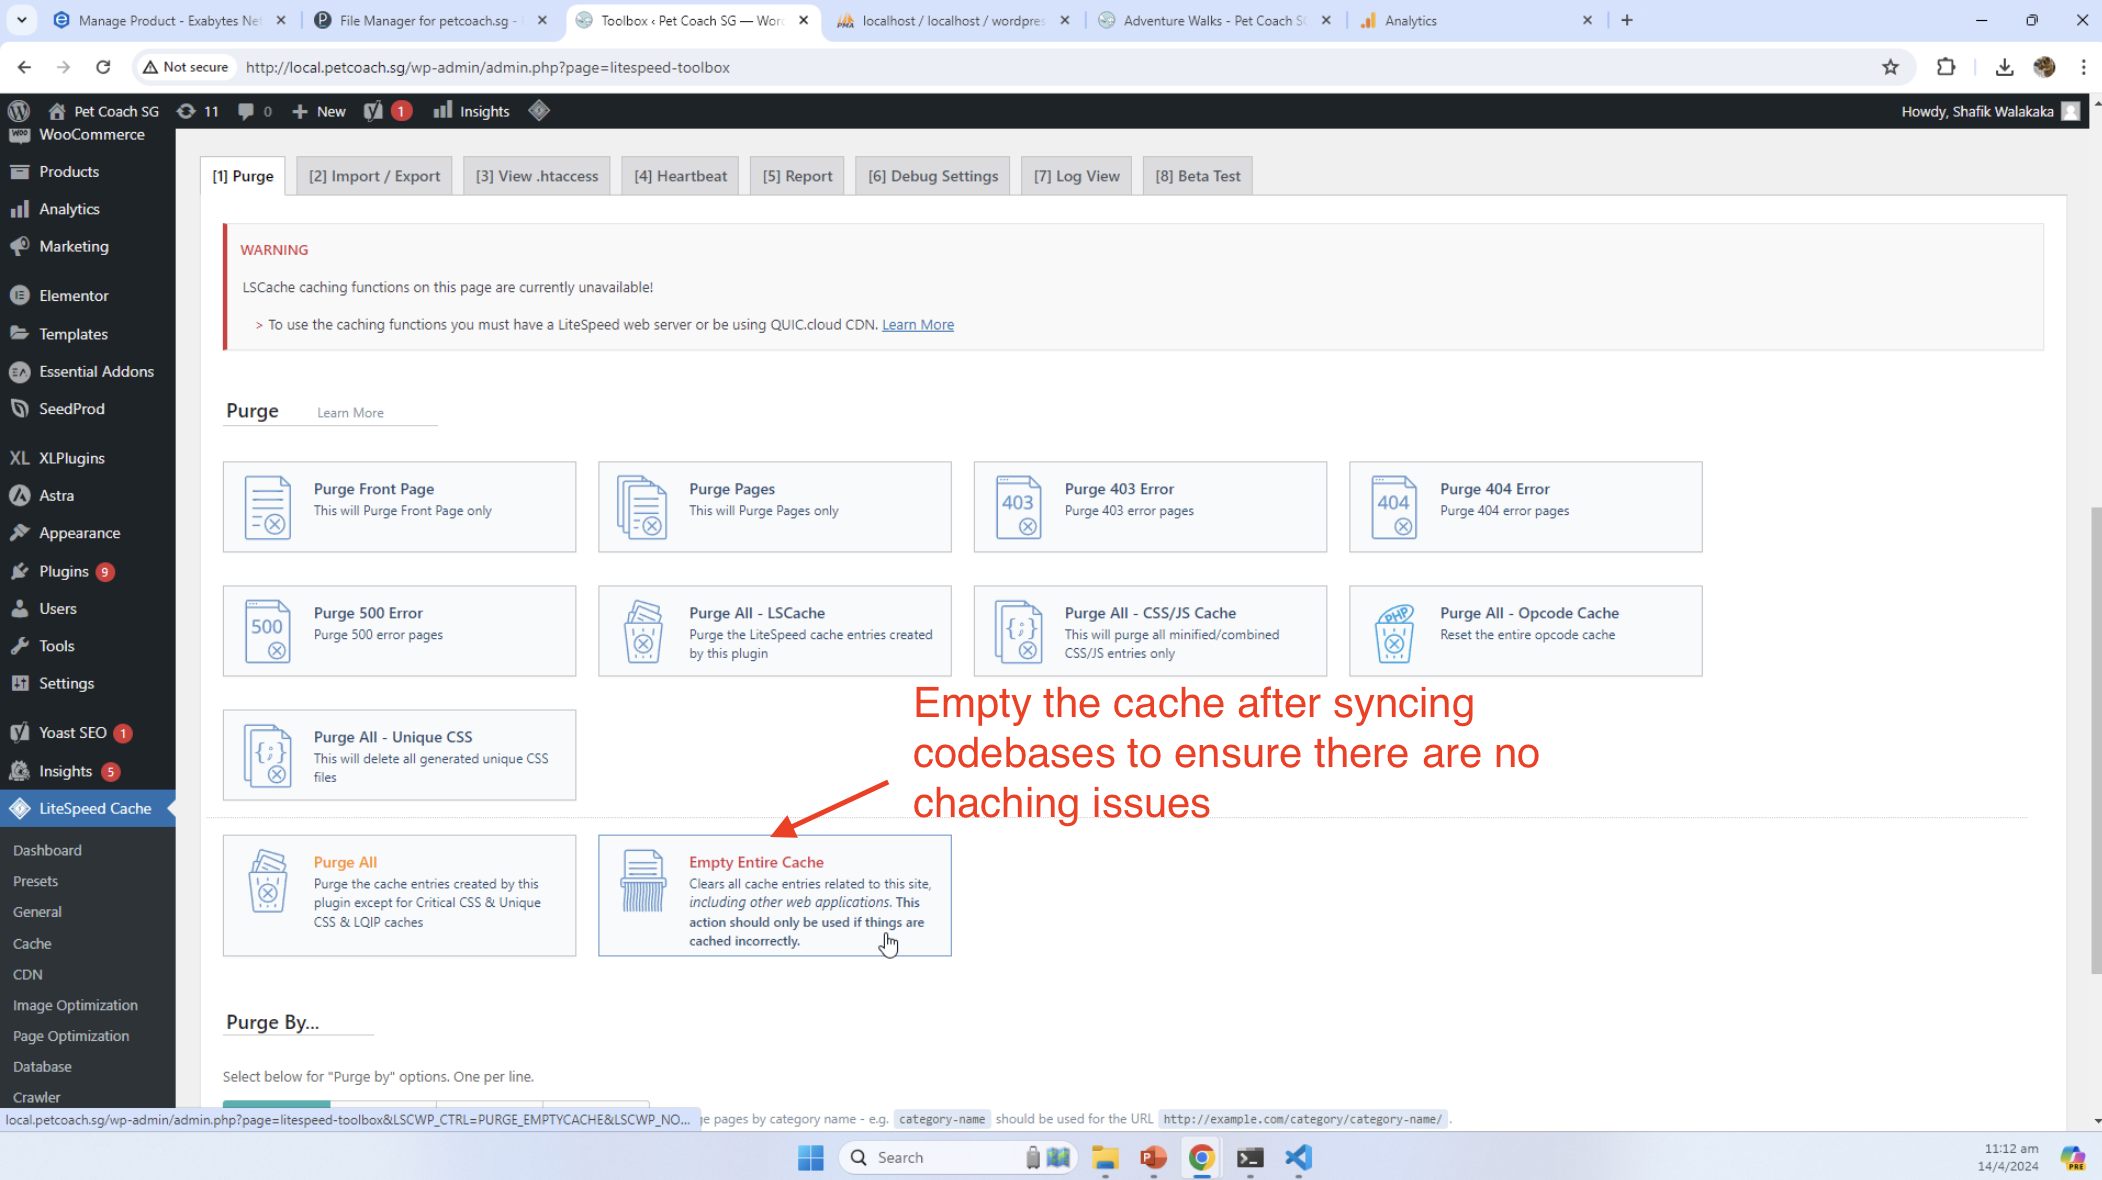
This will guarantee that you’re working with the most current version of your site.
Local Permissions
Updating plugins locally may require you to change file permissions or ownership to avoid permission-related errors. See screenshot of a permission error when trying to update the plugin in Local: 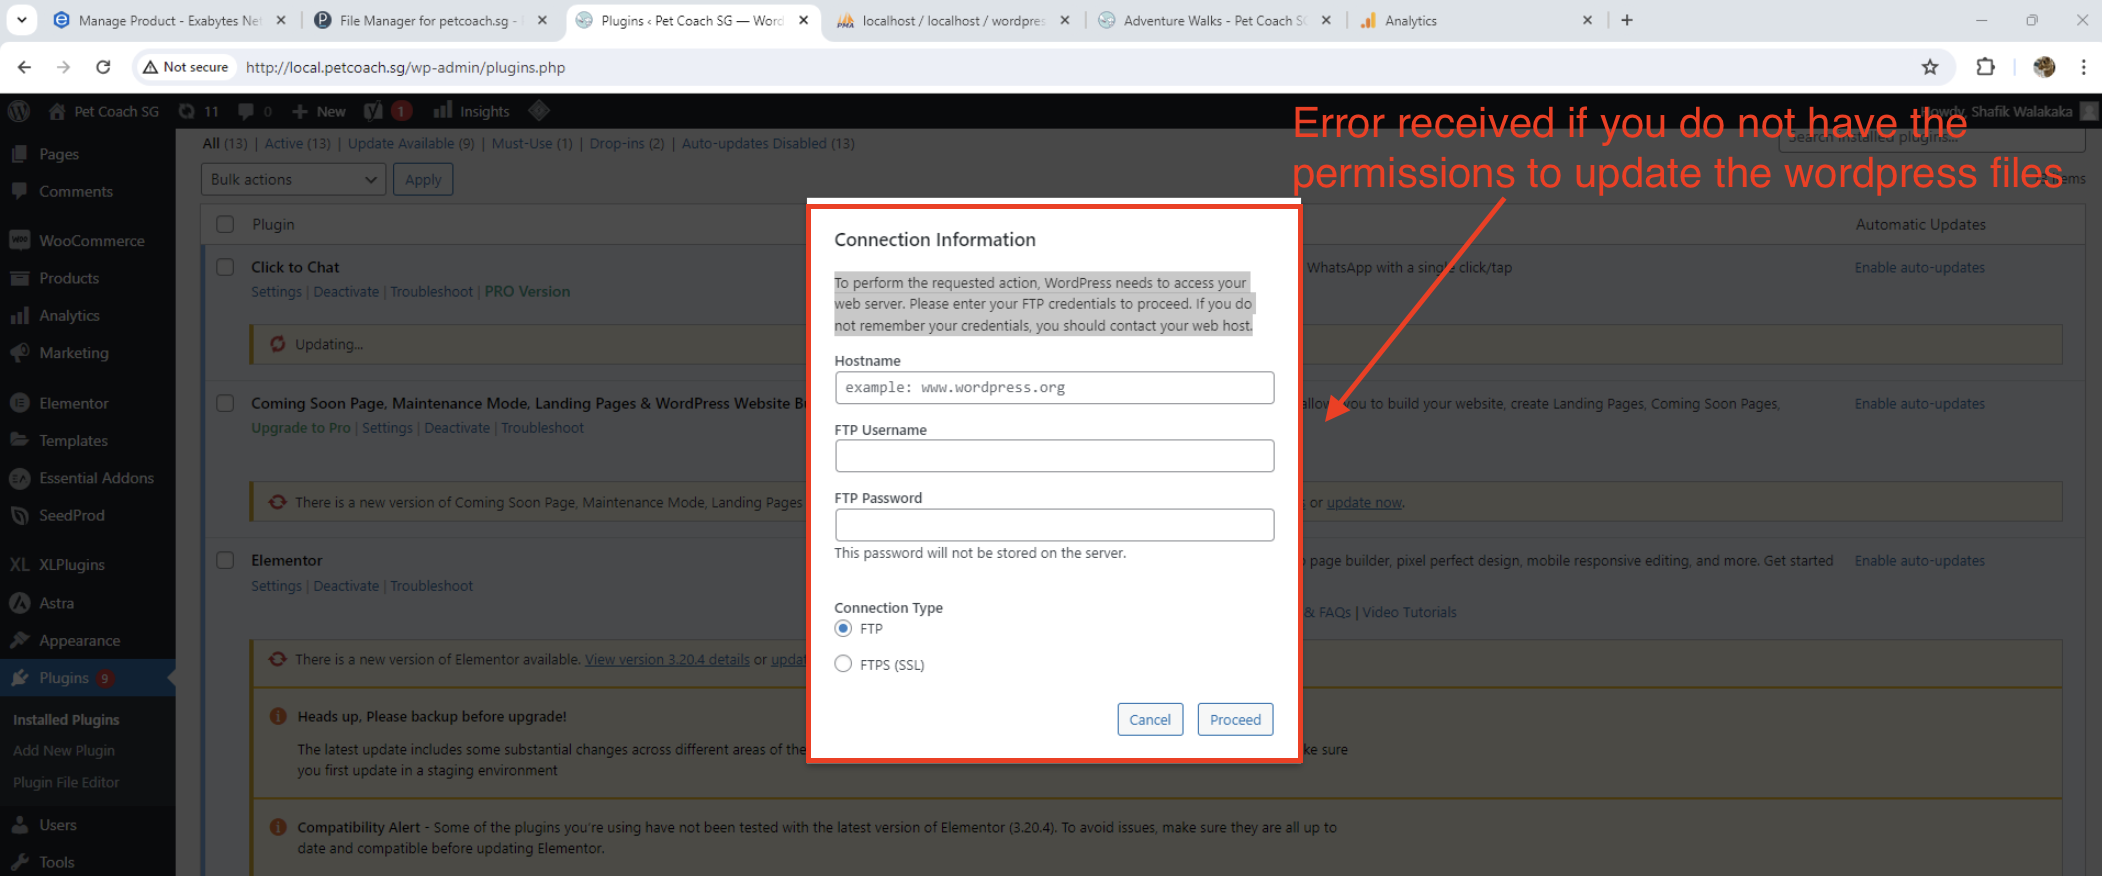
While in local development, you can make these changes without concern, but be sure not to carry these alterations over to the UAT or production environments, where they could pose security risks. See screenshot of allowing read, write and execute permissions for all users and groups alongside updating the users and groups to www-data: 
This resolves the issue locally, and we could update the plugins on Local: 
By following this safe and systematic approach to plugin updates, you can keep your WordPress site secure and your production environment untouched until you’re confident that the changes are safe to implement. Remember, in the world of WordPress, an abundance of caution is a virtue, not a vice.
Let us know if you have your own approach for verifying and testing WordPress Site changes. Will be cool to hear and streamline my flow – it is quite a pain at the moment lol ><!
Until next time!
Peace and Love
Shafik Walakaka