Steps to host your Jekyll Site
Here, we’ll walk you through the step-by-step process that would allow you guys to host your own free professional website. We will be utilizing the Jekyll Static Site generator and hosting the site on GitHub pages completely for free!
Git
Please download Git prior to proceeding to the next section. You can download Git Here!
Before diving into GitHub, it’s essential to grasp the basics of Git. Here are the fundamental commands that would be good to know:
- git init: Initializes a new Git repository in your project directory.
- git clone: Copies a repository from a remote source to your local machine.
- git remote: Manages connections to remote repositories.
- git add: Adds changes to the staging area, preparing them to be committed.
- git commit: Records changes to the repository with a descriptive message.
- git status: Shows the current status of your repository, including any changes to be committed.
- git pull: Fetches changes from a remote repository and merges them into your local branch.
- git push: Pushes your local commits to a remote repository.
Understanding and mastering these commands will streamline your workflow when working with Git. Don’t worry, the next few sections will step down the steps so that you can follow and familiarize with the above concepts.
For those that are interested, the documentation for the full list of Git Commands can be found Here!.
GitHub
GitHub is a remote repository where you can push and store your code. Let’s proceed with the following steps:
- Create a GitHub Account Here!
- Create repository in GitHub
Steps to Create Repository in GitHub
- Login to your GitHub Account
- Click
New
- Fill up the repository form
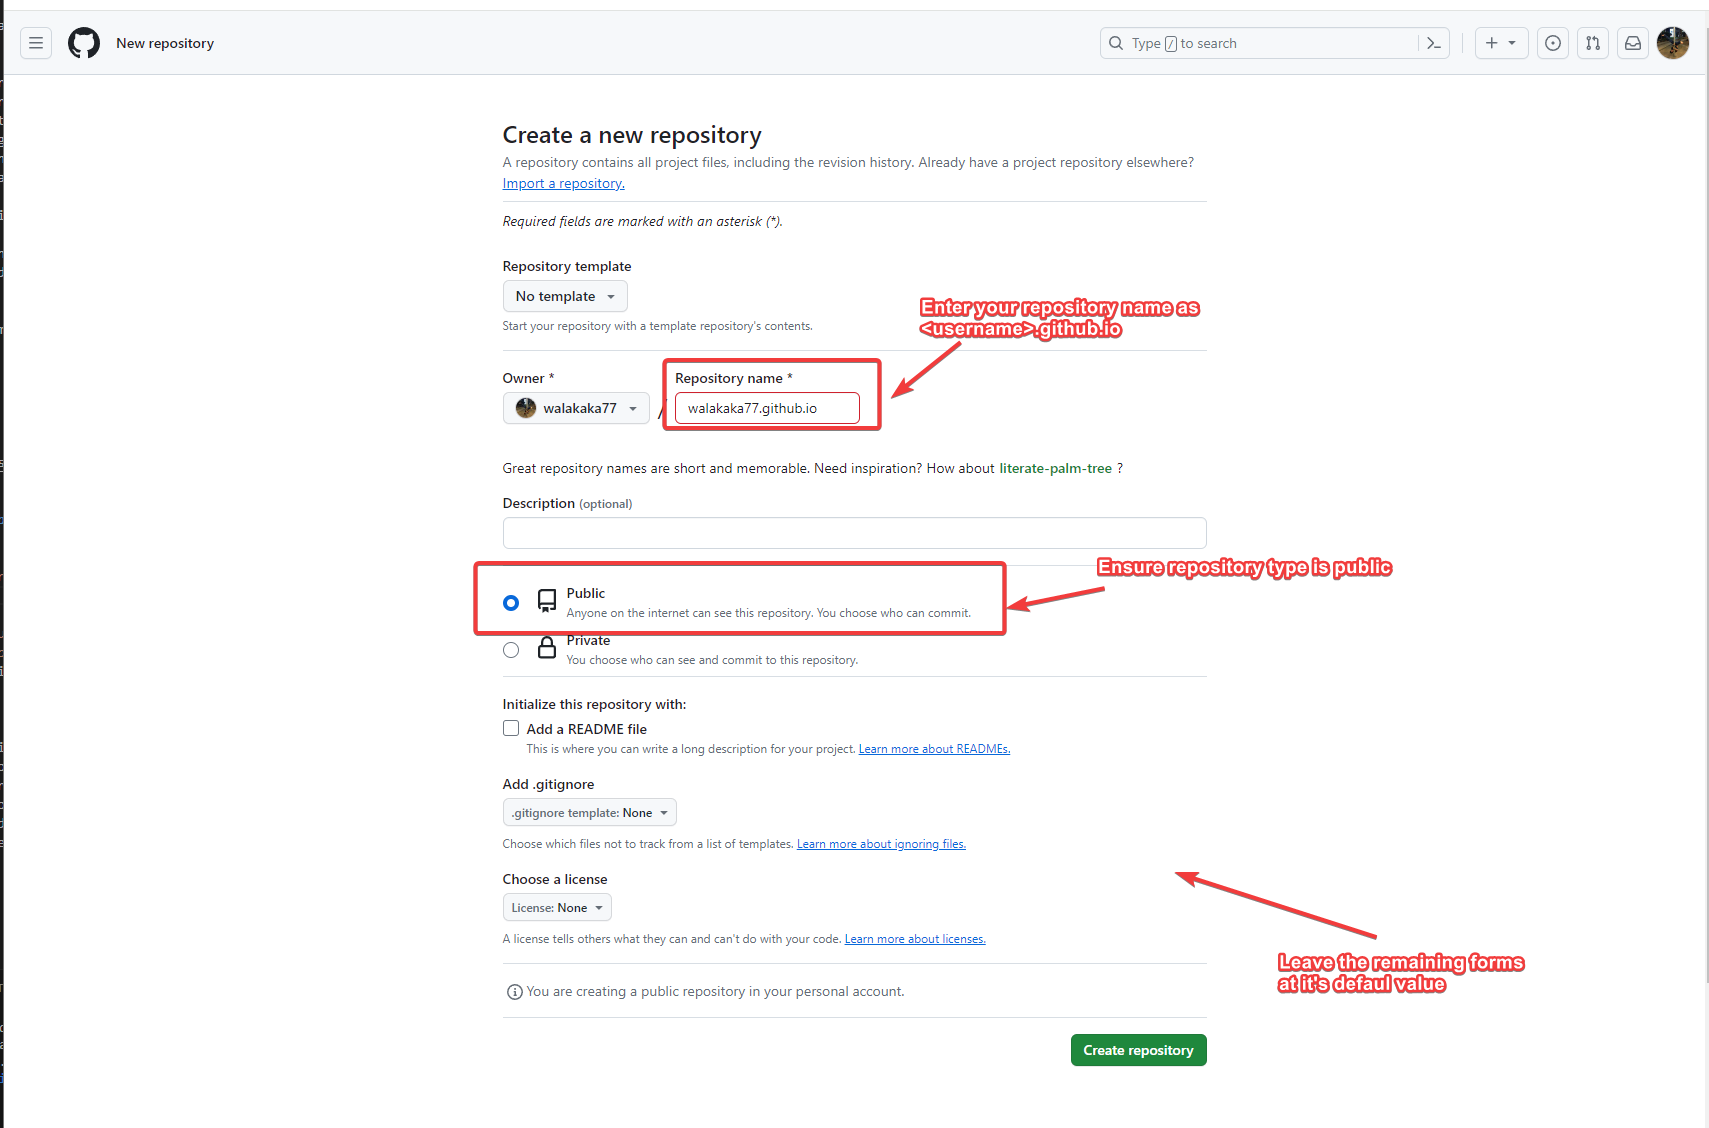
- Name your repository
<user>.github.io. In my case it would bewalakaka77.github.io - Ensure the repository type is
Public - Leave the remaining fields as their default value
- Name your repository
- Click the
Create repositorybutton
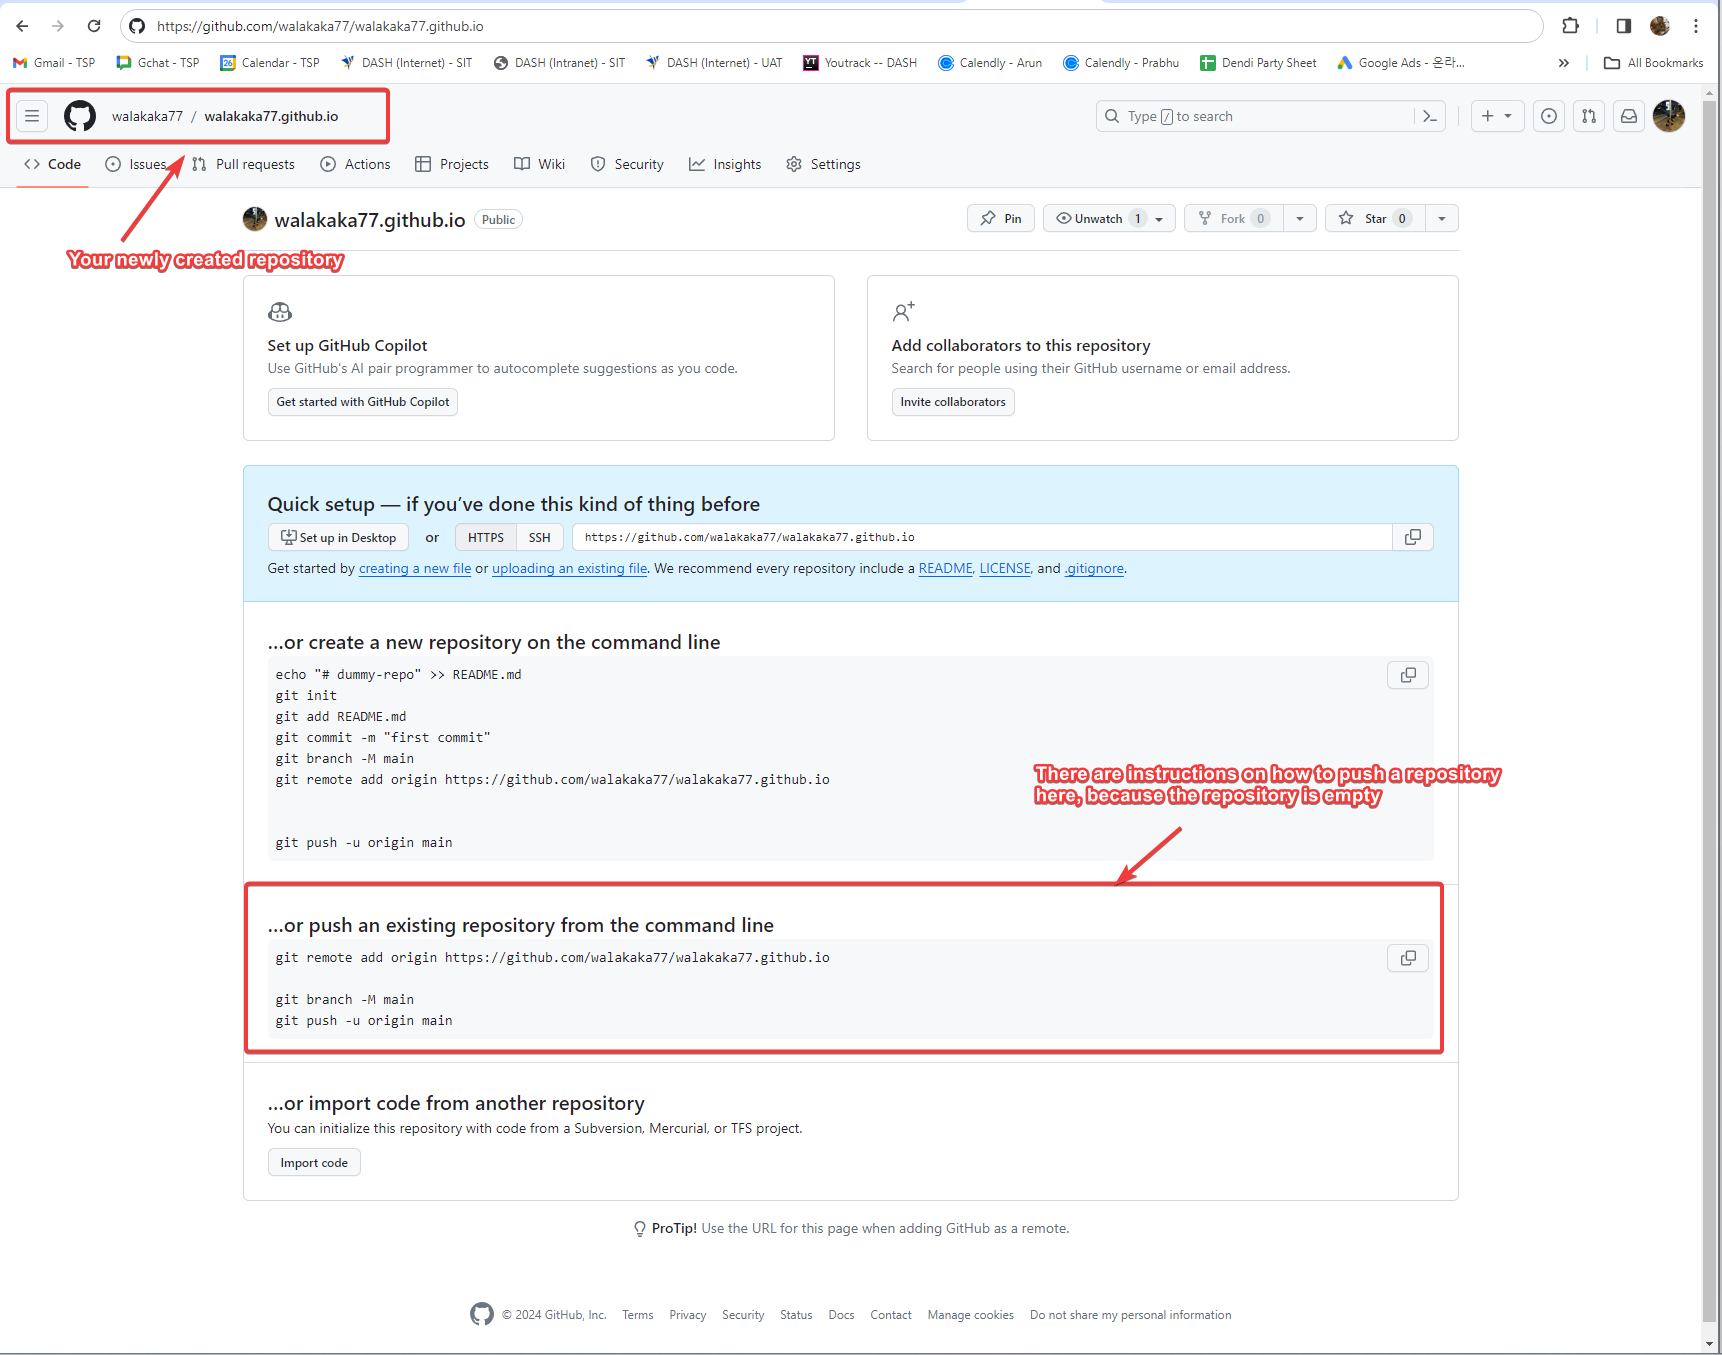
- Your remote repository would have been created here:
Clone the Jekyll Minima Template
Now that we have Git Installed, we will proceed to clone the Jekyll Minima template:
- Proceed to the Minima Project Github repository at this link
- Click on
Codeand copy the github project URL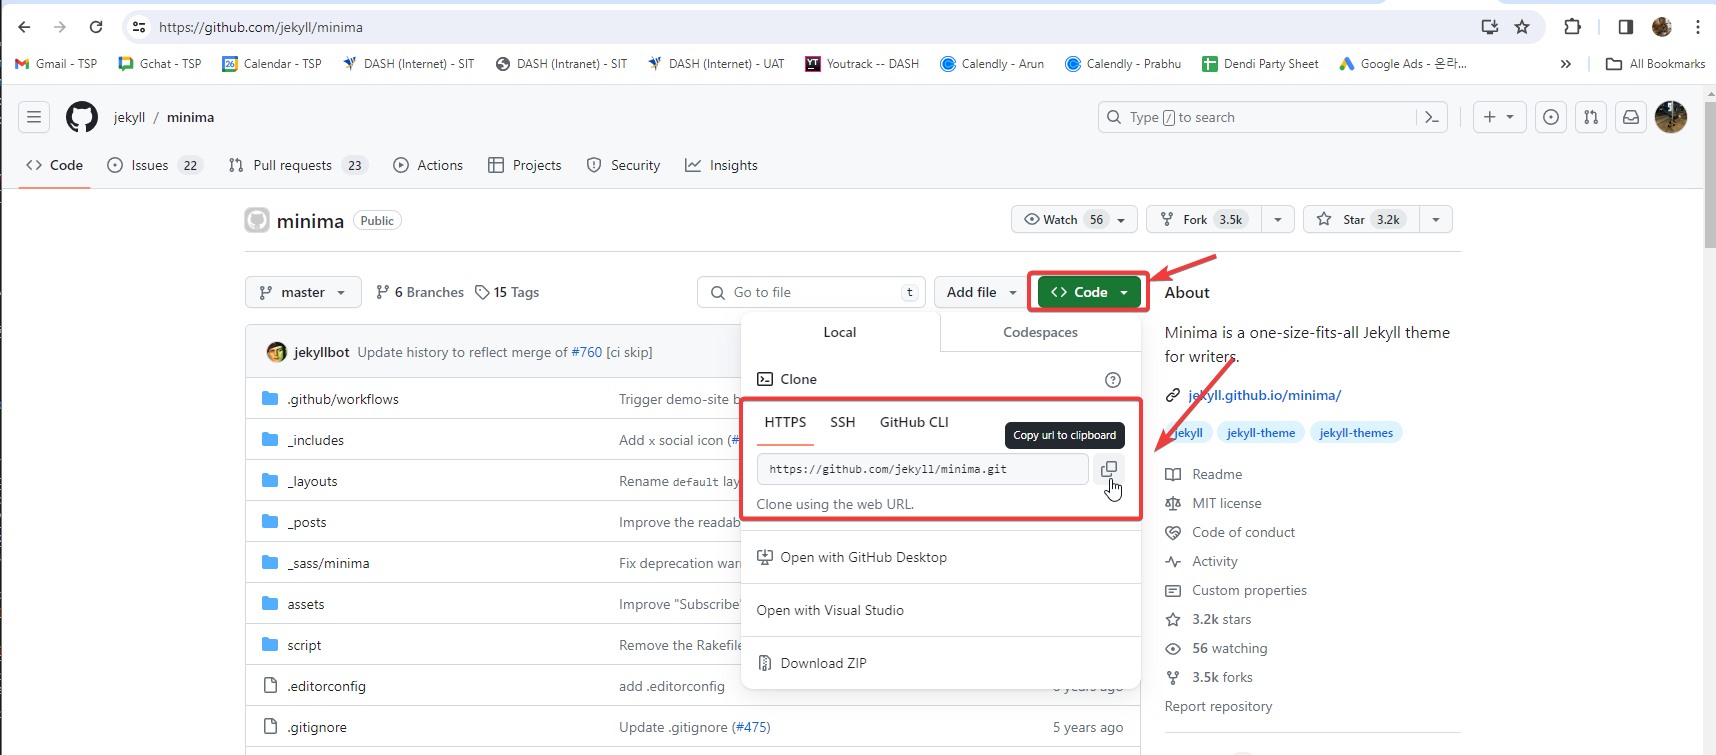
- Clone the Minima Project to you PC by running the following command
git clone https://github.com/jekyll/minima.git - The Minima Project will appear in the directory that you are in
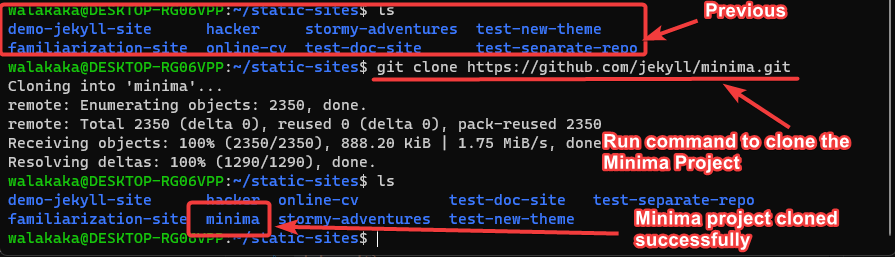
- Access the cloned Minima Project using
cd minima
Push the Cloned Minima Project to your Remote Repo
- Check the remote repository tied to the project directory by using
git remote -v. Notice that the Minima project directory is still tied to the project directory.
 - Change the remote repository to our github repository that we previously created by running the following command
git remote set-url origin https://github.com/<username>/<username>.github.io Please note to ensure you change the remote directory URL based on your github project URL obtained in step #2.
 - Now push your files into the remote repository by following the instructions specified in github in the earlier section
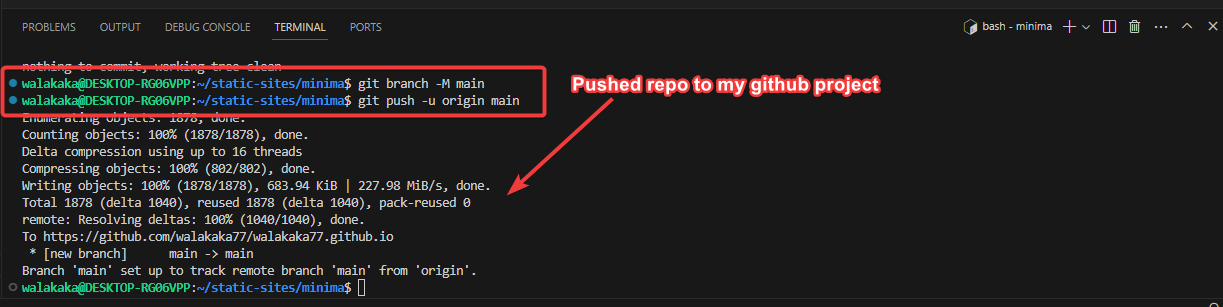
- Run
git branch -M main - Then run
git push -u origin main
- Run
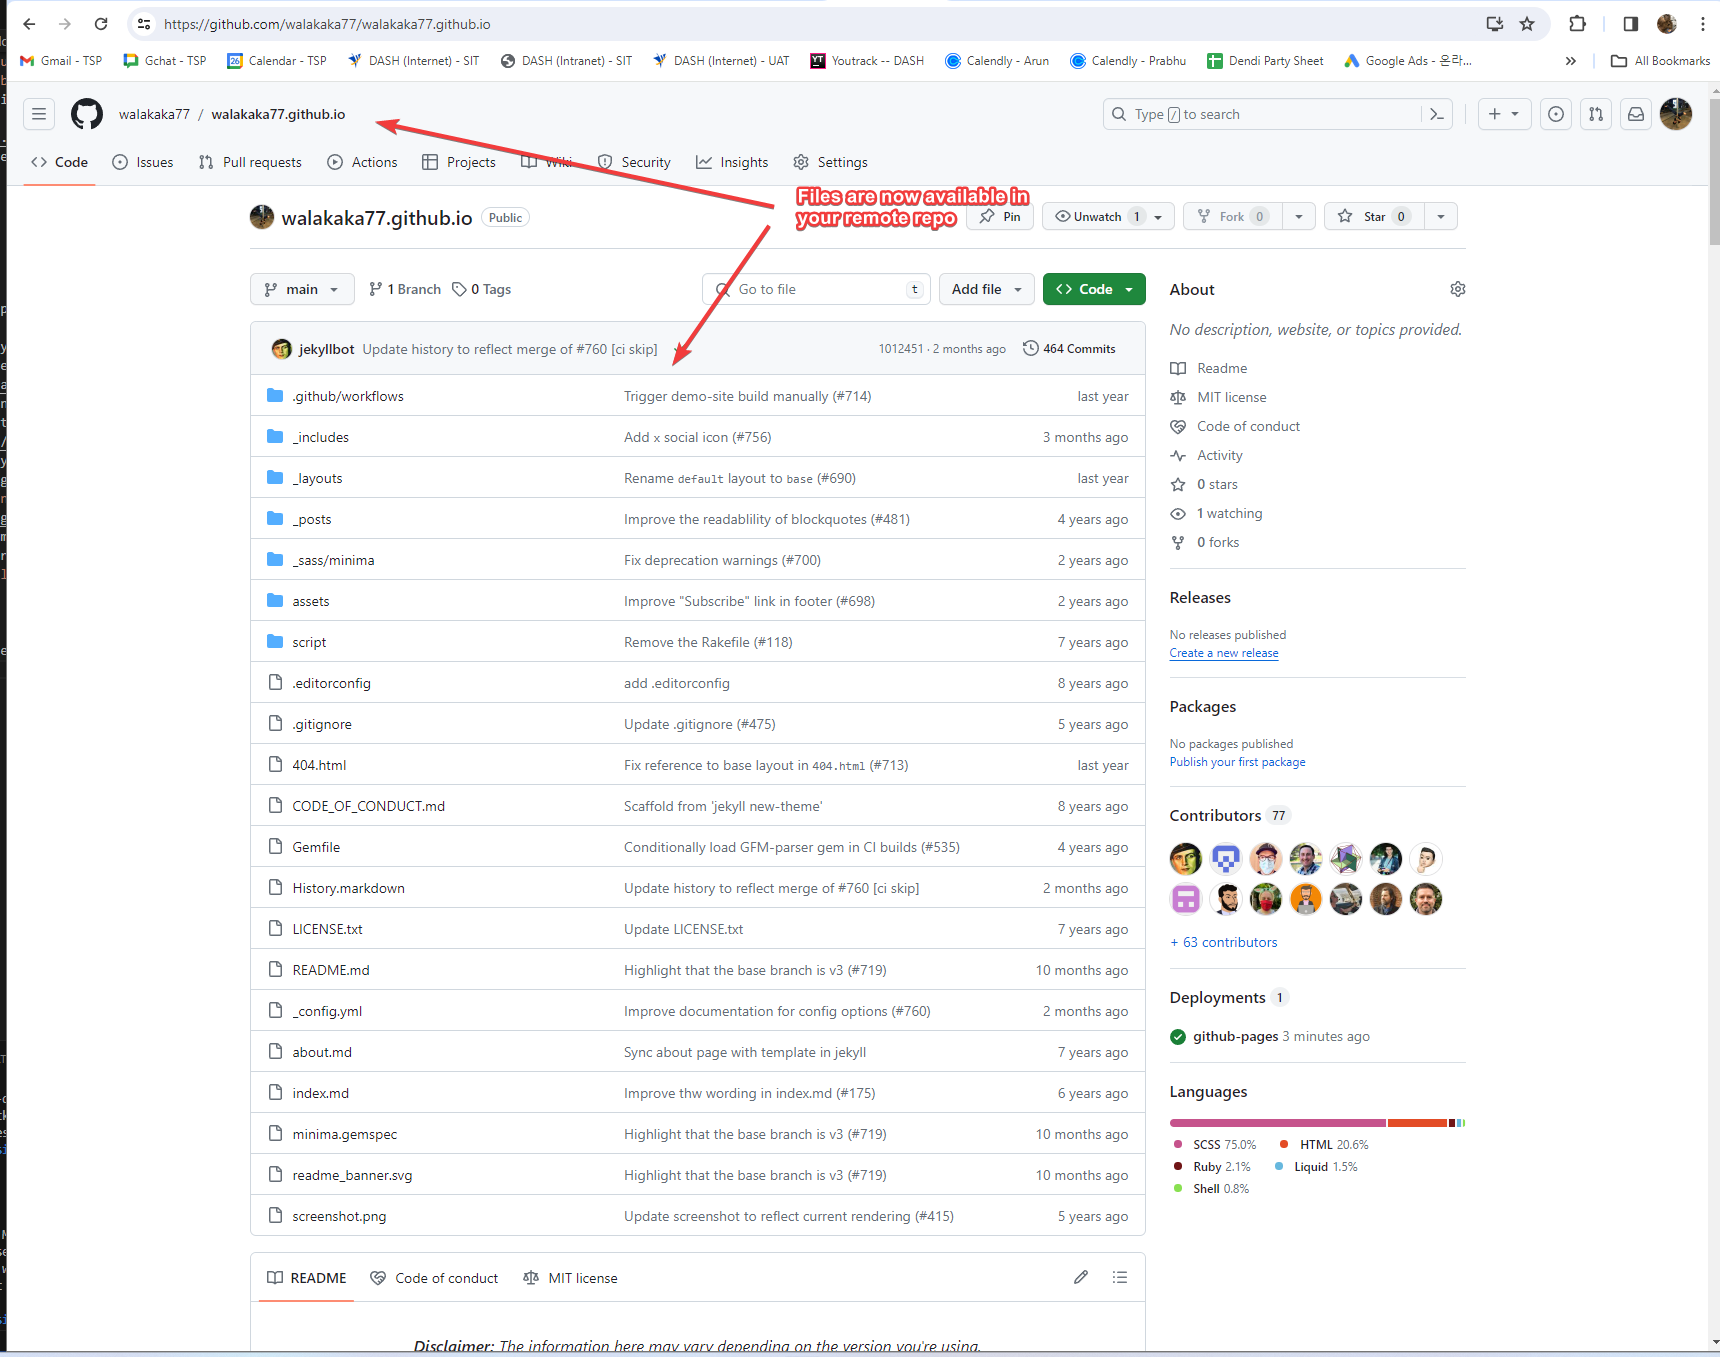
- Refresh your github repo, and all the files on your local should be available in your remote repo:
Configure your GitHub Repo to support GitHub Pages
- Configure GitHub Actions
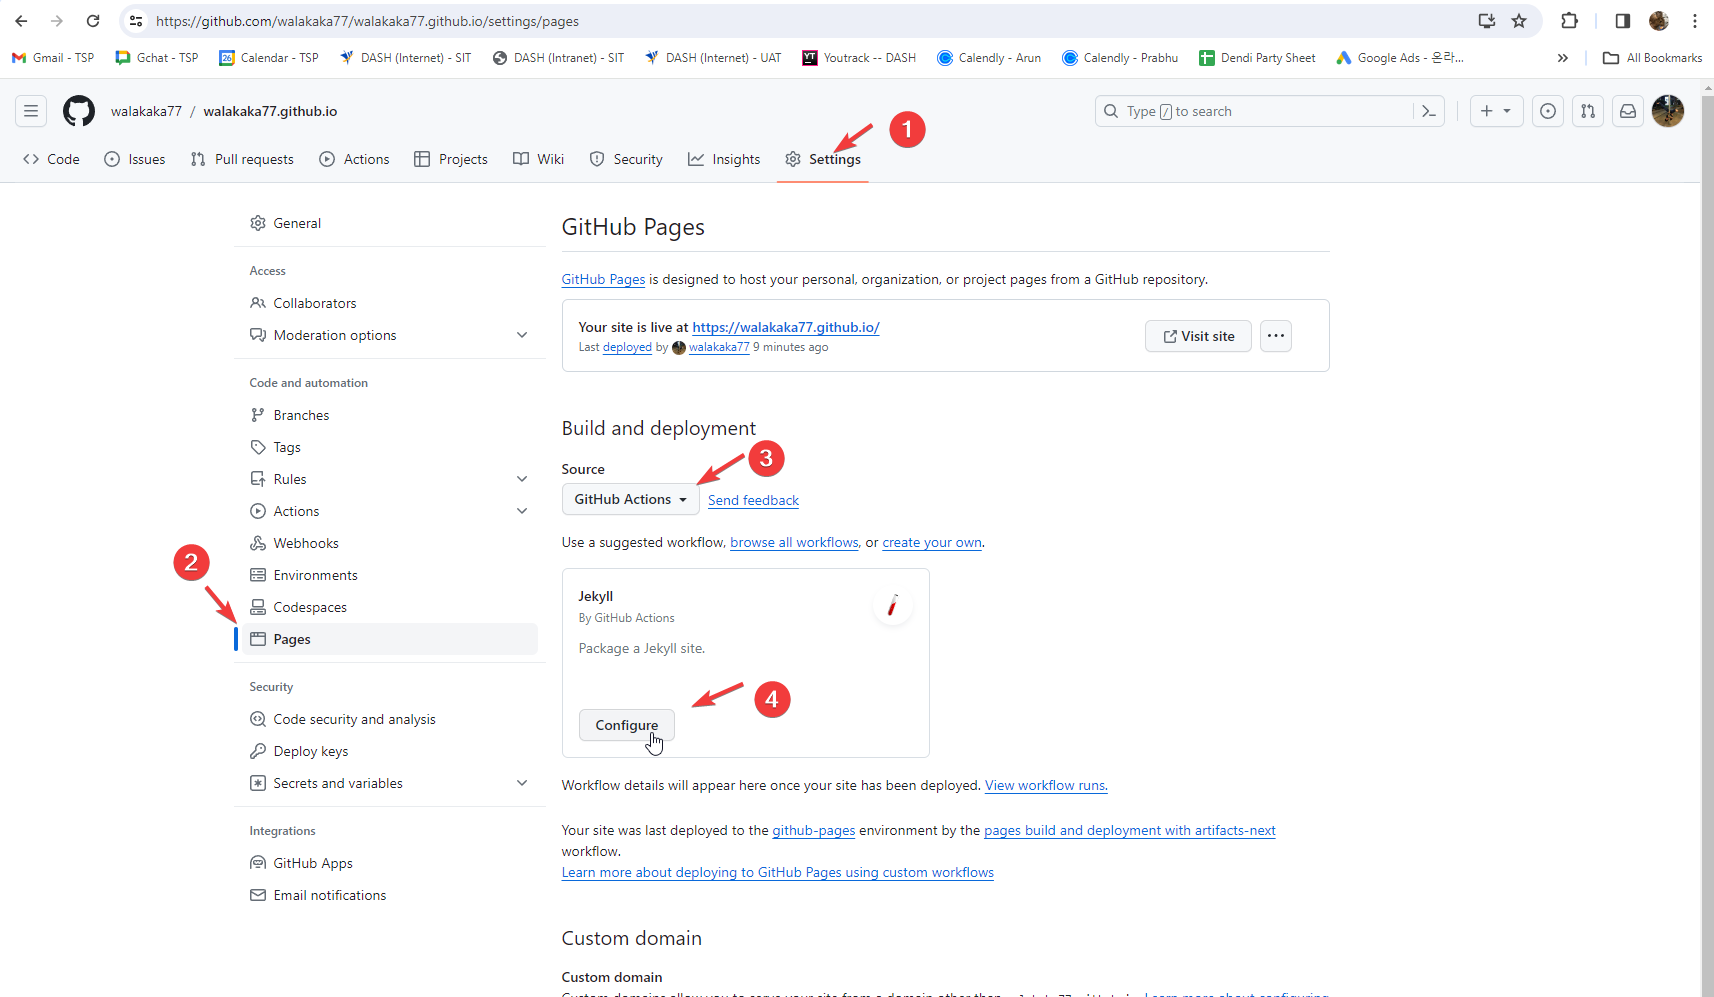
- Click into
Settings - Click into
Pages - Have Source indcate as
Github Actions - Click on
Configure
- Click into
-
Do not change the defaul settings, and click
Commit Changes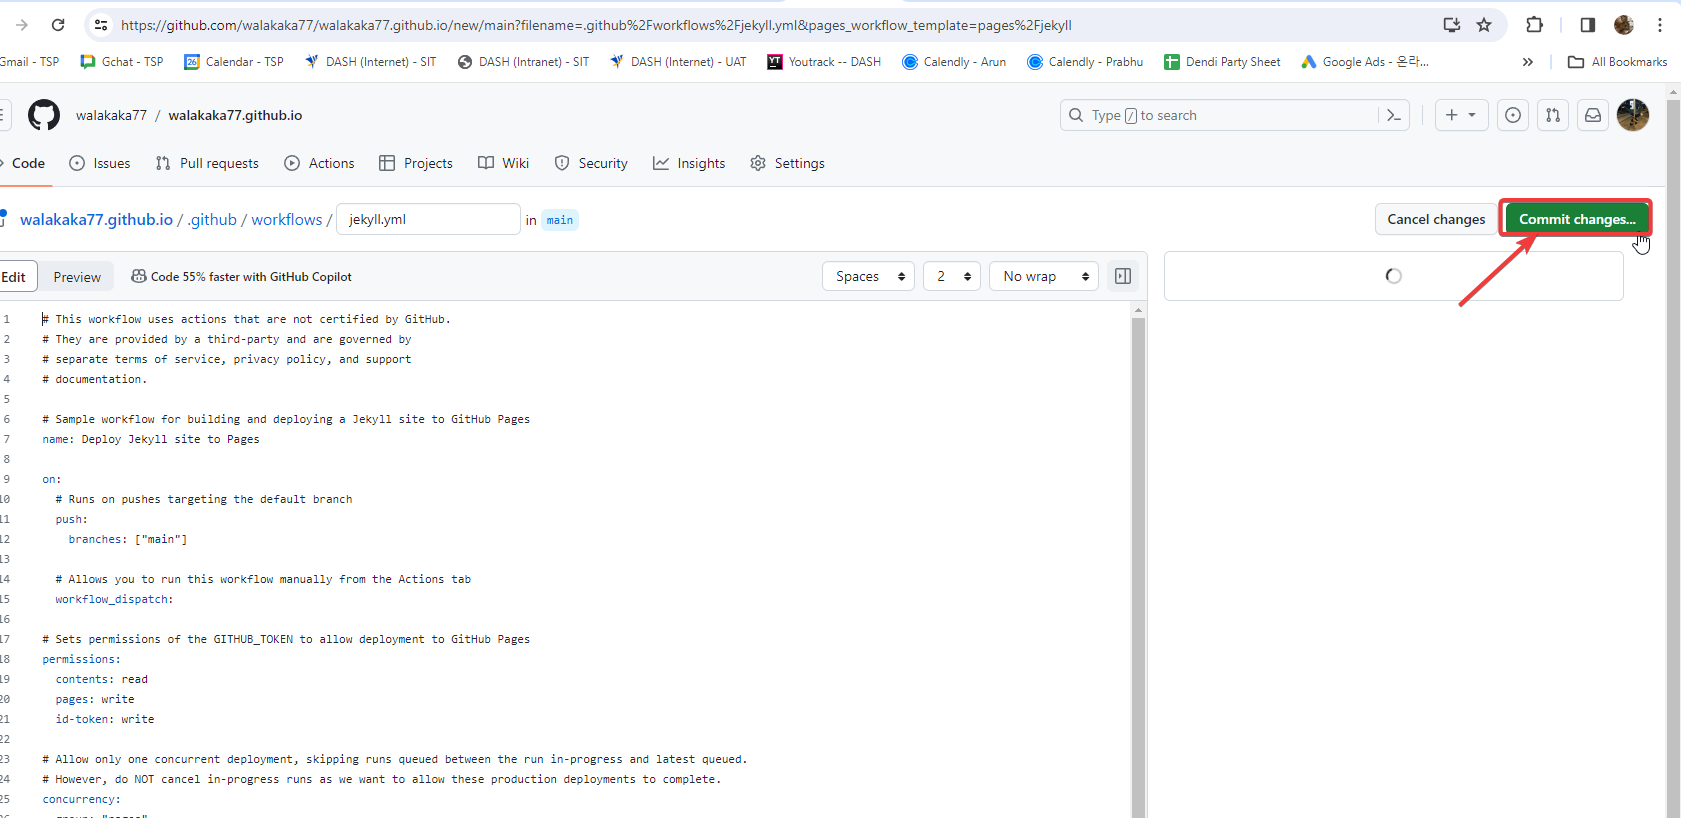
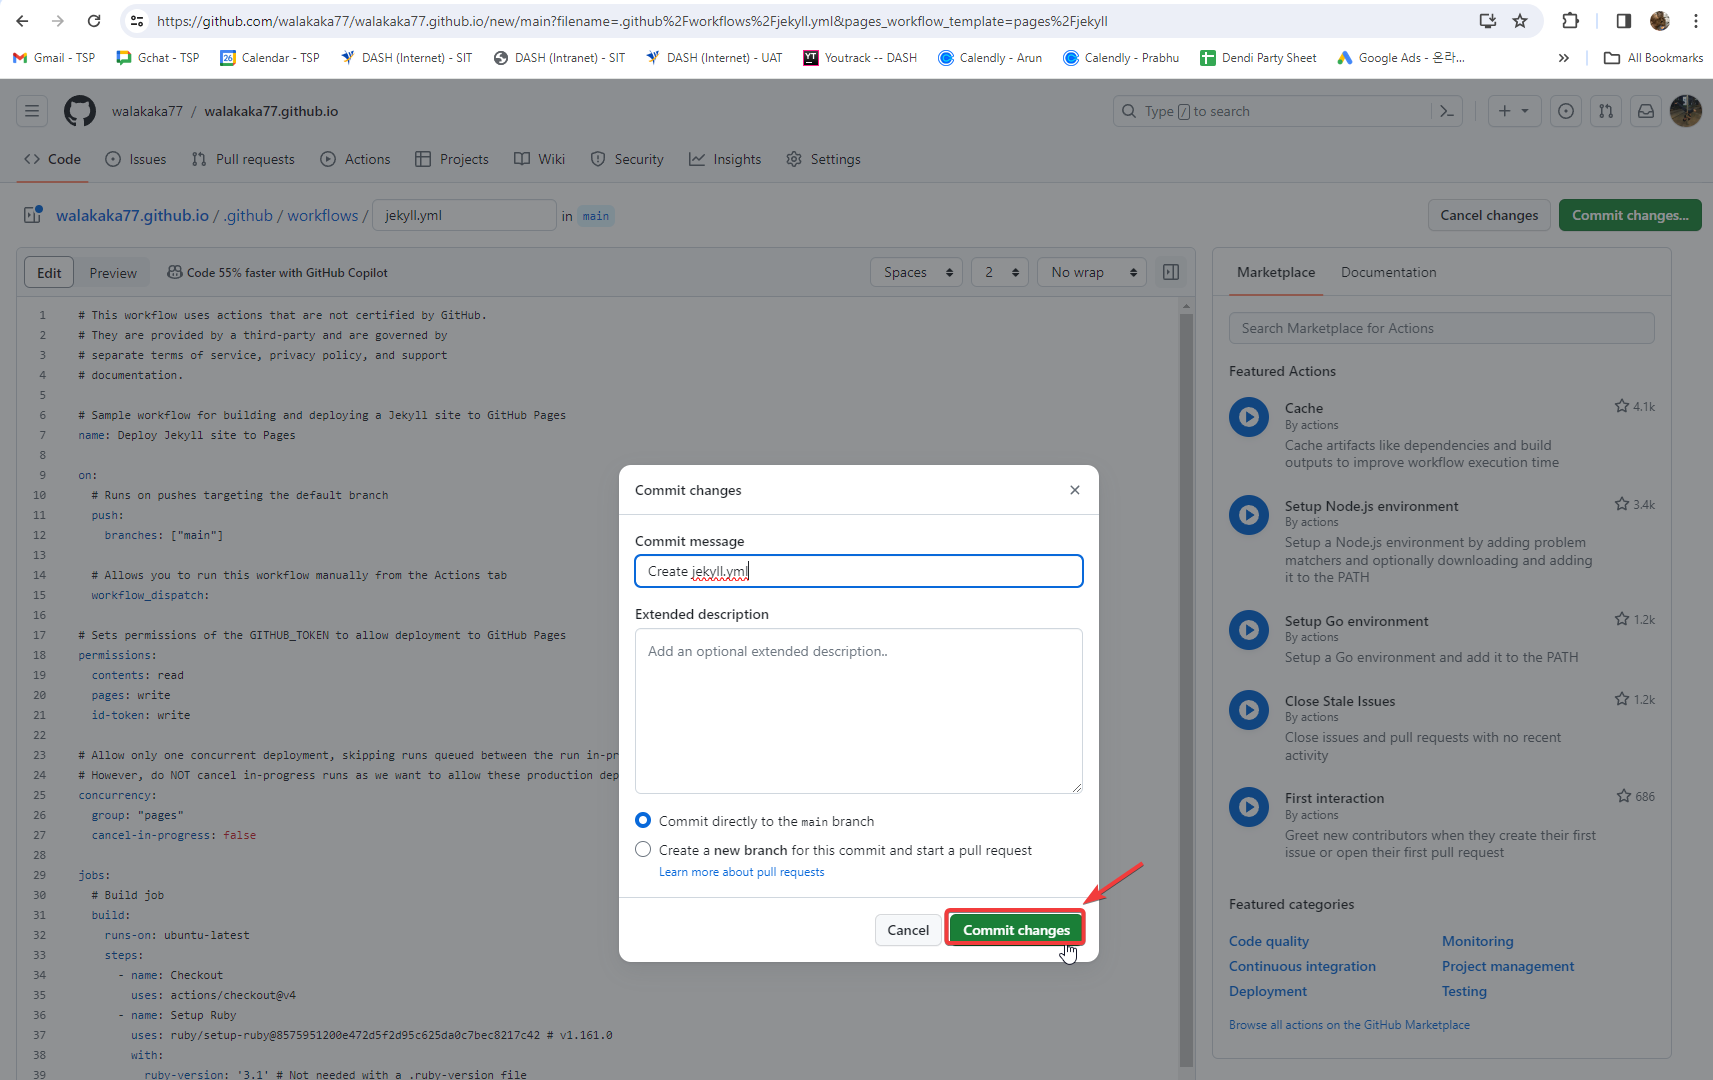
-
Once you have completed the above configuration, GitHub will proceed to deploy your page, and you can see that your site will be hosted at this URL:
<username>.github.io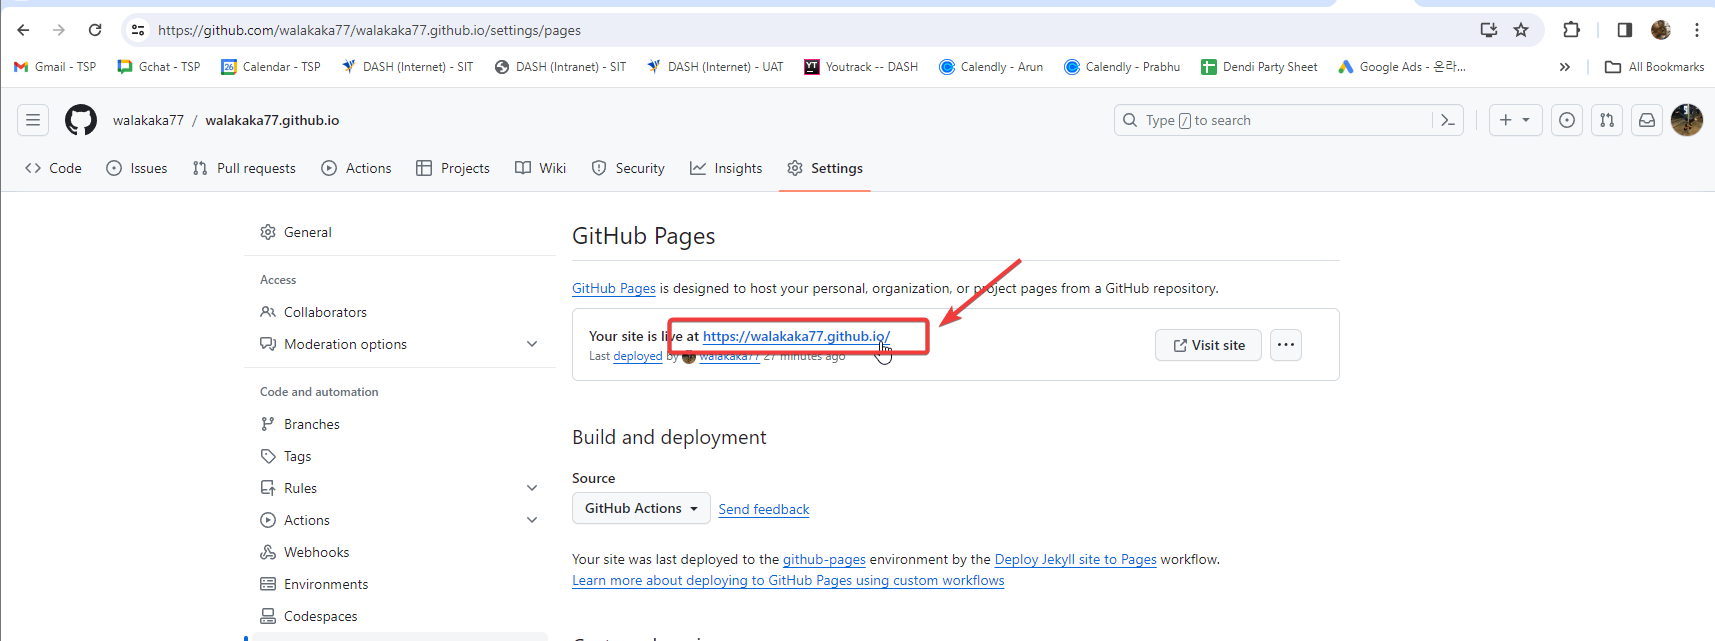
- For mine, it’s at
https://walakaka77.github.io/
- For mine, it’s at
If you guys are keen to see the repo, can check it out here! These were based on the exact steps mentioned above ^^
Push your changes
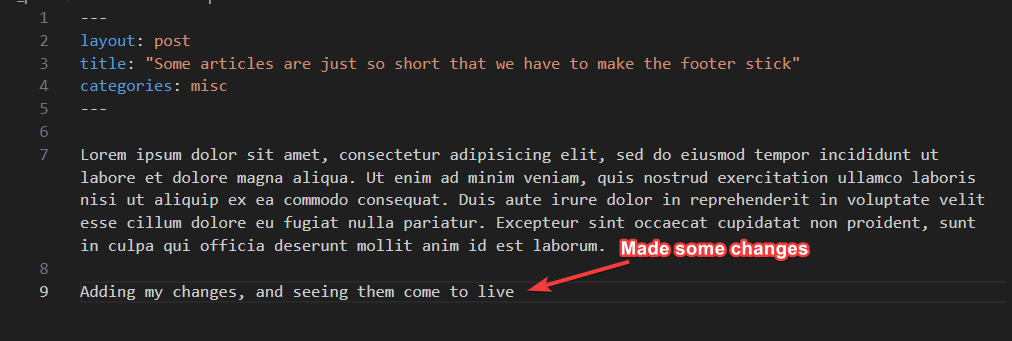
Now that you have successfully obtained a live site. You can fiddle around with this Jekyll tool – make some changes, push it and see it come to live!
-
First we made some changes
- Next we performed the following:
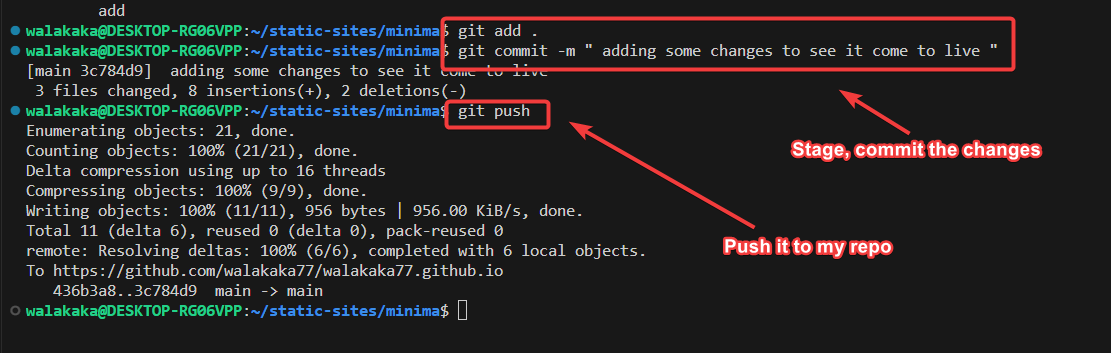
- staged the changes by running
git add . - commited the changes by running
git commit -m "<any-commit-message> - Push the changes to the remote repository by running
git push
- staged the changes by running
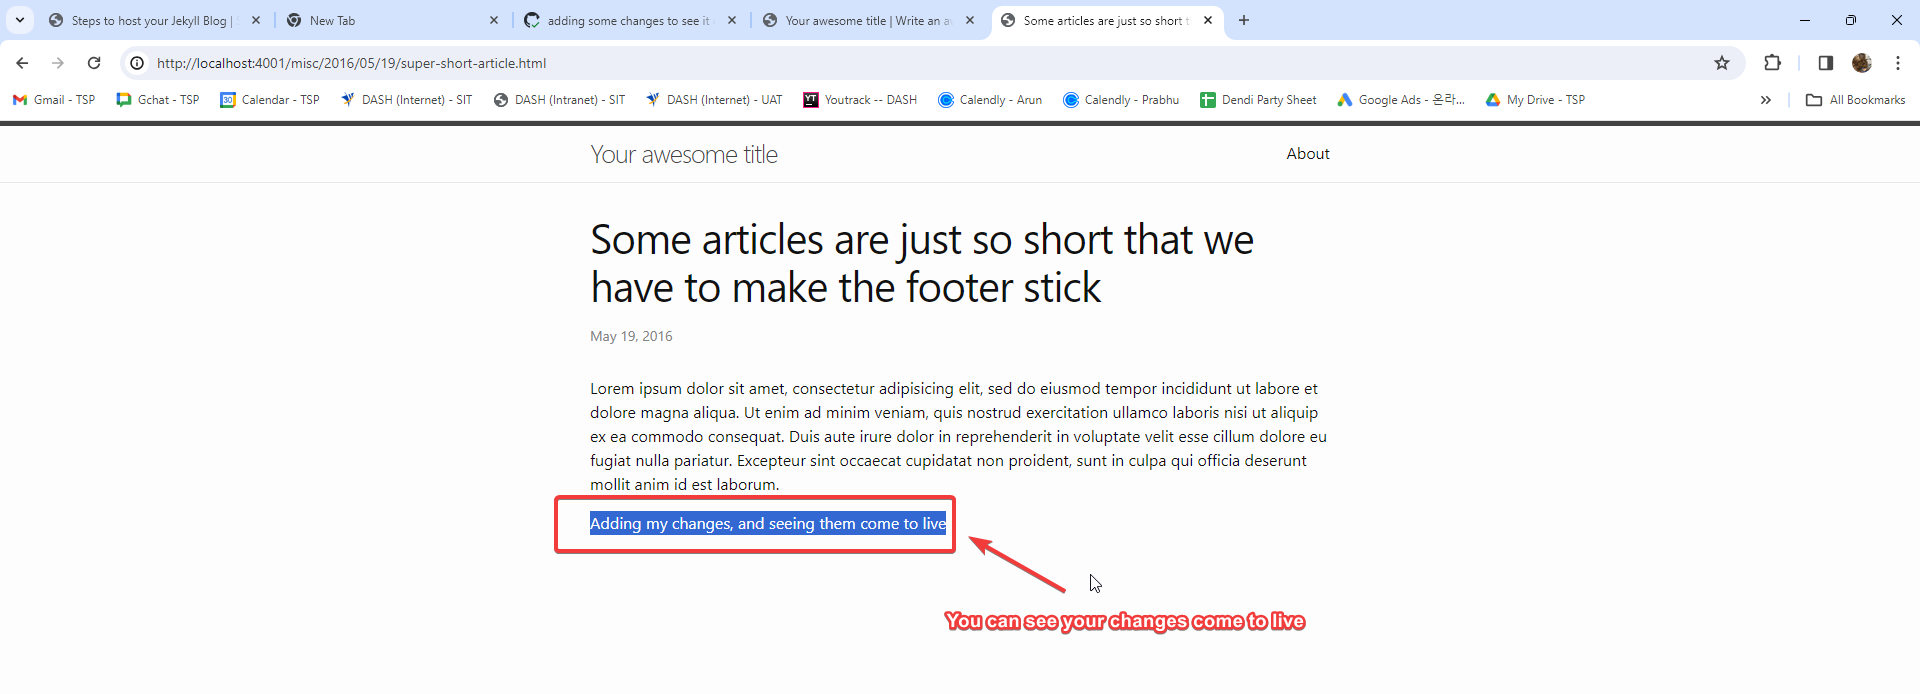
- The amazing thing is seeing your changes come to live
The tool is really friend, minimal html, css knowledge required. All you need to know is markdown, and this can be covered in an hour. In fact, can refer to this article!. I use it for reference all the time haha.
Thank You!
That was a heavy one, and tried to give step-by-step instructionals so that anyone can set it up, and see their first free website come to live.
Hope this helps, let me know if there is any part that can be improved etc.
Peace and Love
Shafik Walakaka