What is GitLab Pages
If you guys have checked out our Jekyll Blog articles, you’ll know we host it on Github pages. But yes, GitLab has a similar functionality, and we use GitLab at my workplace.
Recently, we wanted to push an automated testing script report and host it locally so that QA review the test results.
The tool that we use for automated testing is Playwright – a Microsoft tool, pretty damn robust.
Why GitLab Pages
So currently, after we run the tool – reports are generated as assets. I can’t share my work reports here – but when I do get around to replicating how playwright runs, I’ll share a sample report here for your reference.
The problem is that to view the report, you need to host it in a server:
- QA’s will need to have node js installed
- They will need to run a command line to run the server
- Then they can view the report locally
Not to mention that since QA’s are viewing the report locally, there will be no way to confirm that they are looking at the same report. Software development is complex, so as bueracratic as it sounds – we need strong processes in place to avoid confusion.
So we decided to use GitLab pages to actually host the report centrally, so that all QA’s can access the report without needing to:
- Install node JS
- Run a command line
- Double confirm with each other that they are looking at the same report
How to Use GitLab Pages
This is pretty damn well documented in GitLab documentation for their pages feature.
But yes, what I missed was that there are differences in configuring self-hosted vs cloud GitLab. It’s actually documented here! (but man, who has the time to dig through all that stuff lol)
CI File
For GitLab pages, all you really need is a .gitlab-ci.yml file. In here, GitLab will check it and run a pipeline
And wala, you have now done automated deployments – officially devops. Just kidding ofcourse, no offence to all my devops colleagues ^^
The GitLab CI file is written in yaml and will look something like this:
pages:
  stage: deploy
  script:
    - mkdir -p public
    # - cp -R * public/  # Or any command to move your build output to the public folder
  artifacts:
    paths:
      - public
  only:
    - main  # Adjust to your branch if needed
The script specifies the scripts that your runner will run. For me, I just need to check that the public file is there.
The artifcats specifies the folder that will be pushed into the artifact.
The only specifies the branch that will trigger the CI pipeline.
Public Folder
This is a key point, GitLab pages will serve all the artifacts that are in your public folder. Normally – people would have the pipeline build their sexy site, and then push the artifacts into the public folder!
See more details on the public folder here!
Major note, since I already have all the assets that I need. I actually just push all the assets into the public folder. Once this is merged into main, gitlab runs the pipeline and the files are served.
Pipeline Jobs
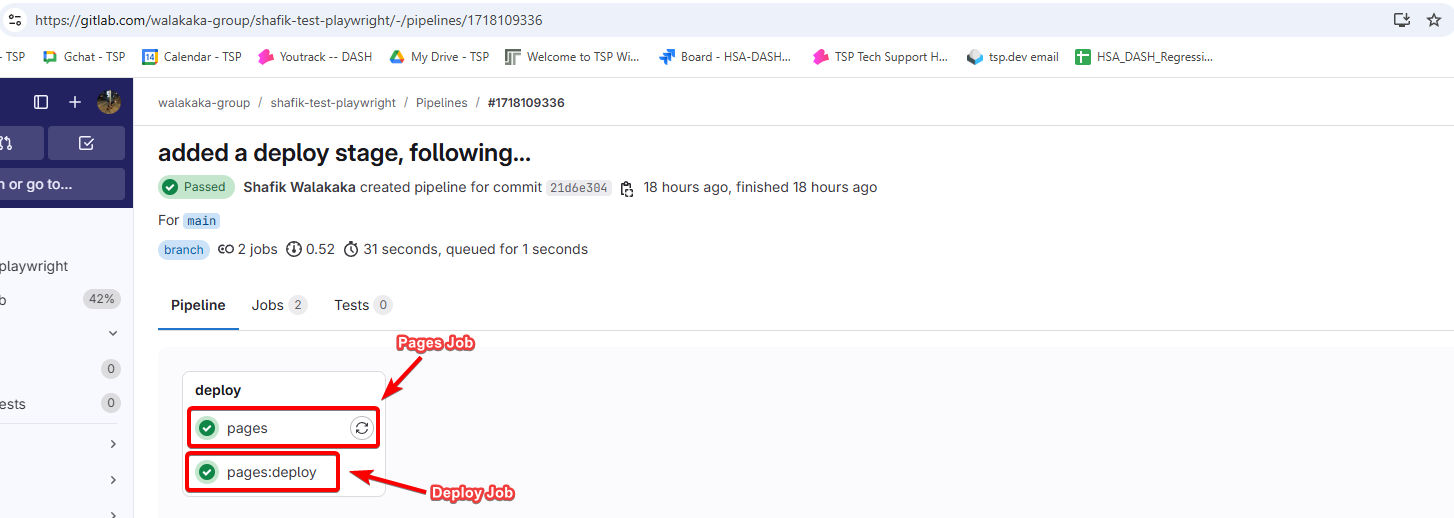
And once the pipeline is triggered, you will see 2 jobs:
- Pages Job
- Pages: Deploy Job

Accessing the Static Site
Once, you see the two tickmarks in the jobs – you can navigate back to the repo and you will see the GitLab Pages button. See the screenshot below:

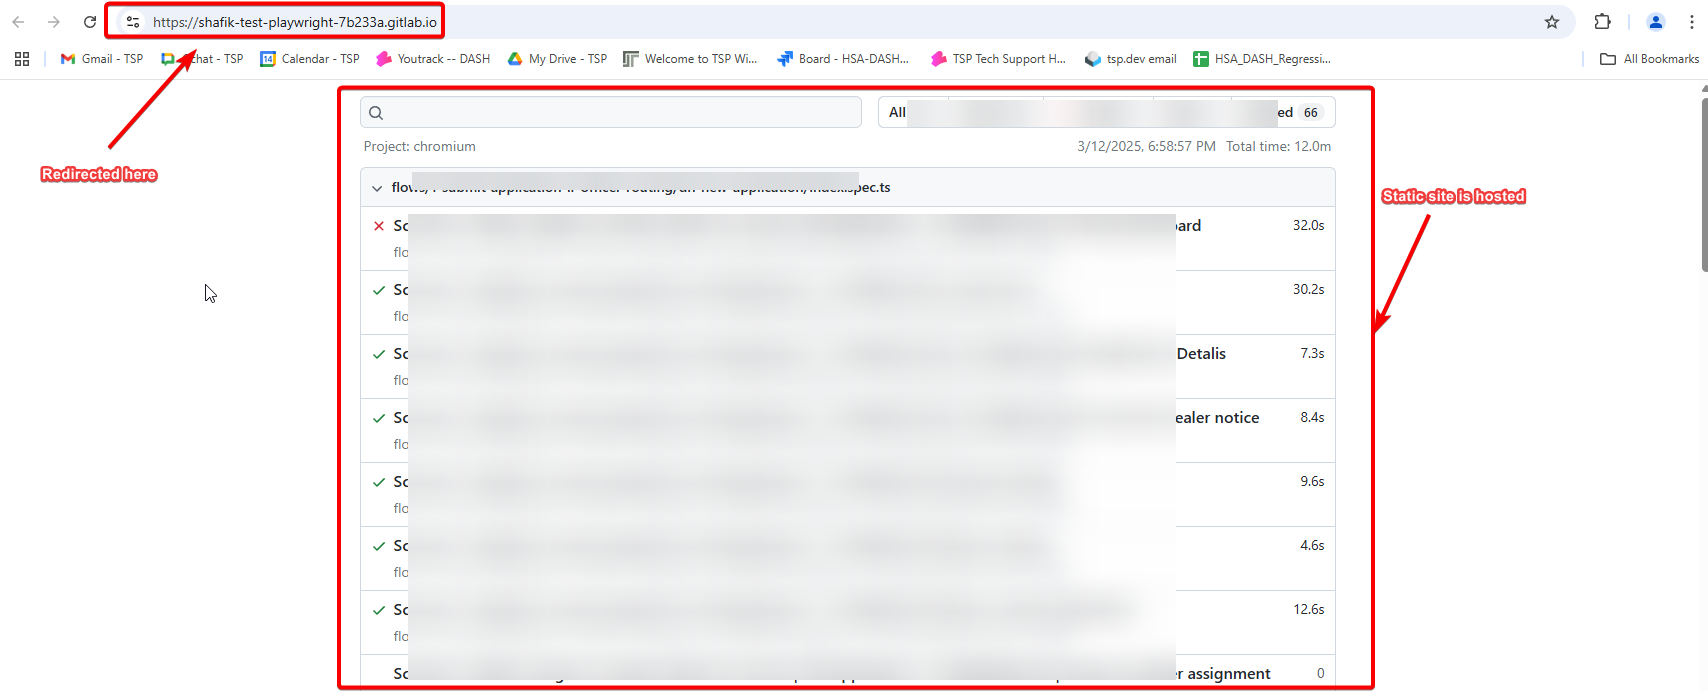
Click on the GitLab Pages buttton, and you should be redirected to your static site 
If you guys are more visual and audio people, checkout this youtube video on setting up GitLab pages.
Thank you!
And there you have it fellas! Your own GitLab pages site lol. Easy right :)
But if you try the link, you will notice that you cannot access it.
Since i’m hosting my work related reports, I have made permissions to access the site private. That means, only GitLab members of my repository can access the site.
In subsequent articles, I will share with you guys the permission control and how you can set it.
I will also share with you guys the difference between GitLab Cloud Hosted vs Self-hosted functionalities and setup required. This is one major headache, that I would definitely leave it to my DevOps lead to handle LOL.
Thanks again fellas!