Building a Local WordPress Online Course Platform with WooCommerce & Sensei LMS
Table of contents
In this guide, we’ll walk through setting up a full-featured online course platform locally, testing course purchases, user registration, and email workflows using Mac, Apache, MariaDB, PHP, and WordPress. By the end, you’ll have a sandbox to experiment safely before going live.
Local WordPress Stack Setup
Requirements
- Platform: macOS (Linux can be used similarly)
- Stack: Apache, PHP, MariaDB (installed via Homebrew)
- Ports: Use 4001, 4002 to separate test sites
Step 1: Install Core Tools
Install Apache, PHP, and MariaDB using Homebrew:
brew install httpd php mariadb
Then start services:
brew services start httpd
brew services start mariadb
brew services start php
Step 2: Configure Apache Virtual Hosts
Apache config location: /private/etc/apache2/httpd.conf Virtual hosts: /etc/apache2/extra/httpd-vhosts.conf
Example virtual host for WordPress on port 4002:
<VirtualHost *:4002>
    ServerName localhost
    DocumentRoot "/usr/local/var/www/petcoach-course"

    <Directory "/usr/local/var/www/petcoach-course">
        AllowOverride All
        Require all granted
    </Directory>

    ErrorLog "/var/log/apache2/petcoach-error.log"
    CustomLog "/var/log/apache2/petcoach-access.log" common
</VirtualHost>
Restart Apache:
sudo apachectl restart
Step 3: Install WordPress
- Download WordPress and extract to /usr/local/var/www/petcoach-course
- Configure wp-config.php to point to your MariaDB database:
define('DB_NAME', 'local_course_db');
define('DB_USER', 'root');
define('DB_PASSWORD', 'password');
define('DB_HOST', '127.0.0.1');
Test your site: http://localhost:4002 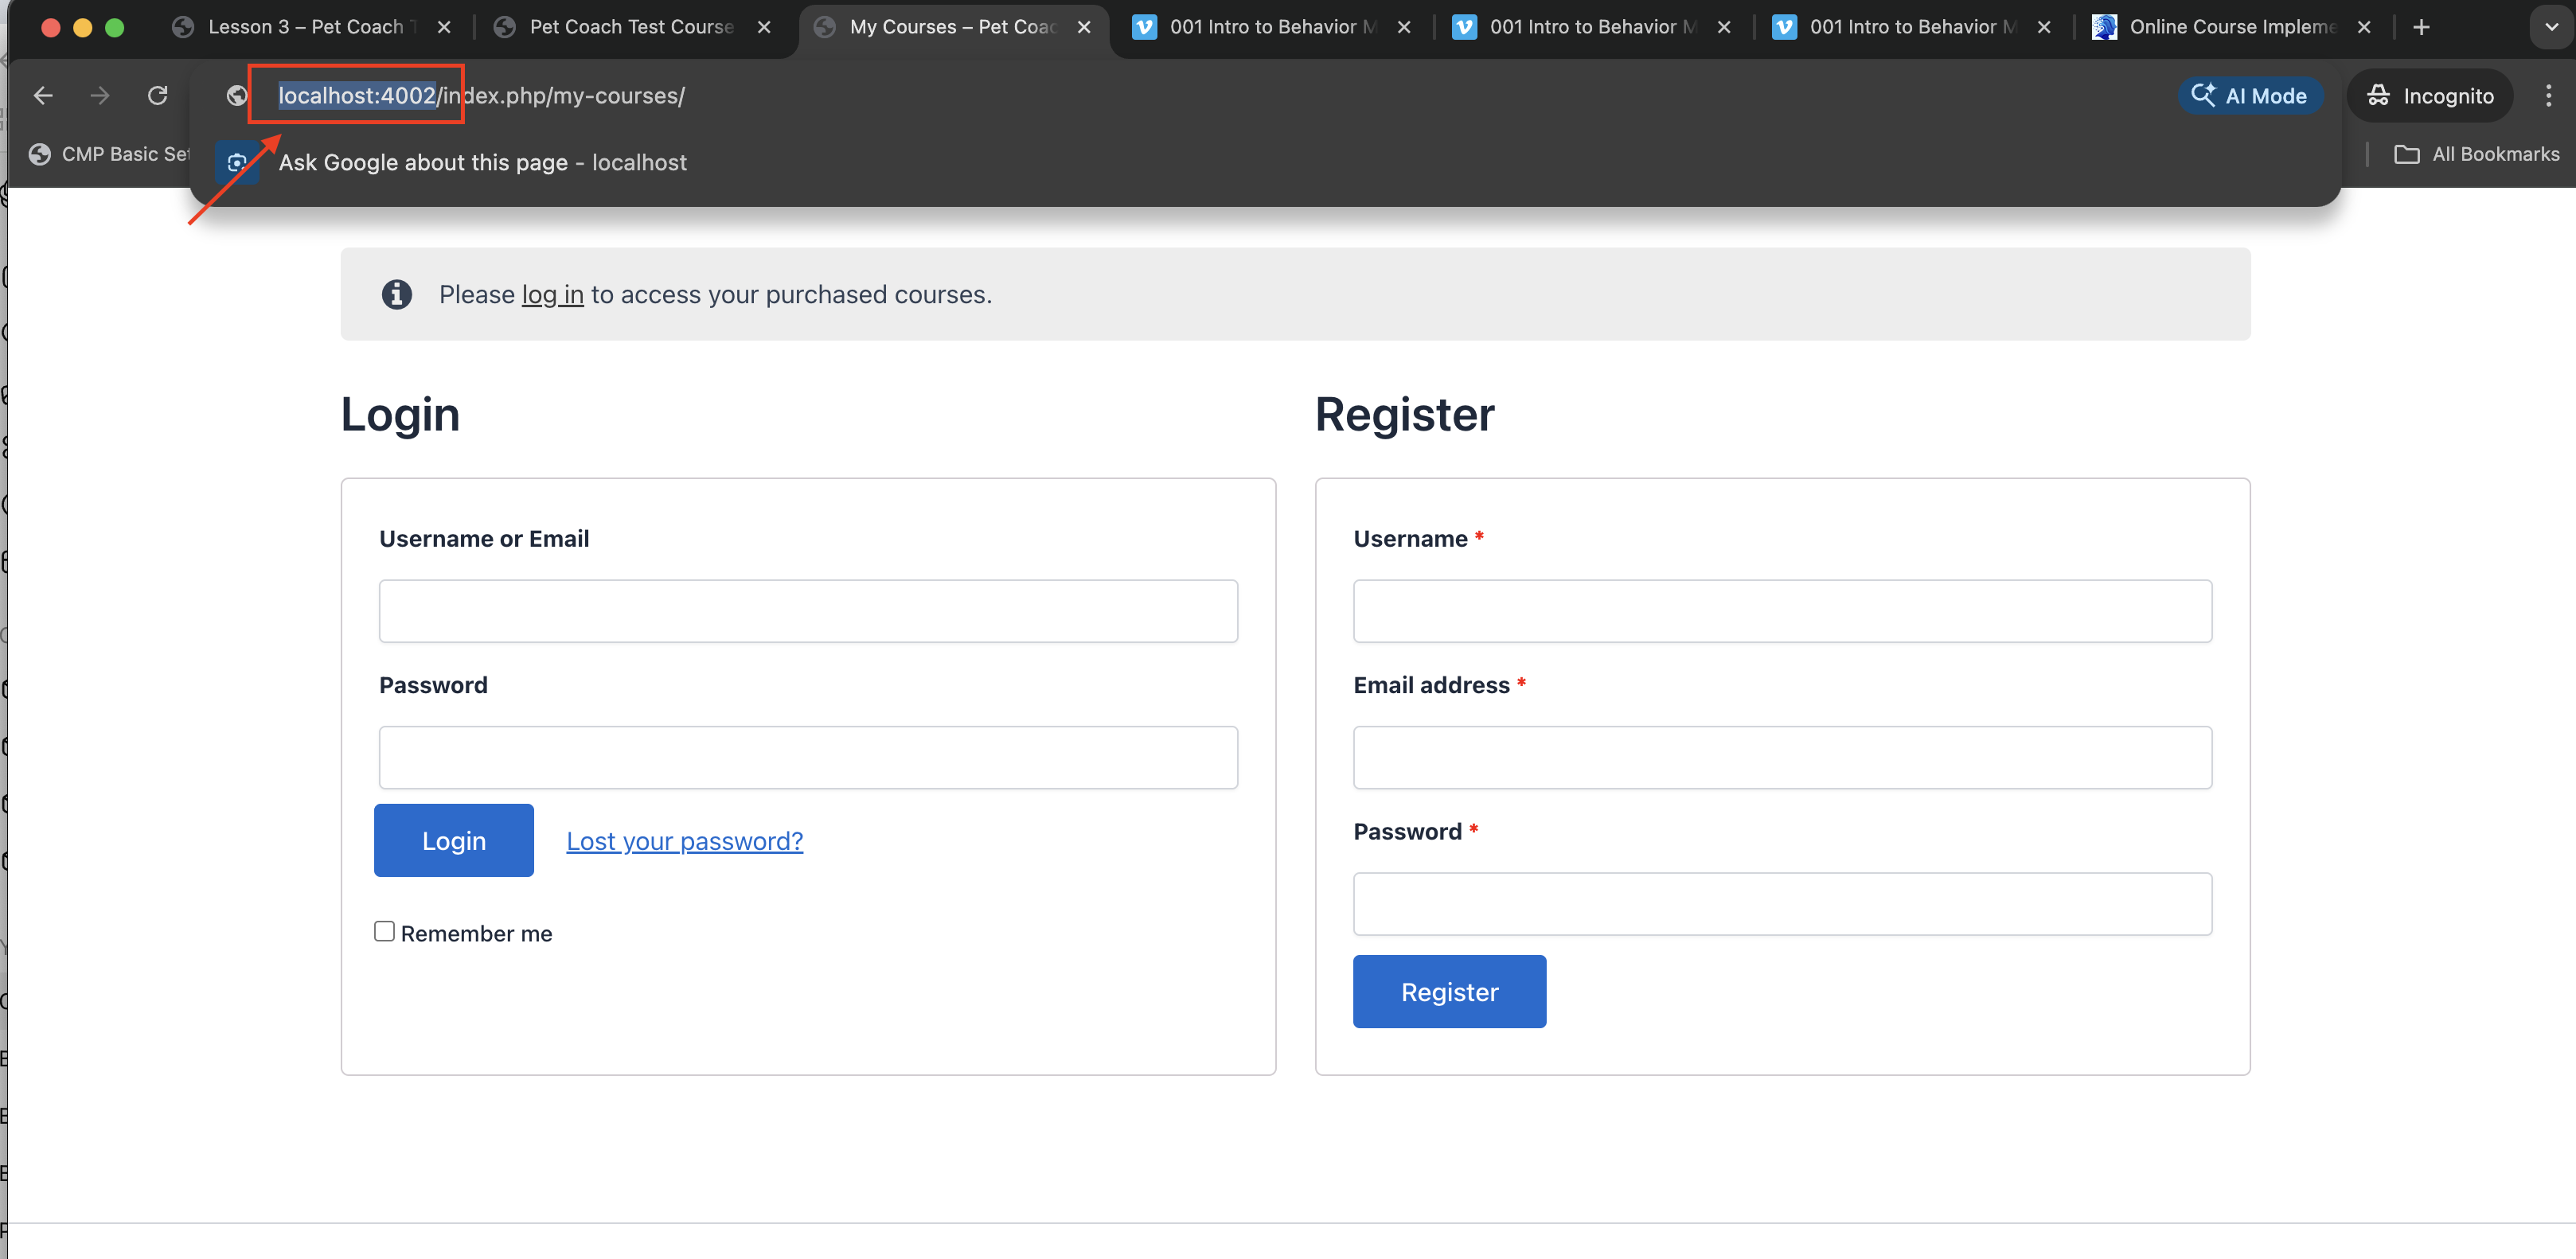
Step 4: PHP Configuration
Check PHP config:
php --ini
Increase limits for uploads and execution:
upload_max_filesize = 64M
post_max_size = 64M
max_execution_time = 300
Restart Apache after changes:
sudo apachectl restart
Install Your Online Course Stack
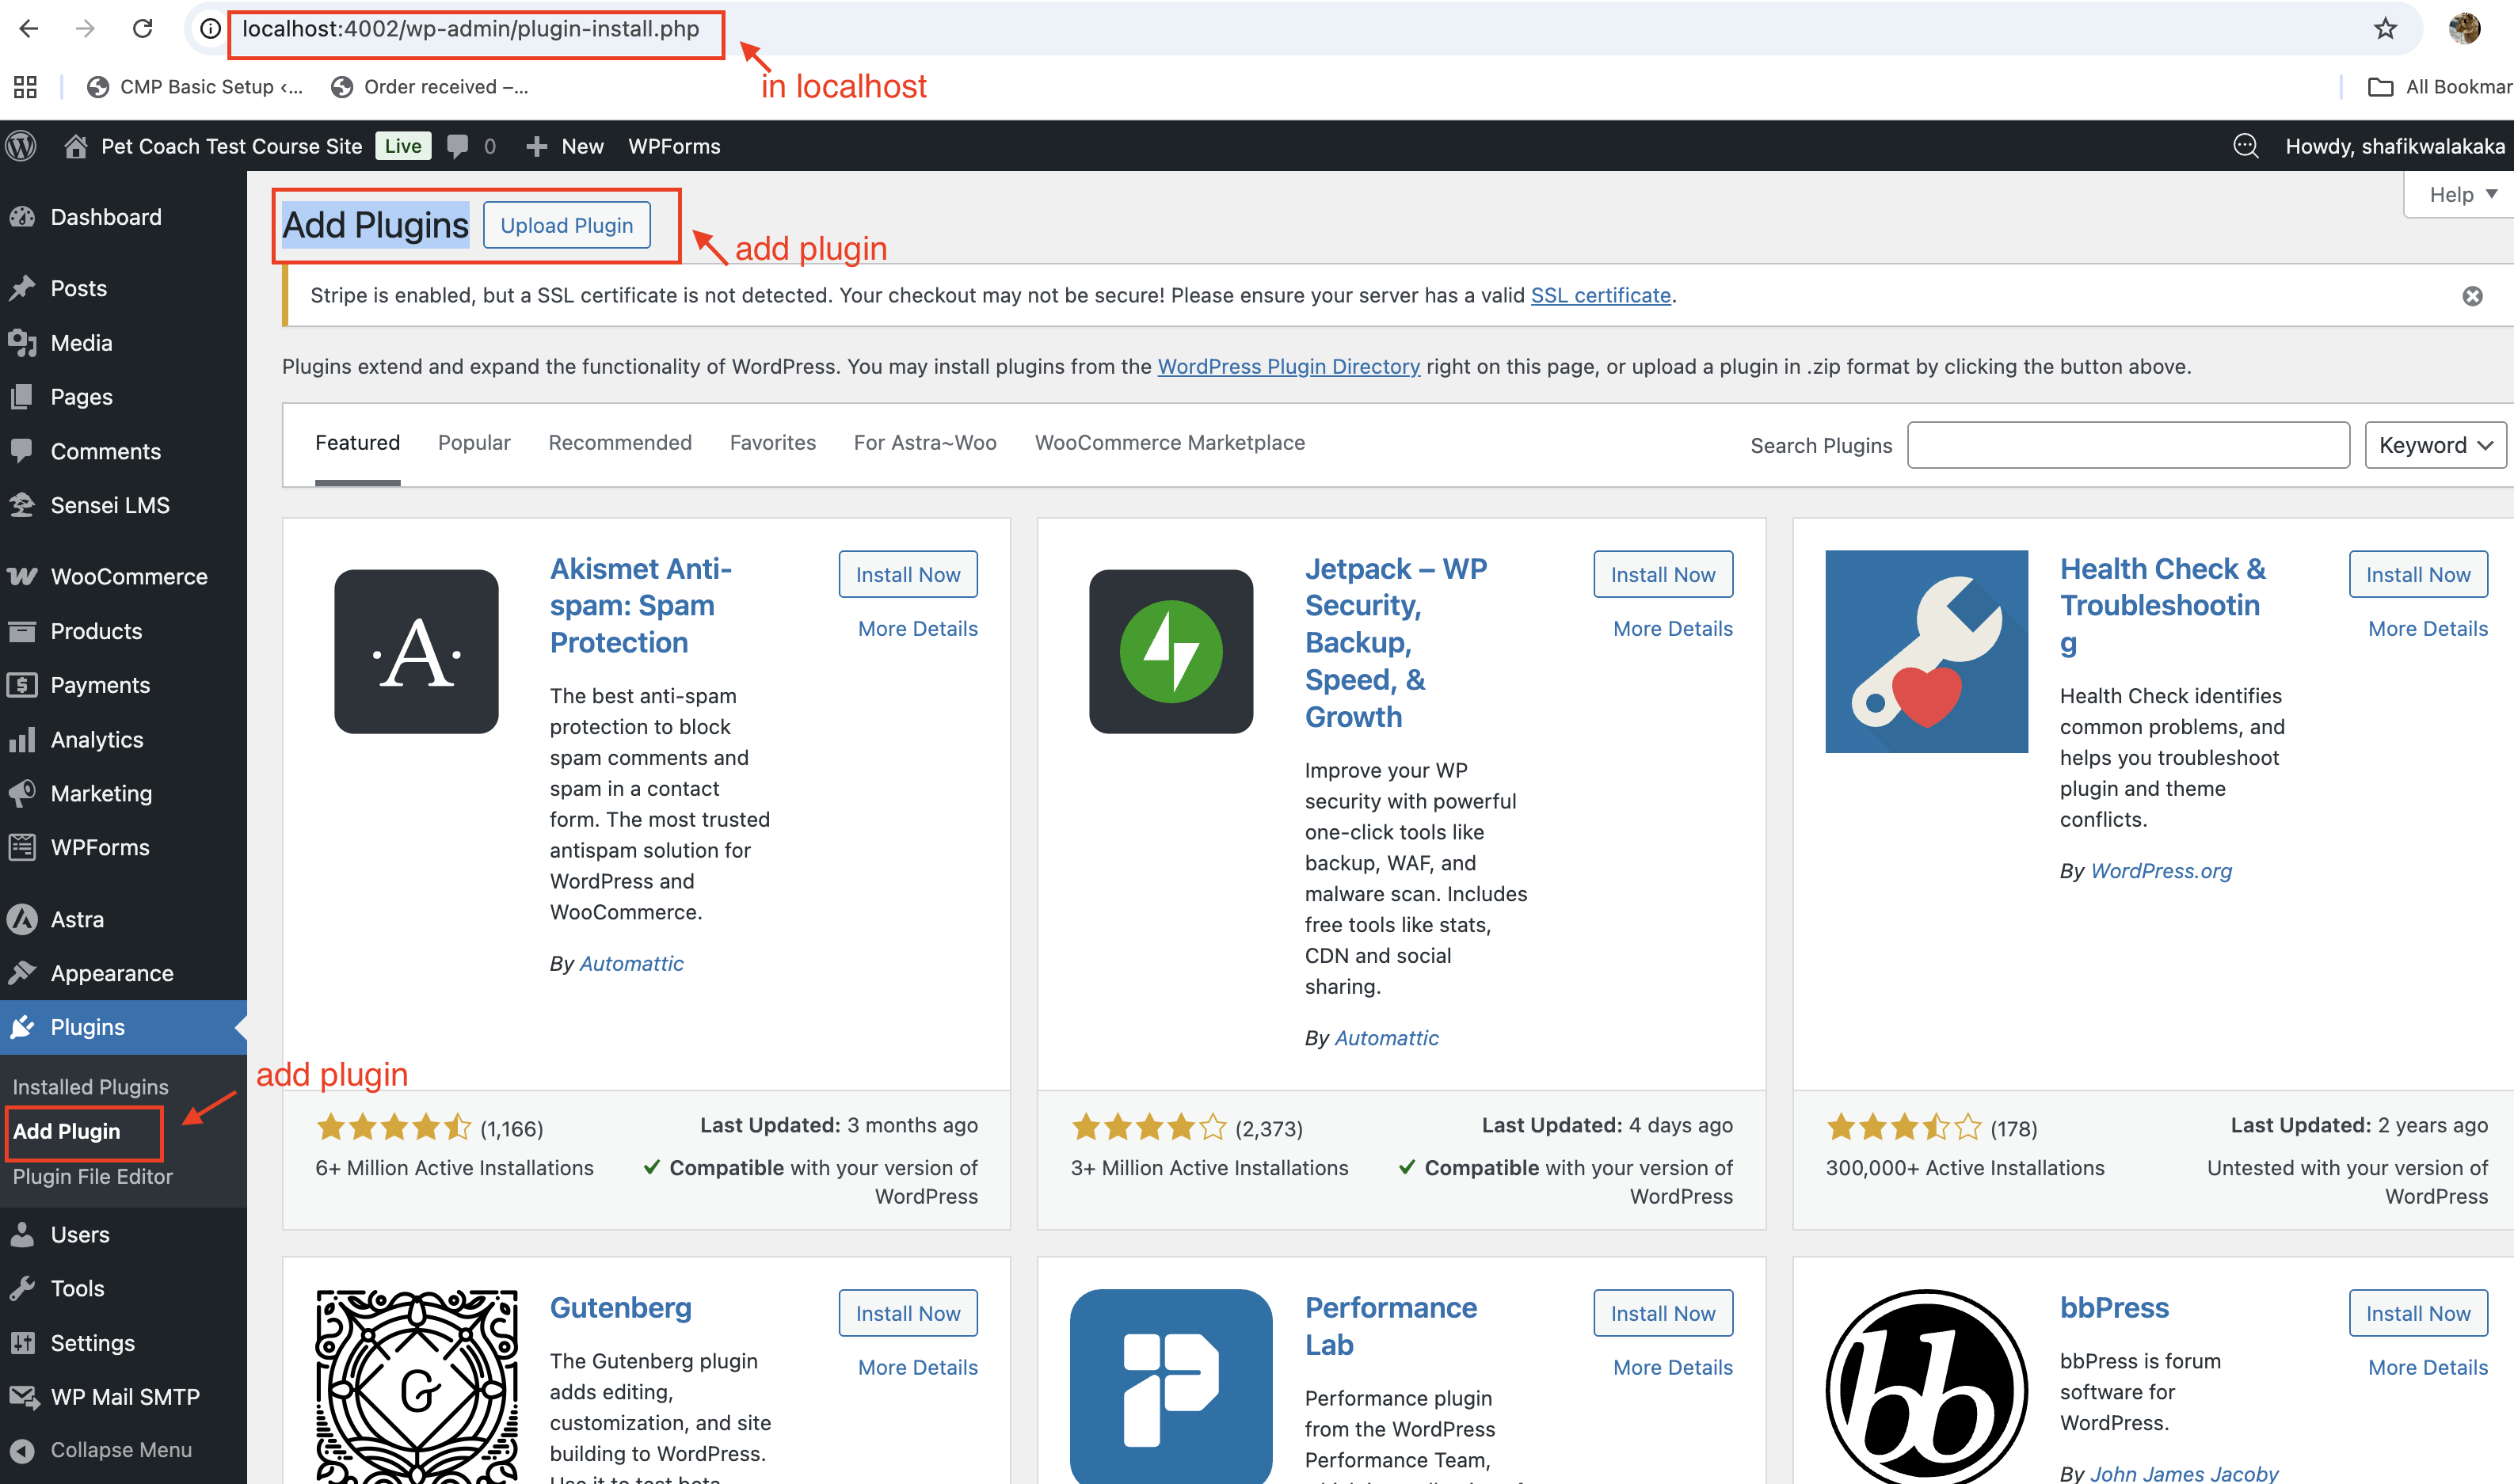
Step 1: Theme & Plugins
- Theme: Astra
- WooCommerce: Core + Stripe Gateway
- LMS: Sensei LMS Pro
Install via WordPress admin: Plugins → Add New → Search & Install
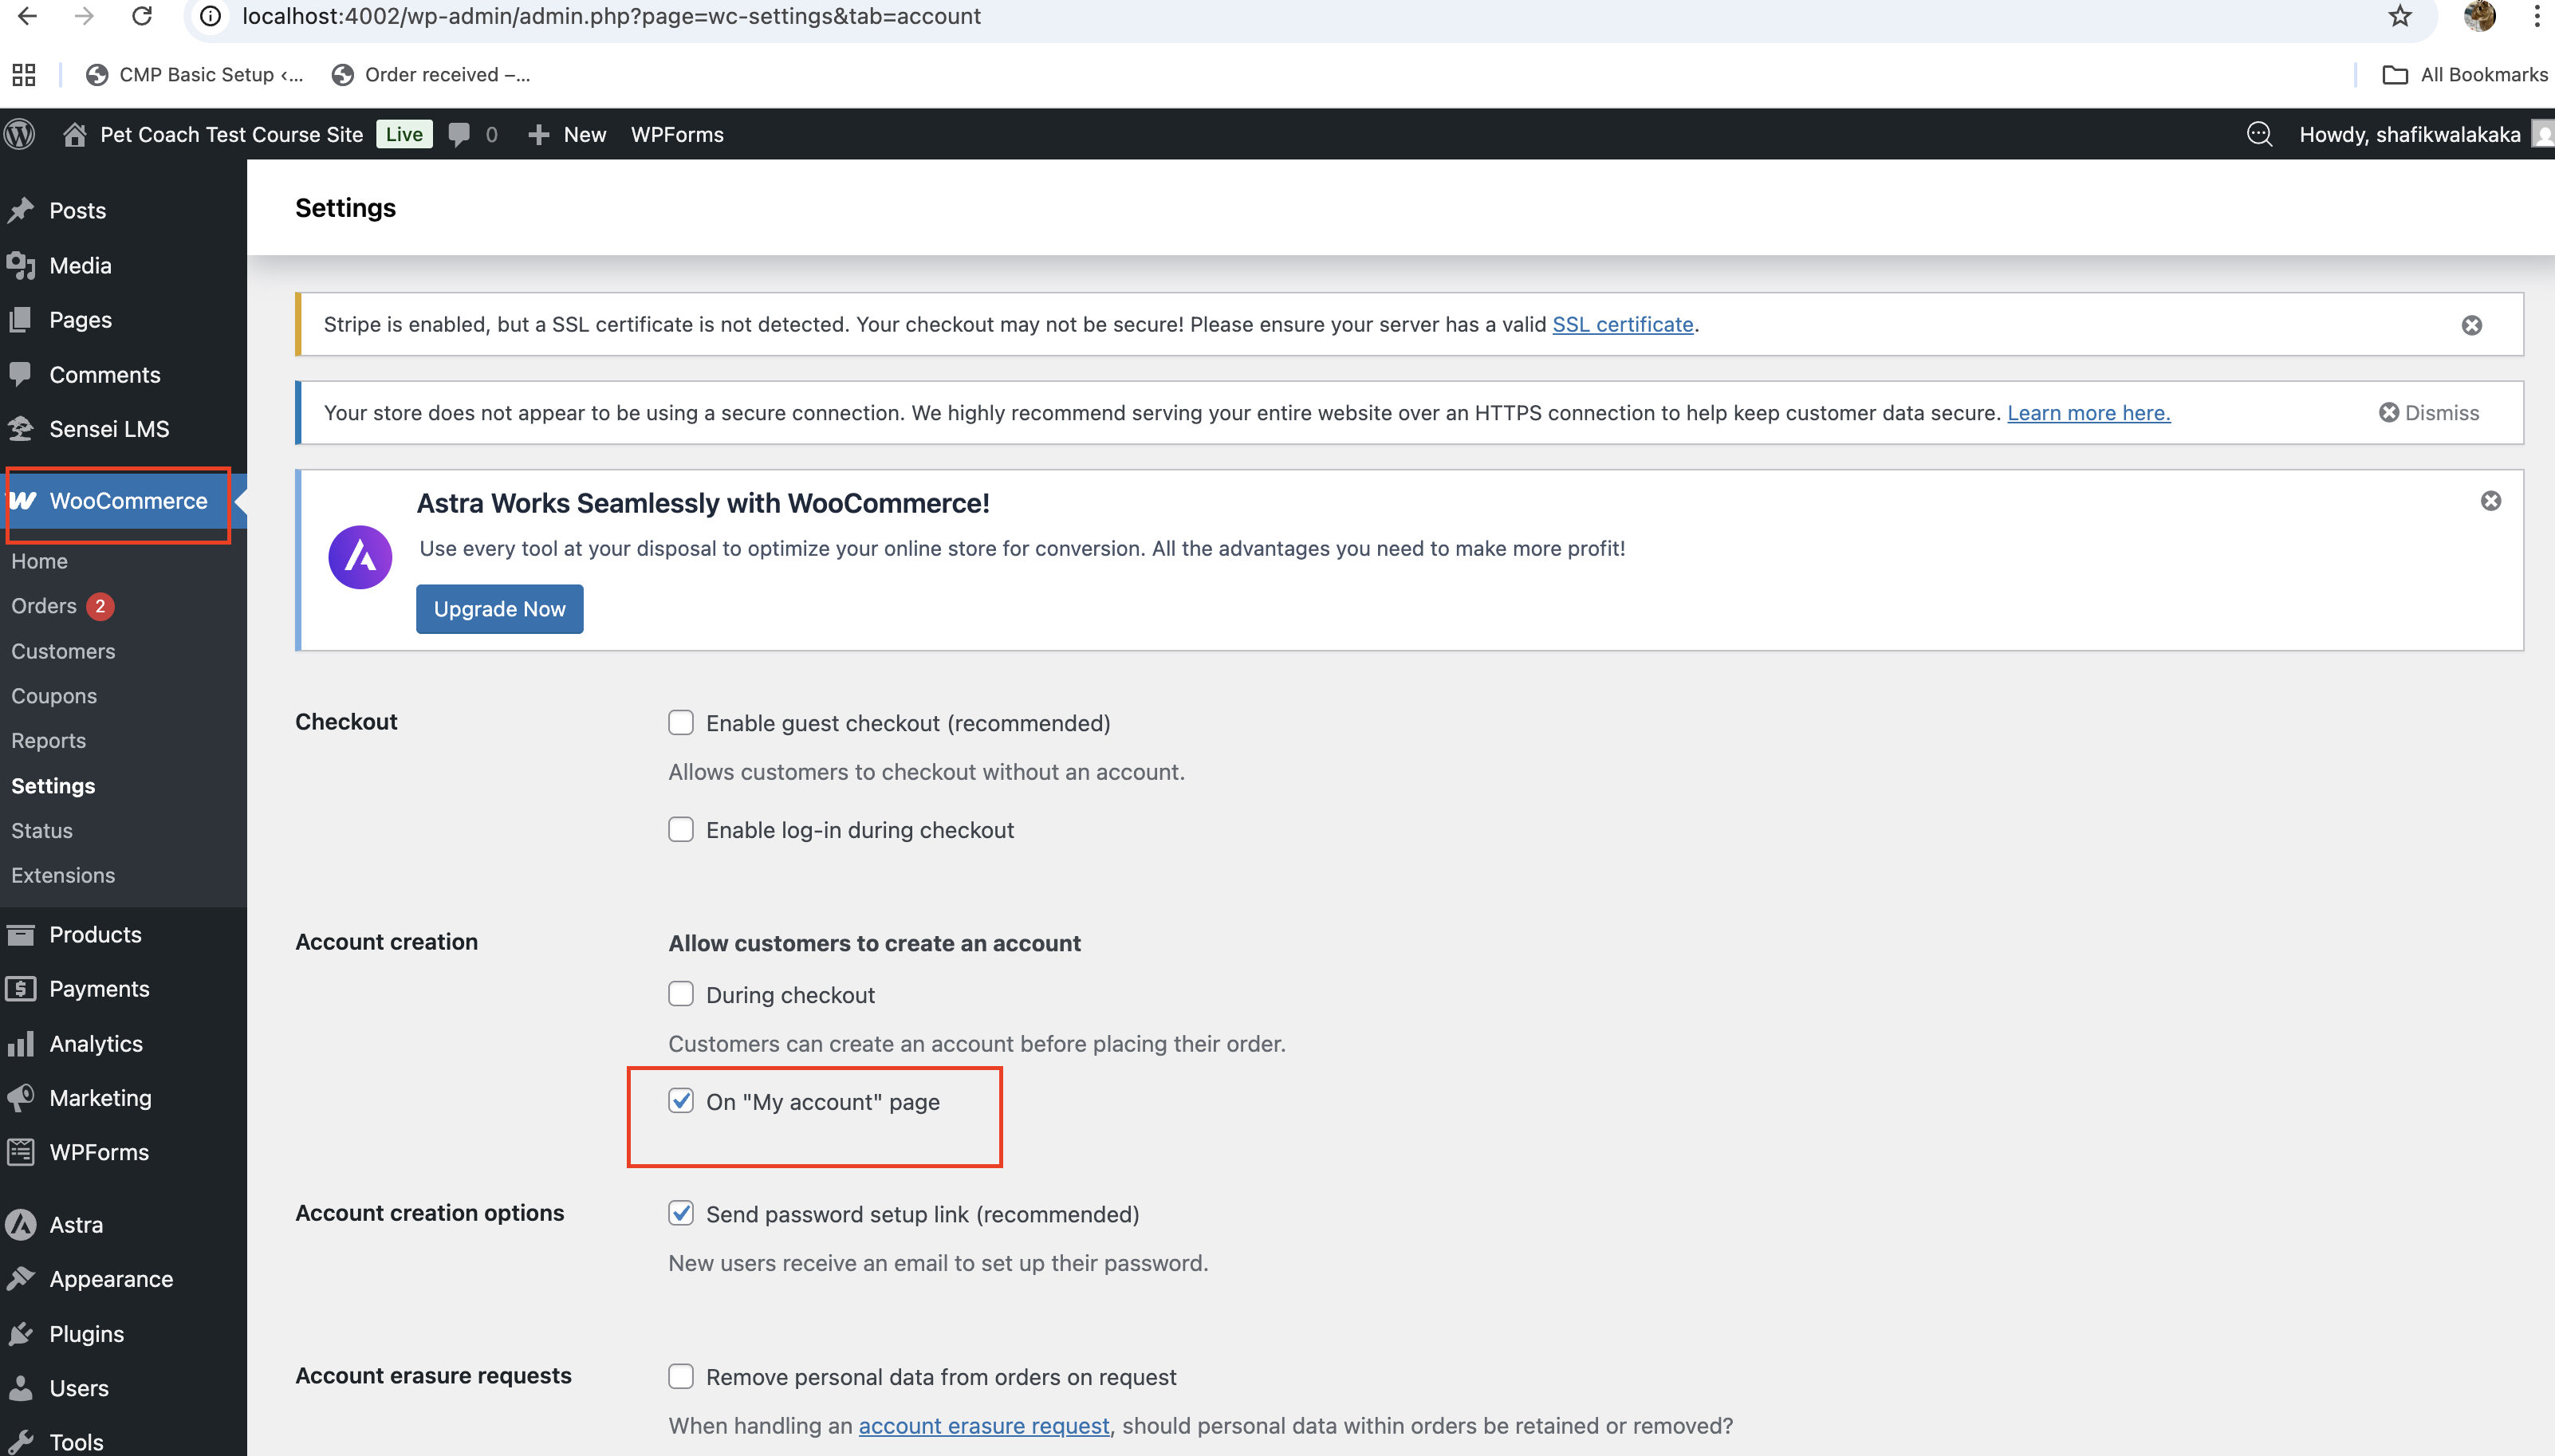
Step 2: Configure WooCommerce + Stripe
- WooCommerce → Settings → Currency, Tax, Shipping
- Payments → Stripe → Test API keys
- Enable Test Mode for local development
Screenshot for configuration in woocommerce 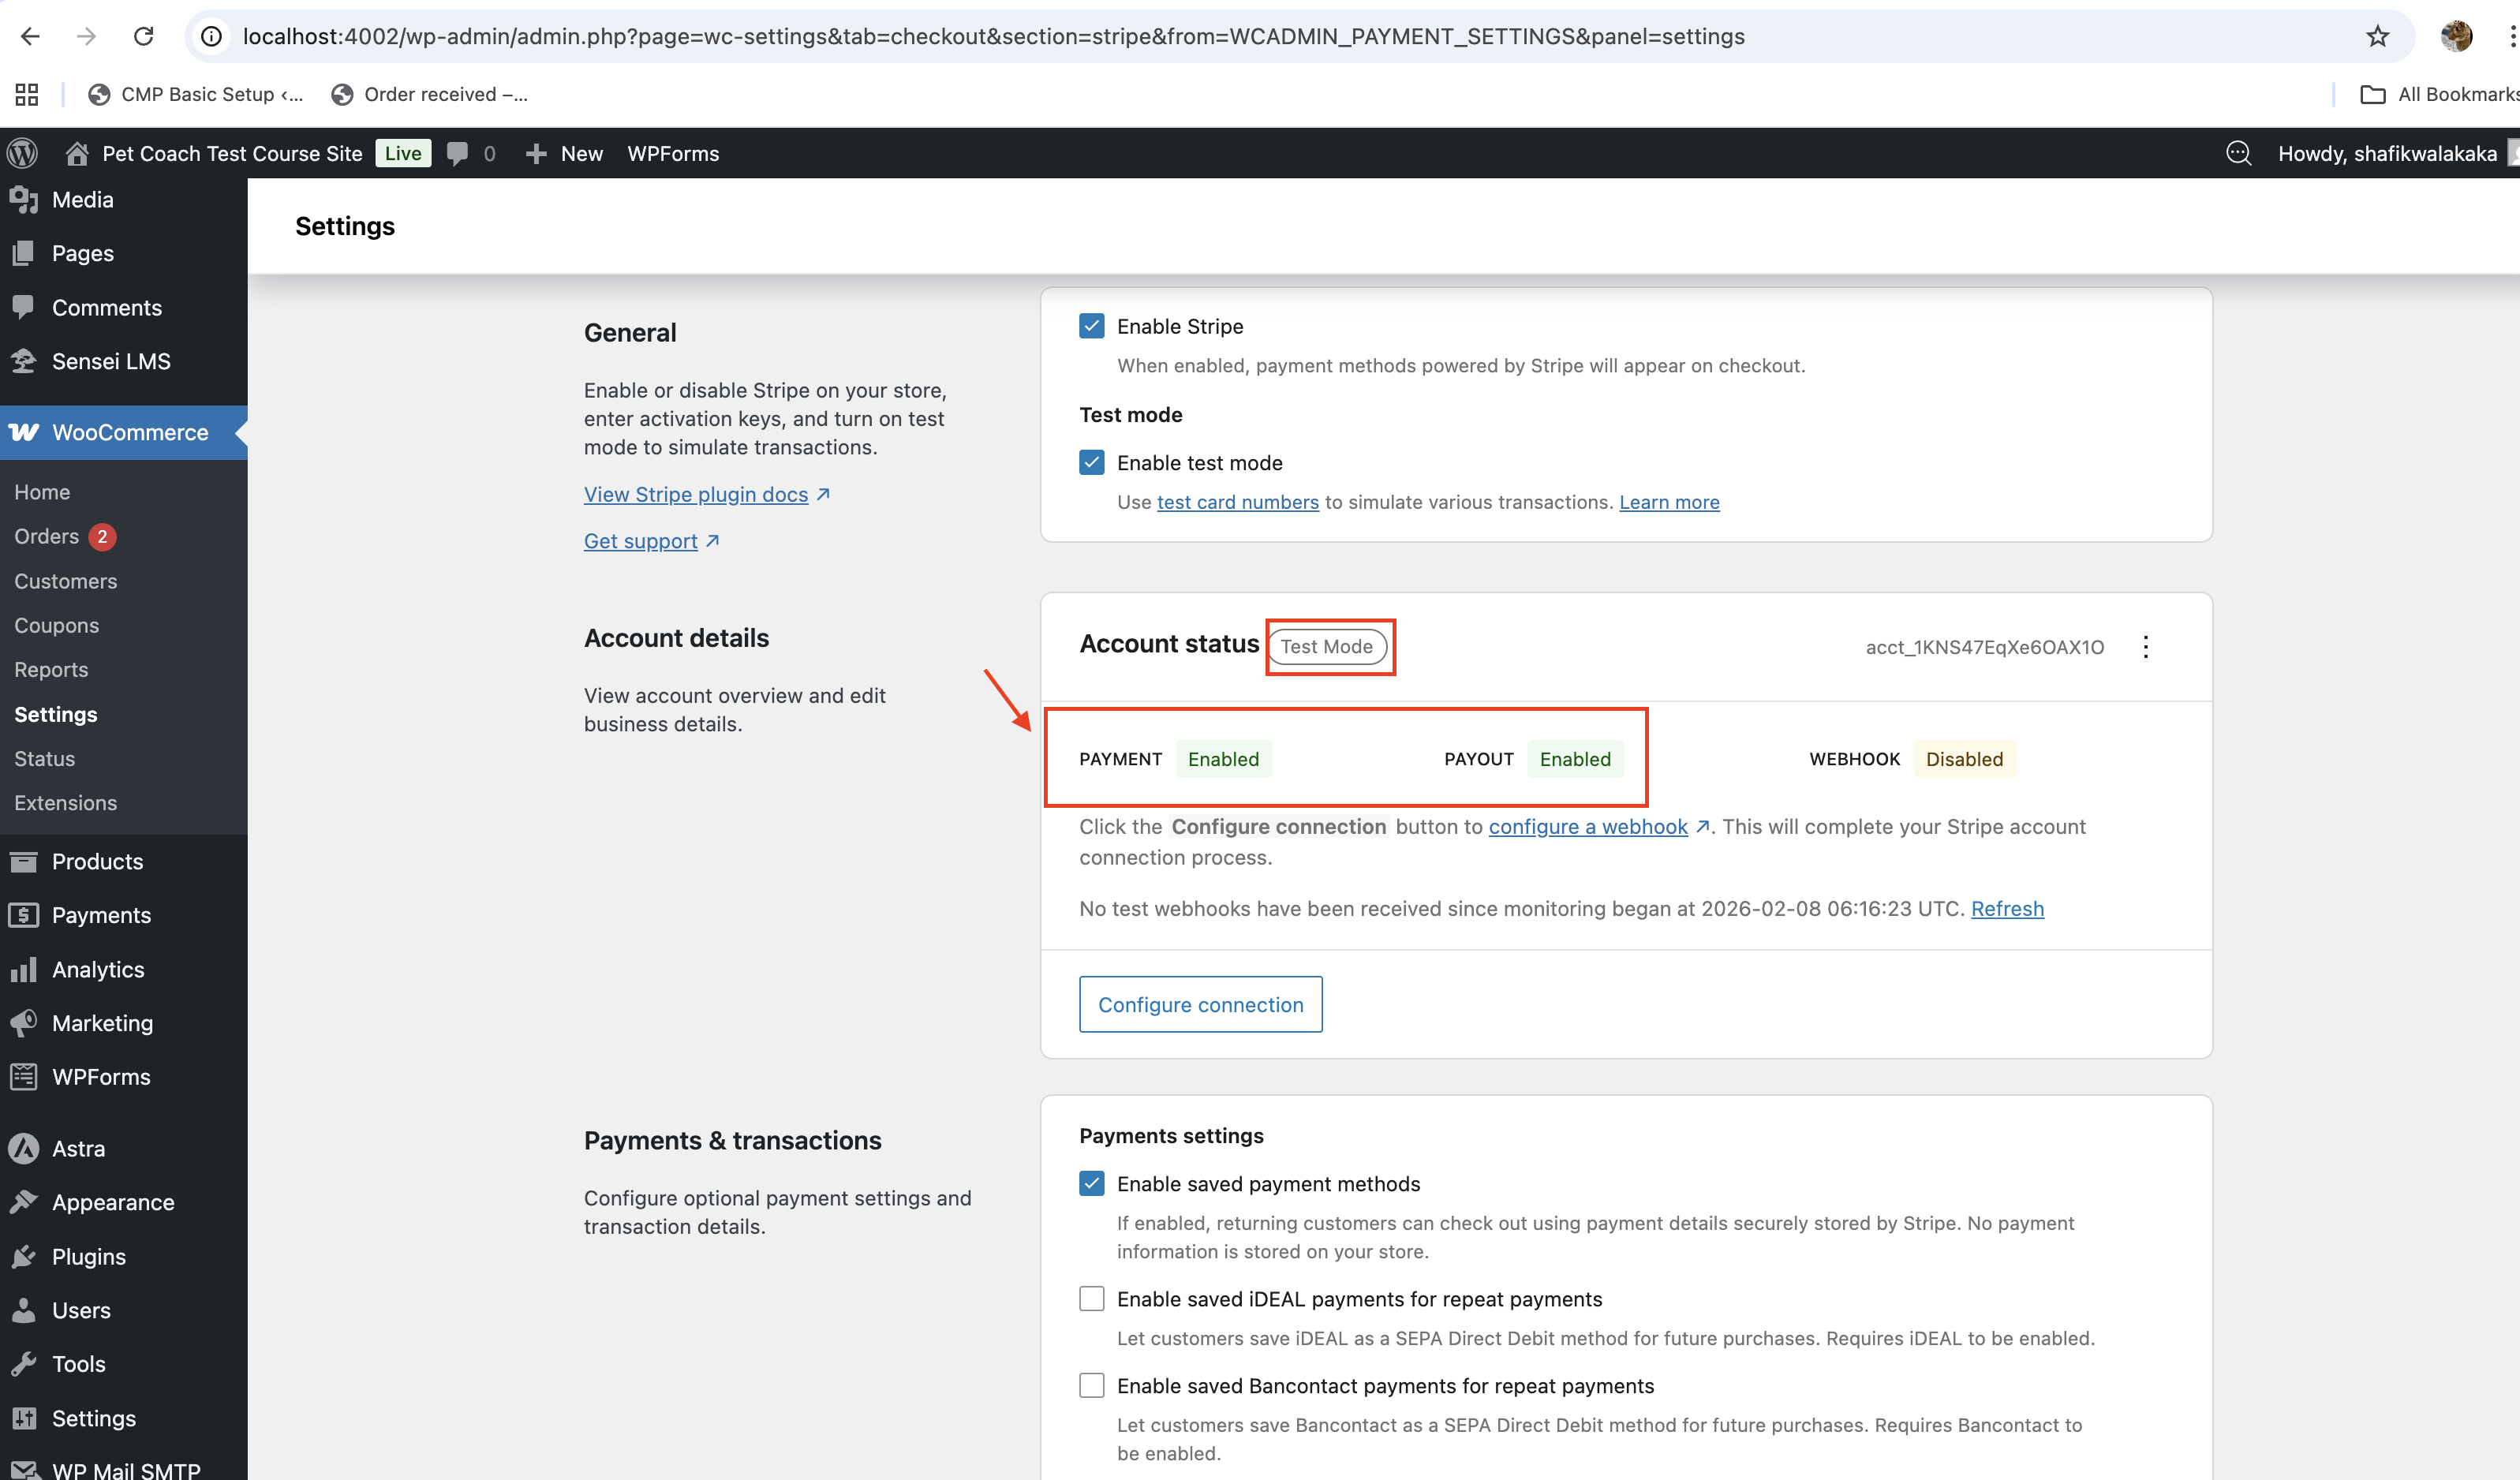
Configuring LMS Sensei
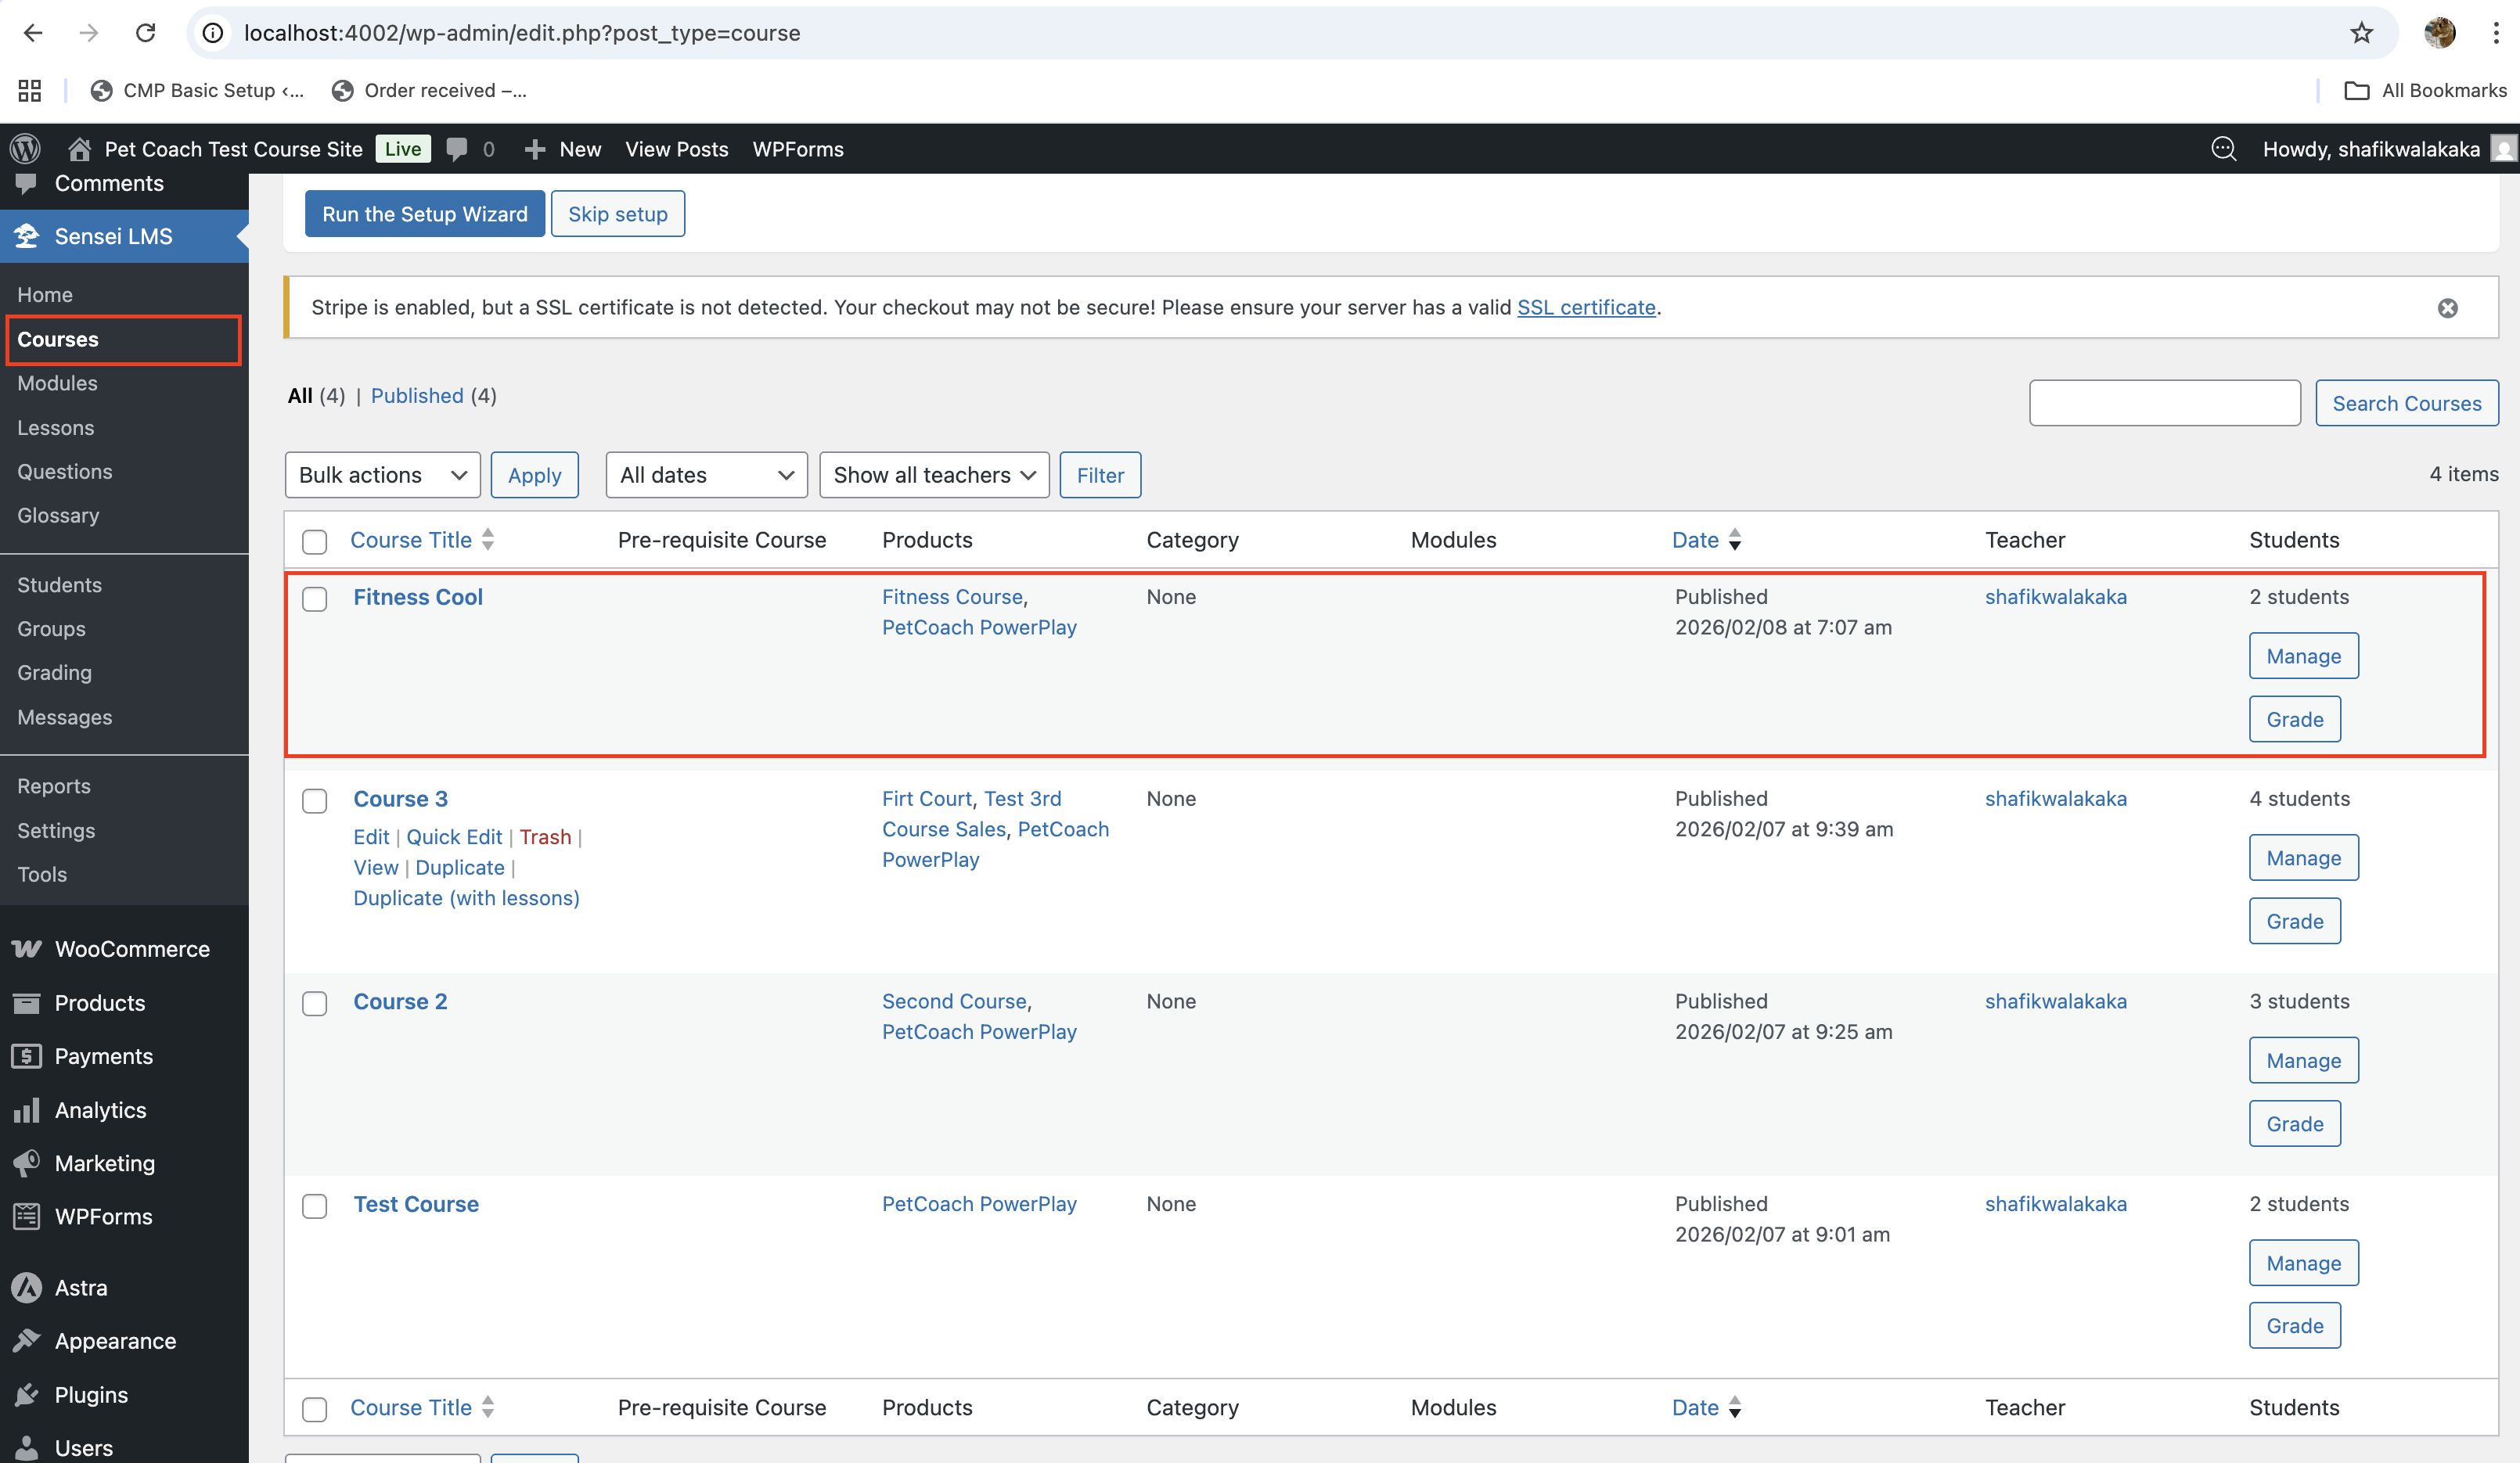
Step 1: Create Courses
-
WordPress → Sensei LMS → Add New Course
-
Link the course to a WooCommerce product
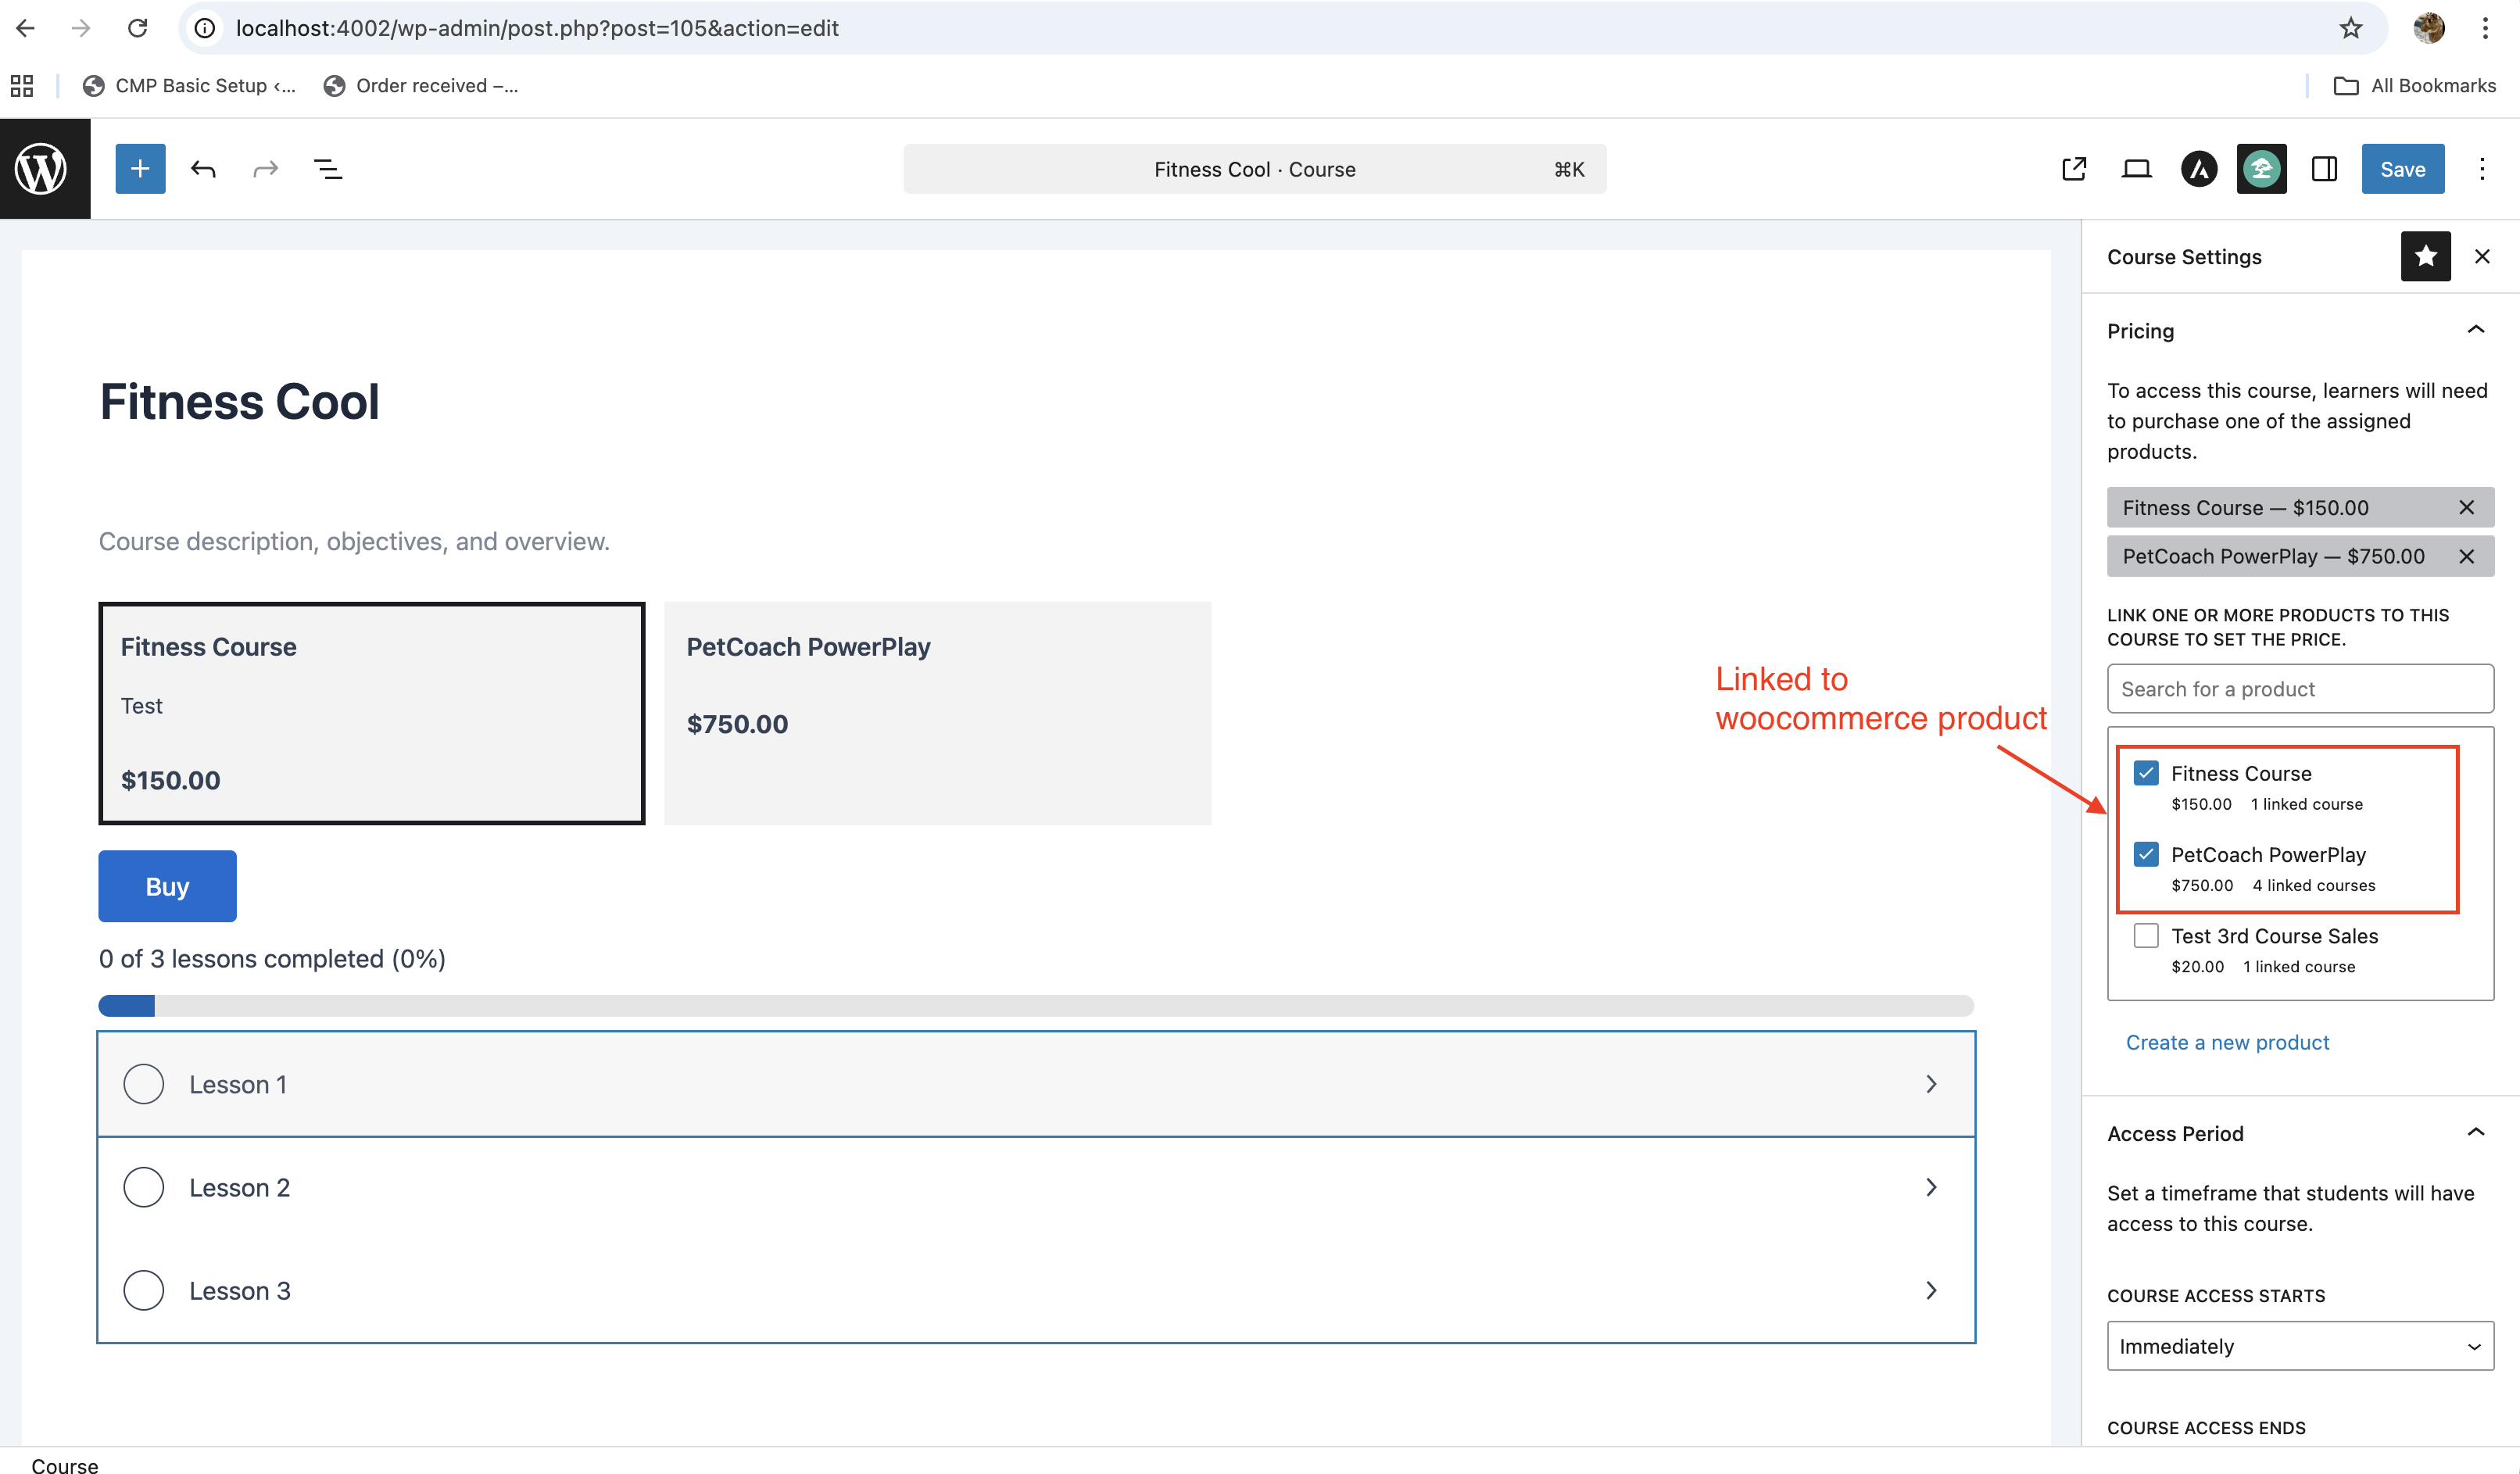
The woocommerce product have have a price and be of type virtual and downloadable product. See LMS sensei documentation for more details here! 
Step 2: Video Hosting Options
- YouTube: Easy, public access
- Vimeo: Domain-based access control (better for paid courses)
Configure Emails (SMTP)
Gmail SMTP Setup
- Install WP Mail SMTP
- Choose Gmail Mailer
- Create Google OAuth credentials for localhost
- Add redirect URI: https://connect.wpmailsmtp.com/google/
- Authorize Gmail account
- Send test email
SMTP Host: smtp.gmail.com
Port: 587
Encryption: TLS
Username: [email protected]
Password: <App Password>
Reference screenshot of my setup: 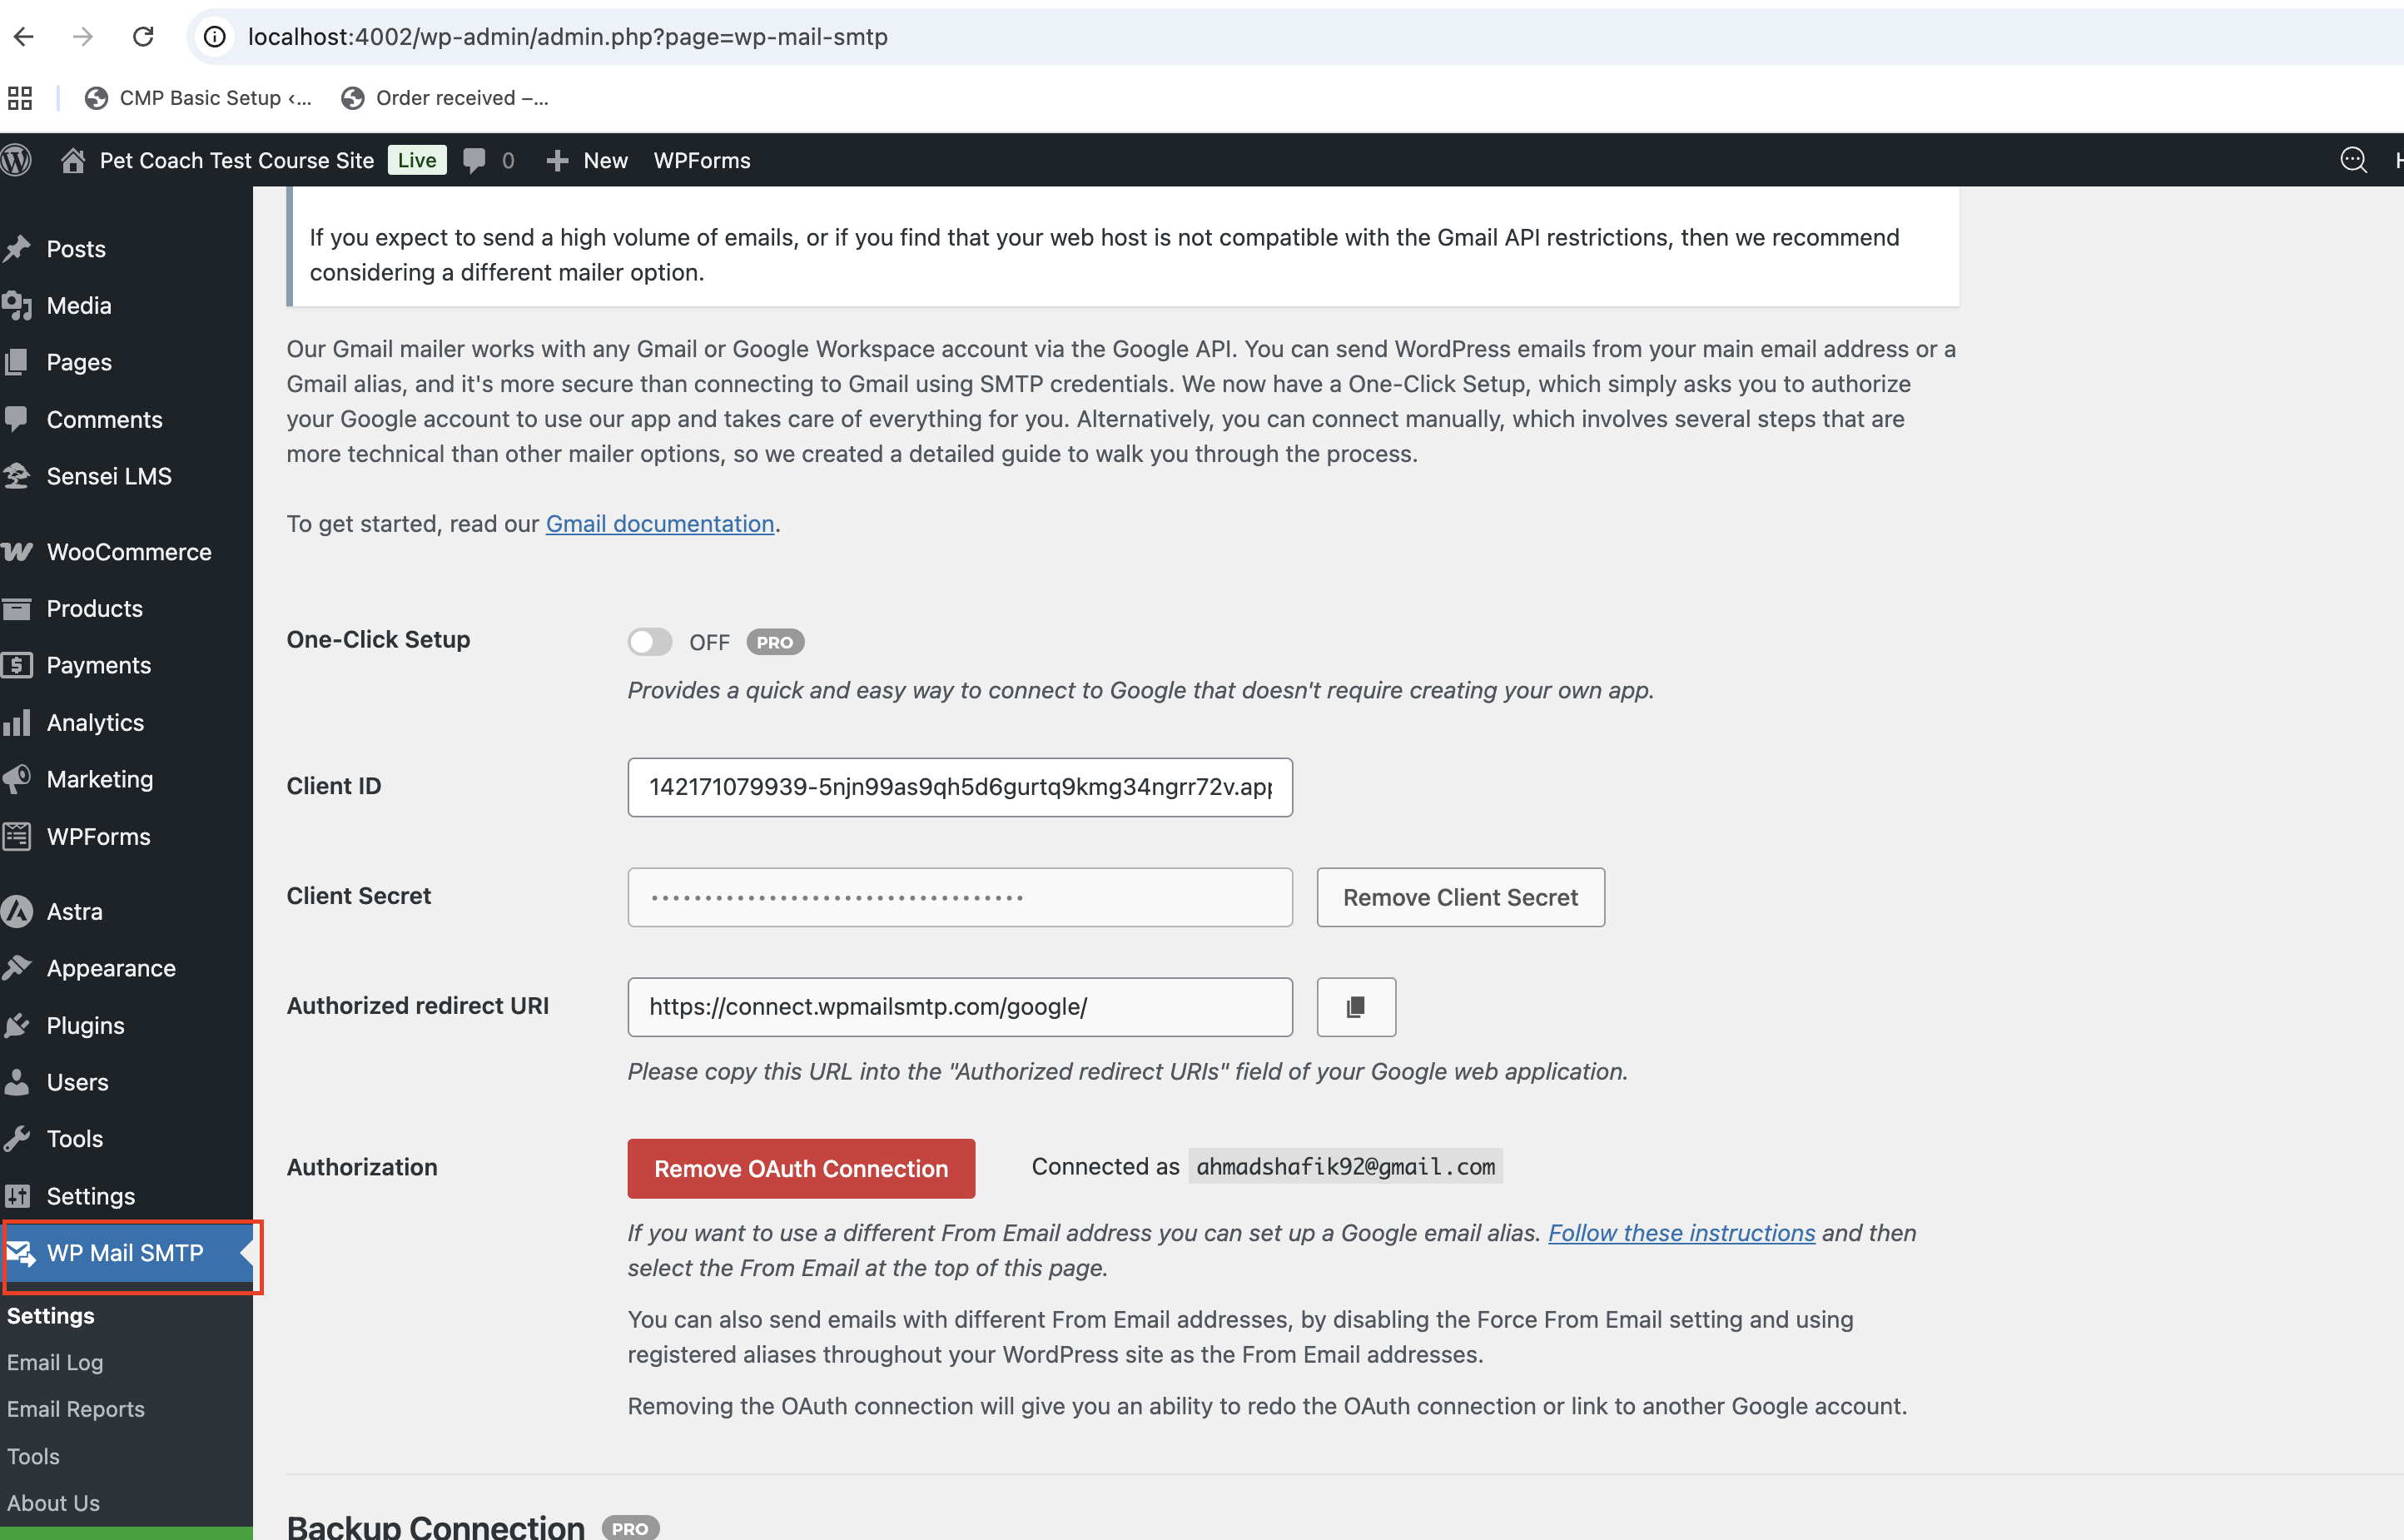
And ofcourse, don’t forget to test tht it sends successfully!! 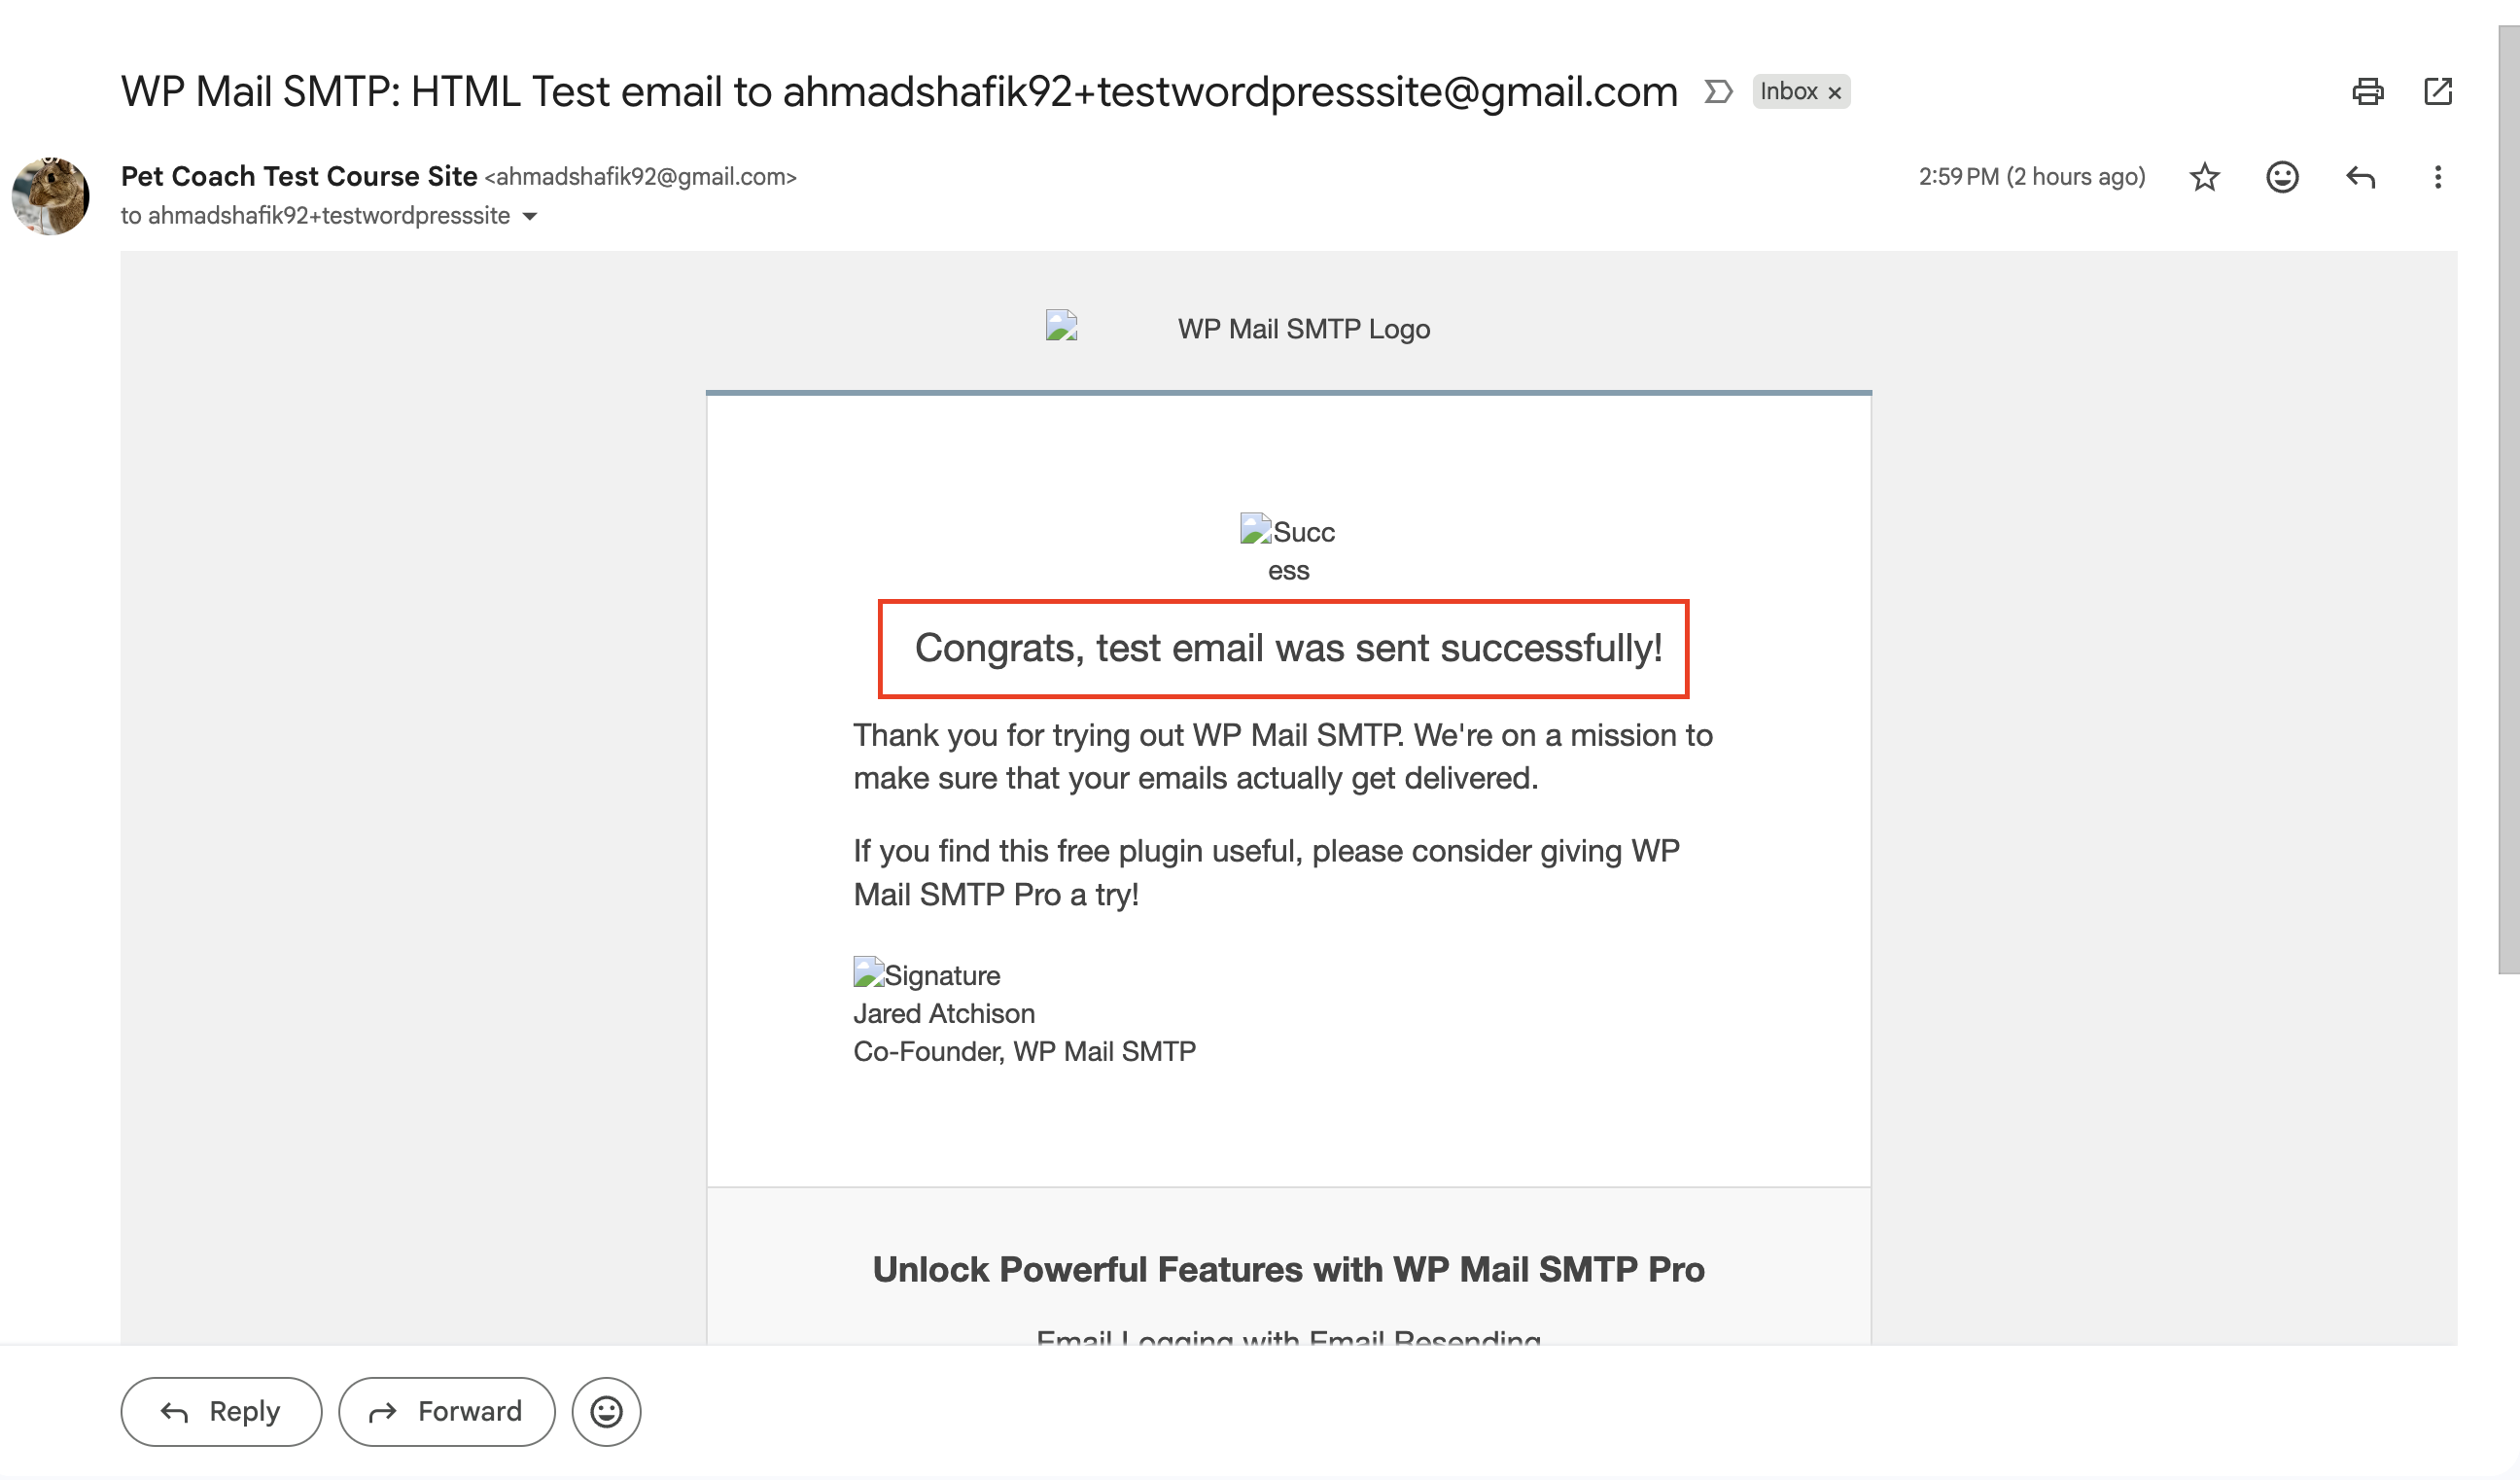
Normally if your hosting provider has an STMP service, then this is not required. I needed to do this because i was running my testing on local (and duhh, no SMTP service installed in my local server)
User Configuration
Enable user registration:
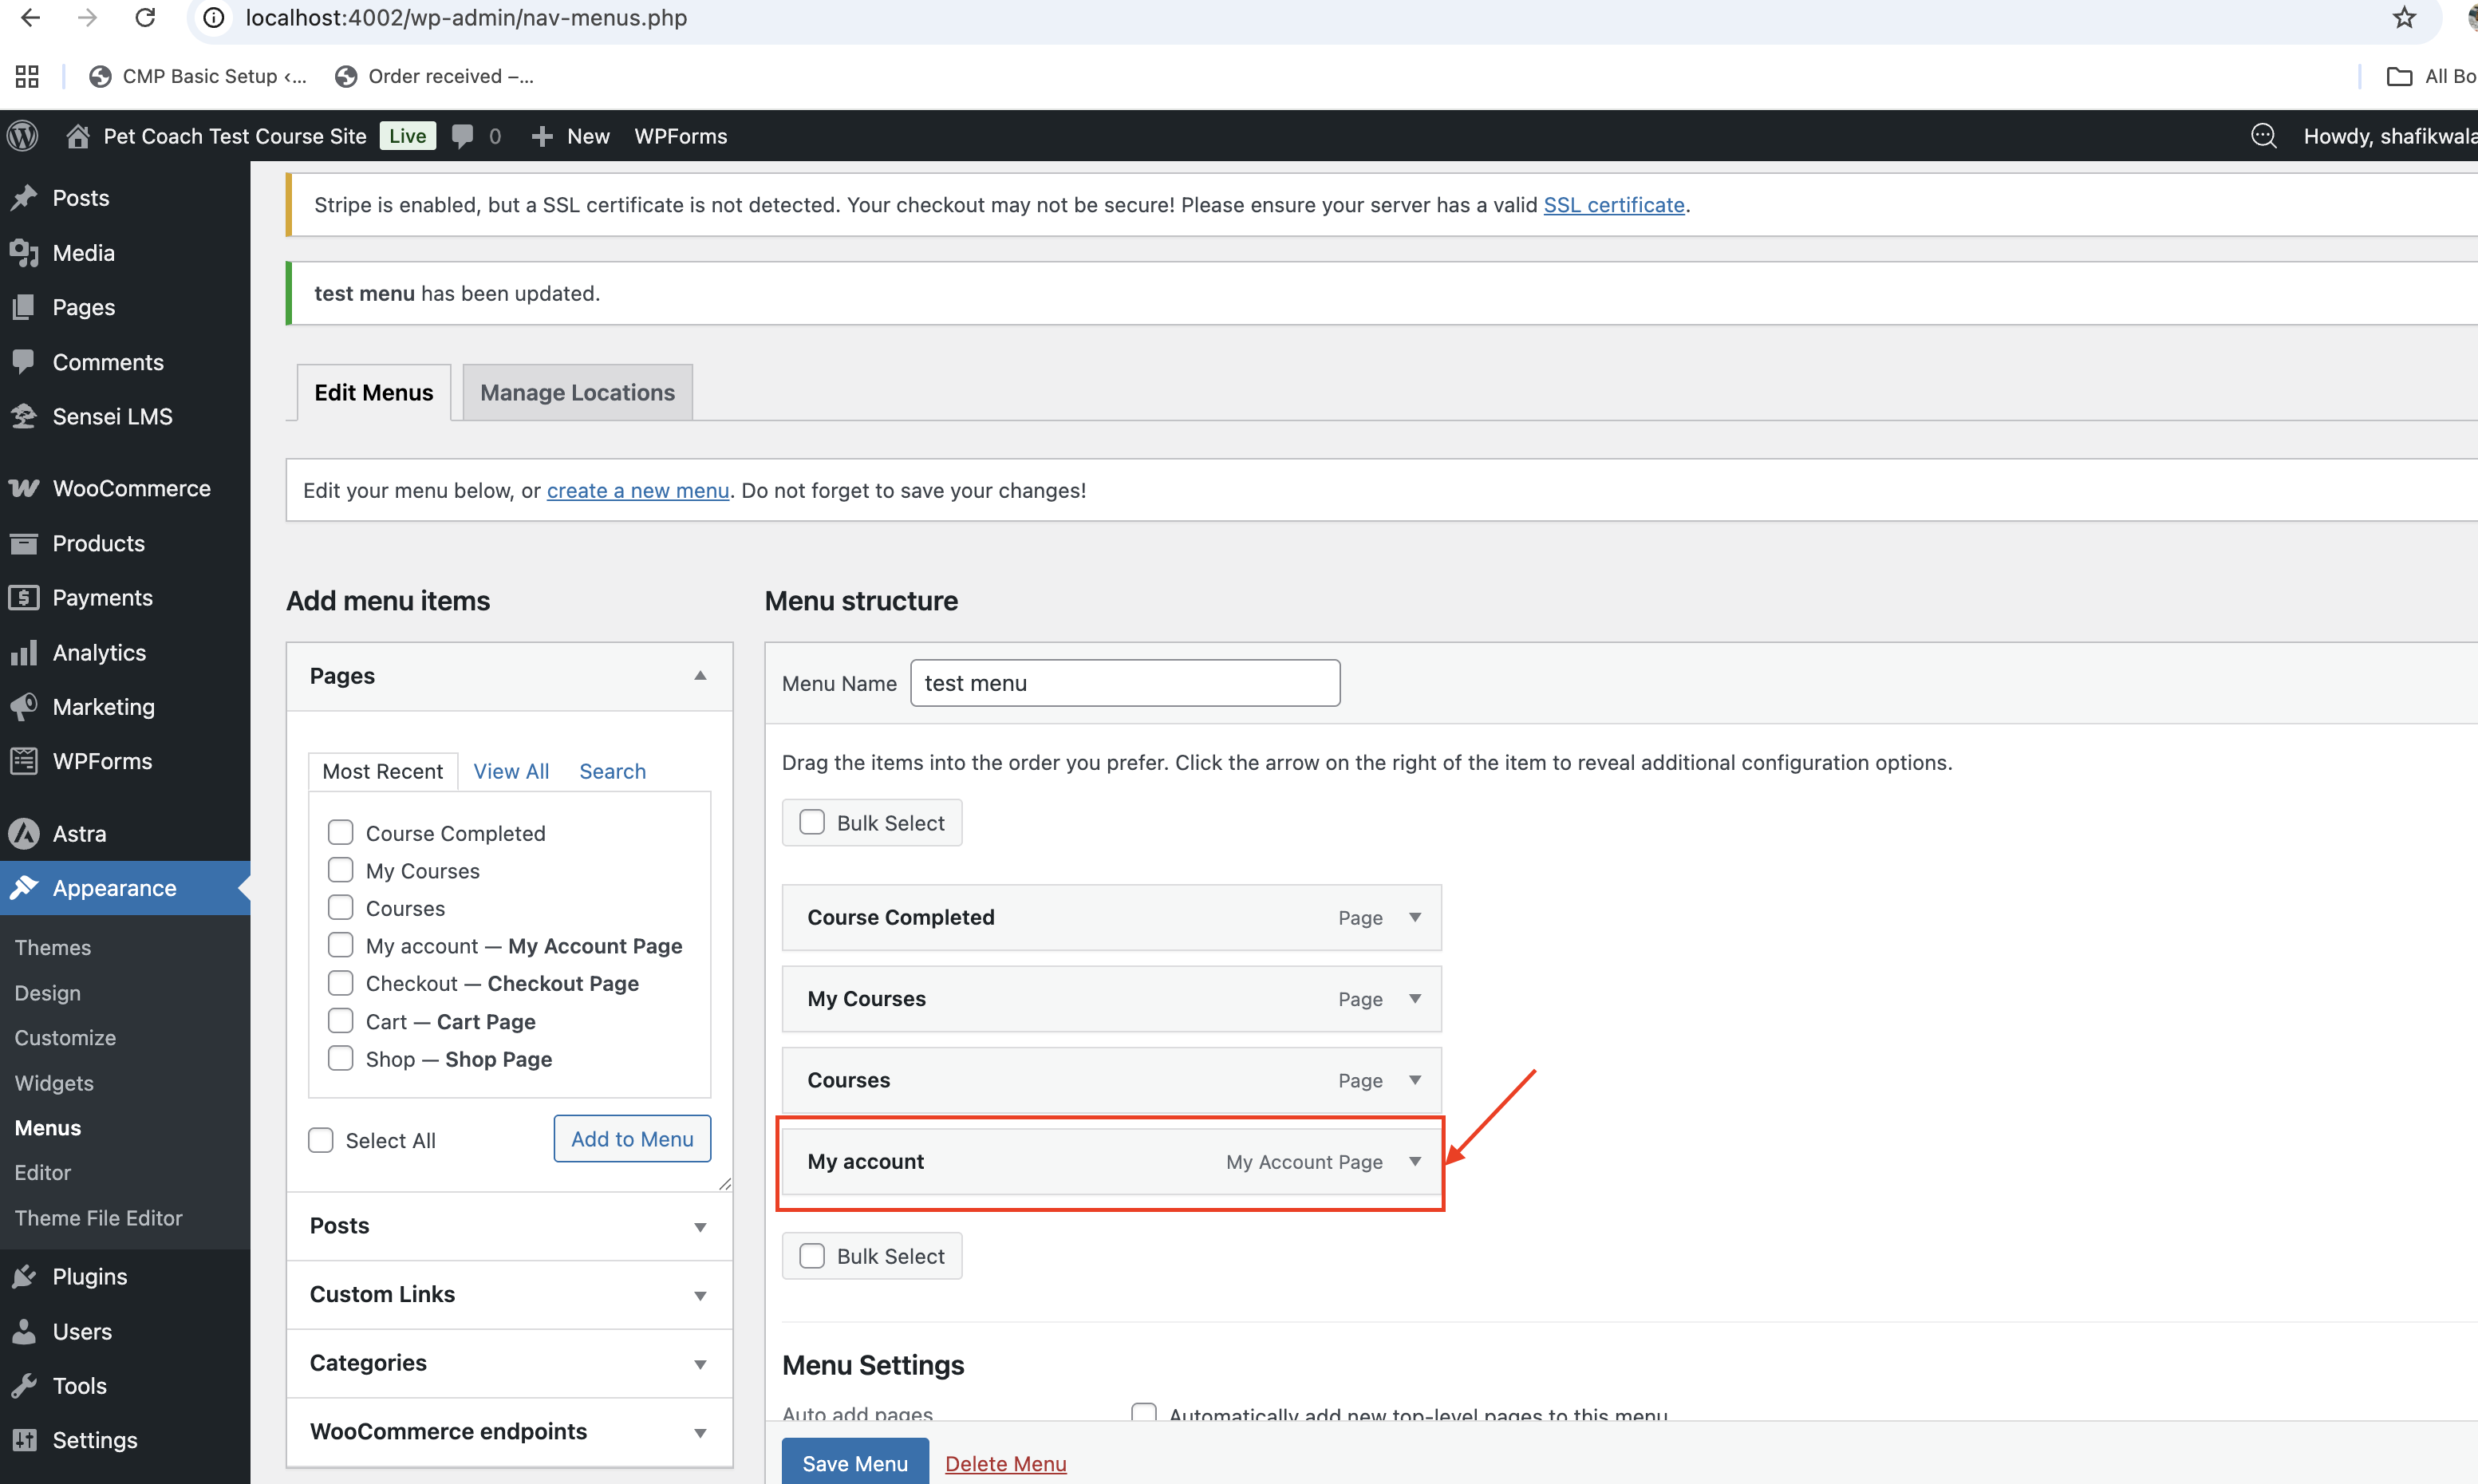
- Settings → General → Anyone can register
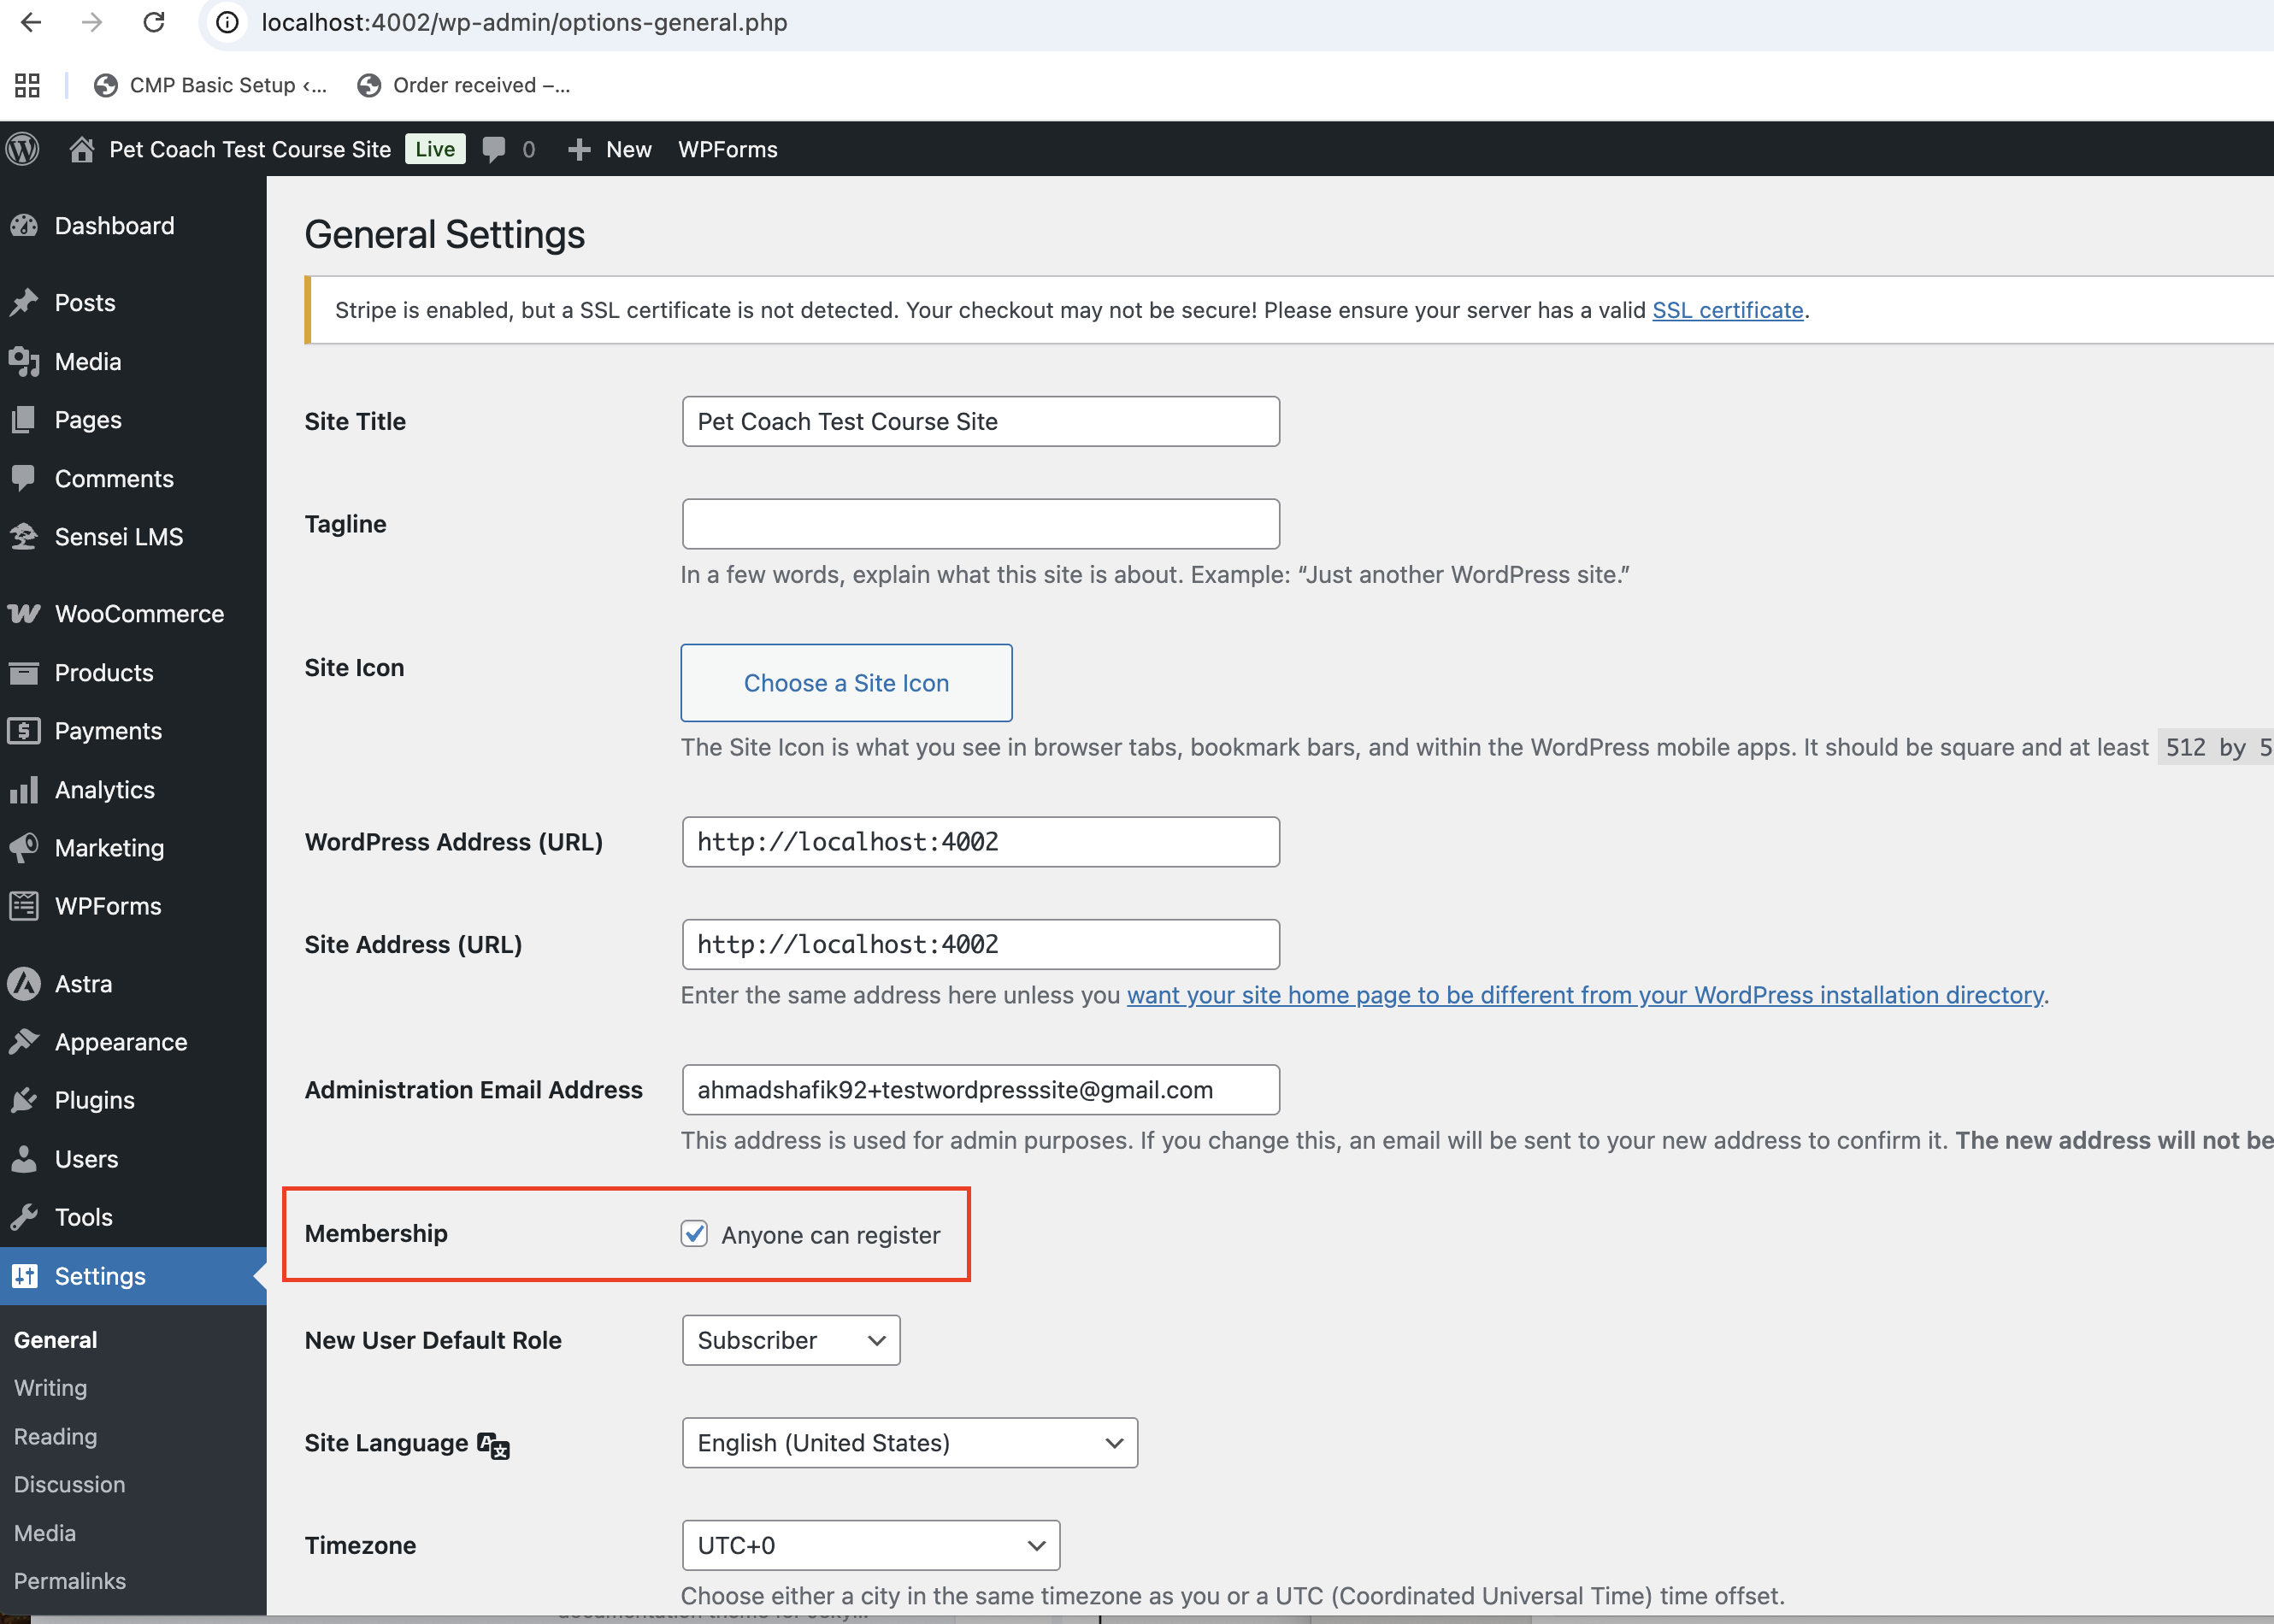
- Ensure WooCommerce accounts link to WordPress users
- Add Account Page to navigation menu (Astra → Customize → Menus)
User Registration Testing
- User registers or logs in
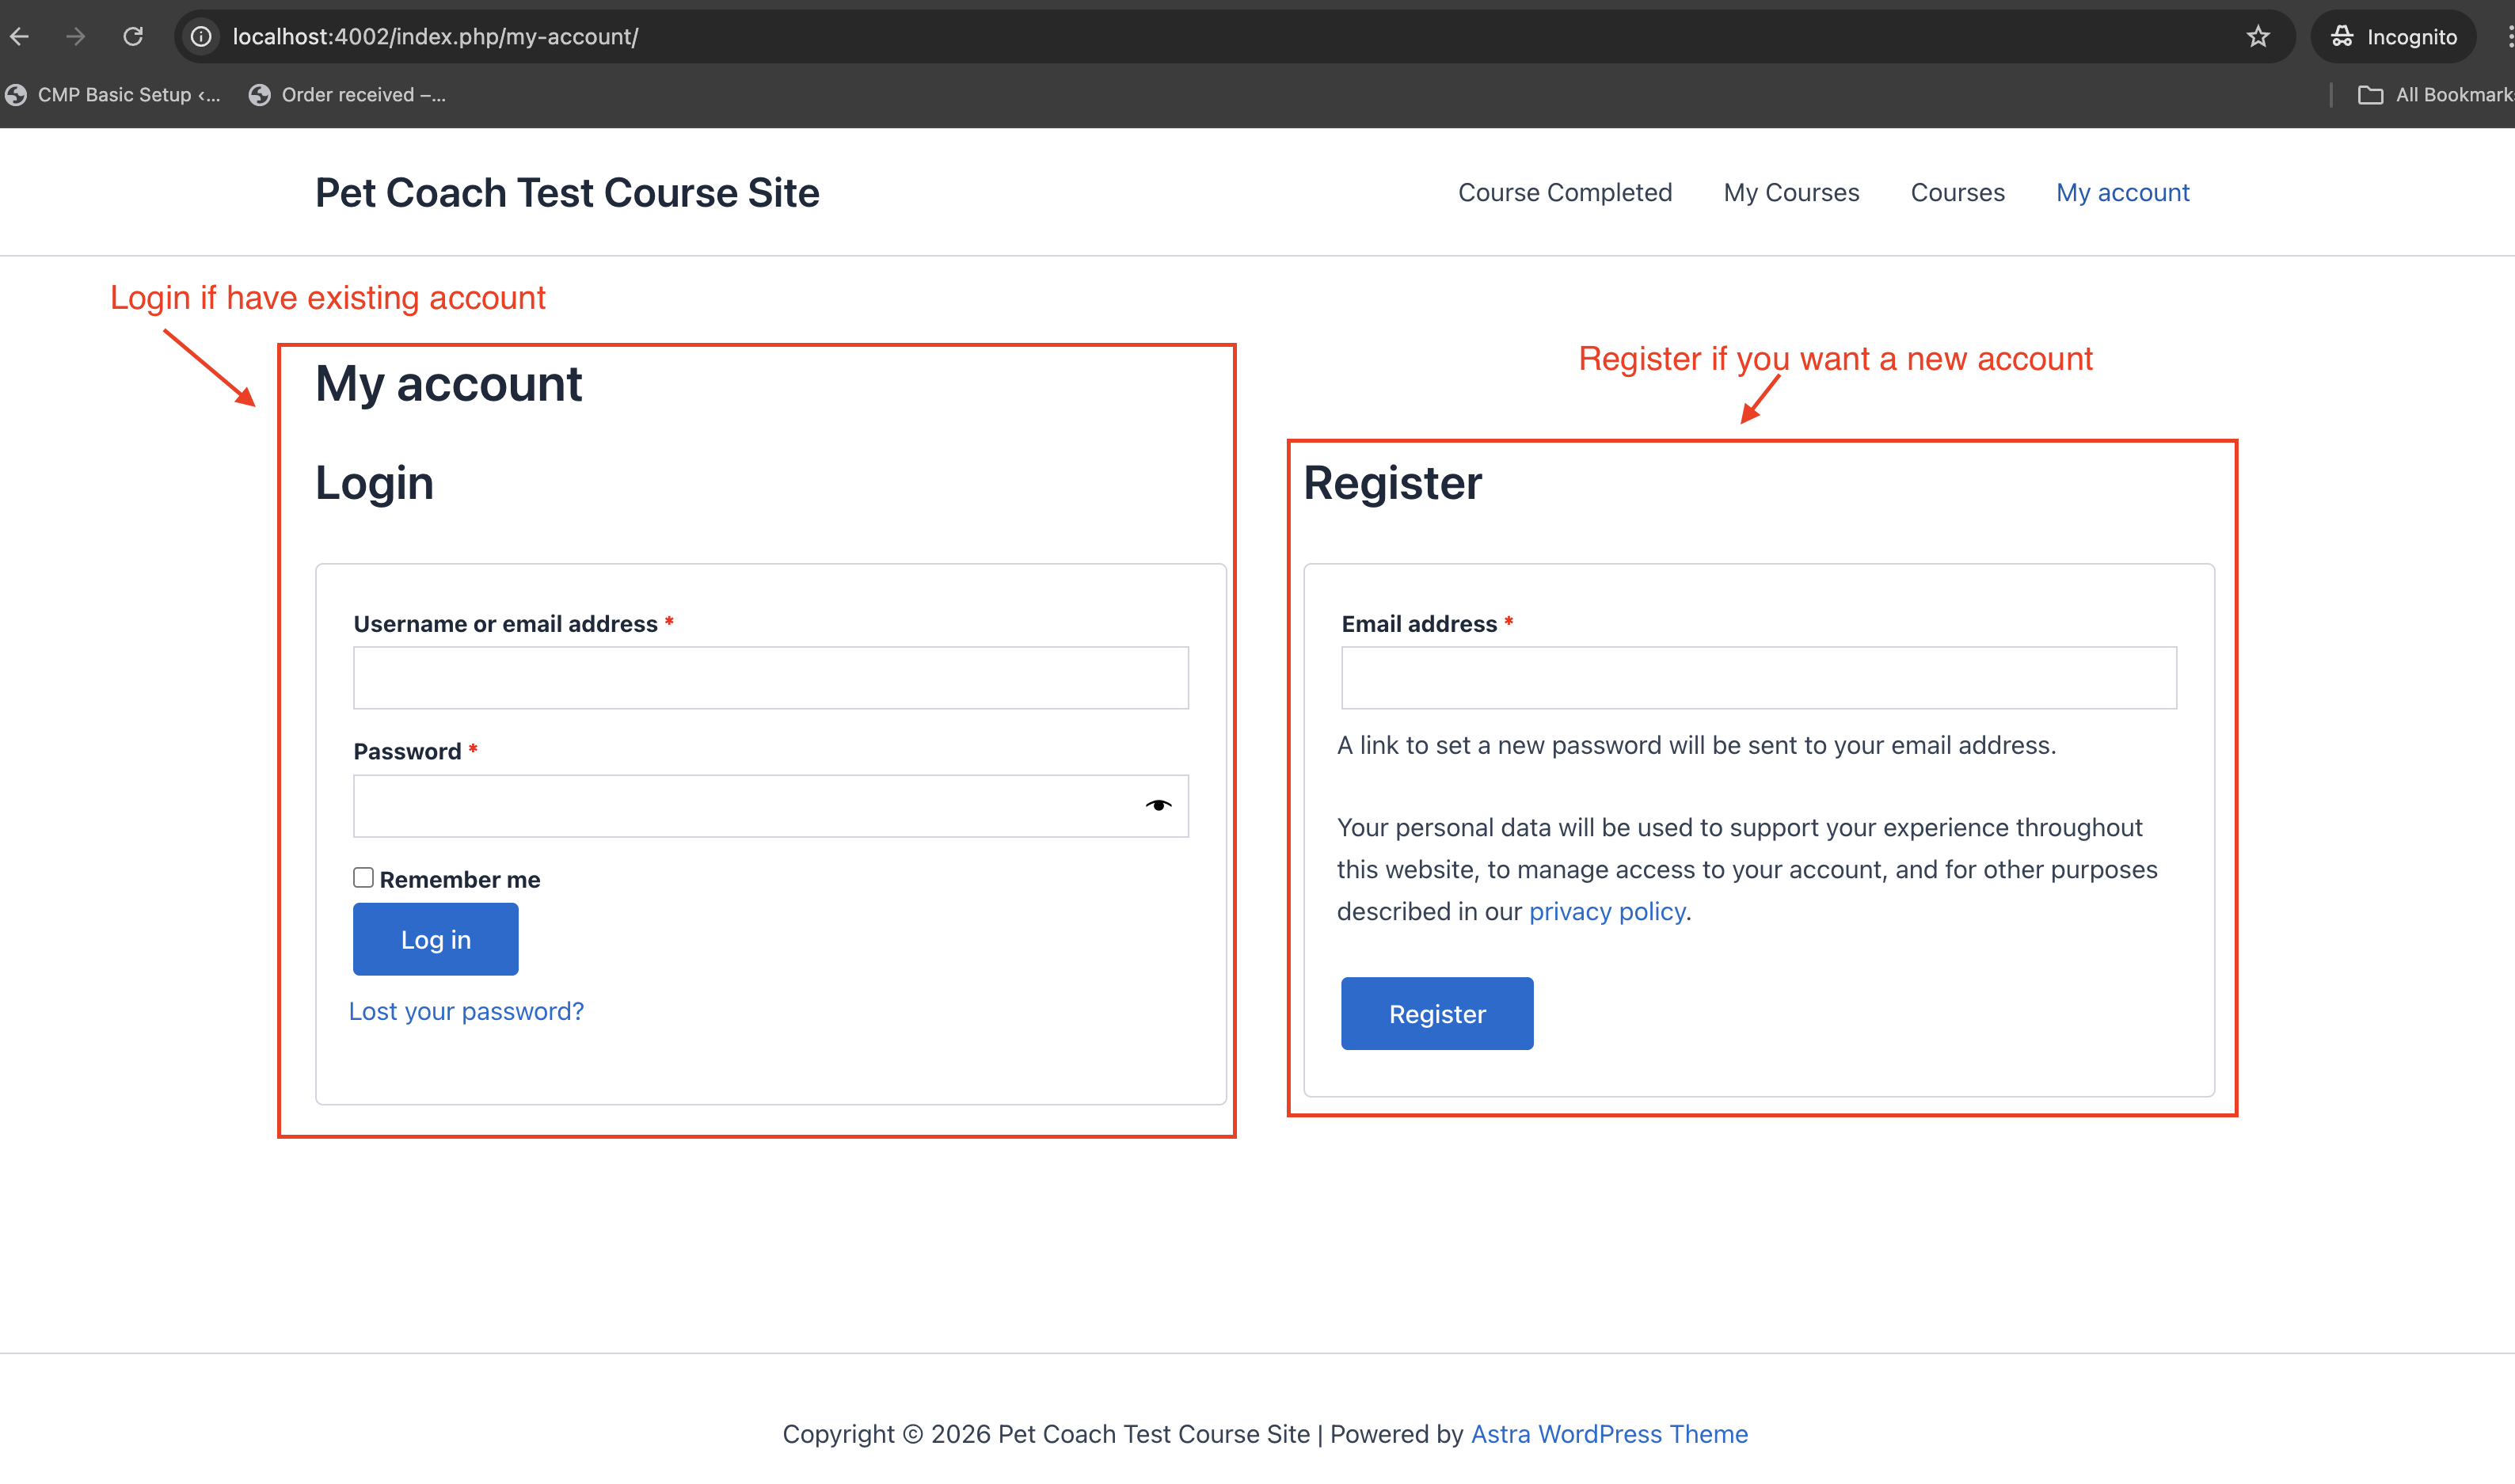
- After they register, they can set their password. Link sent via email
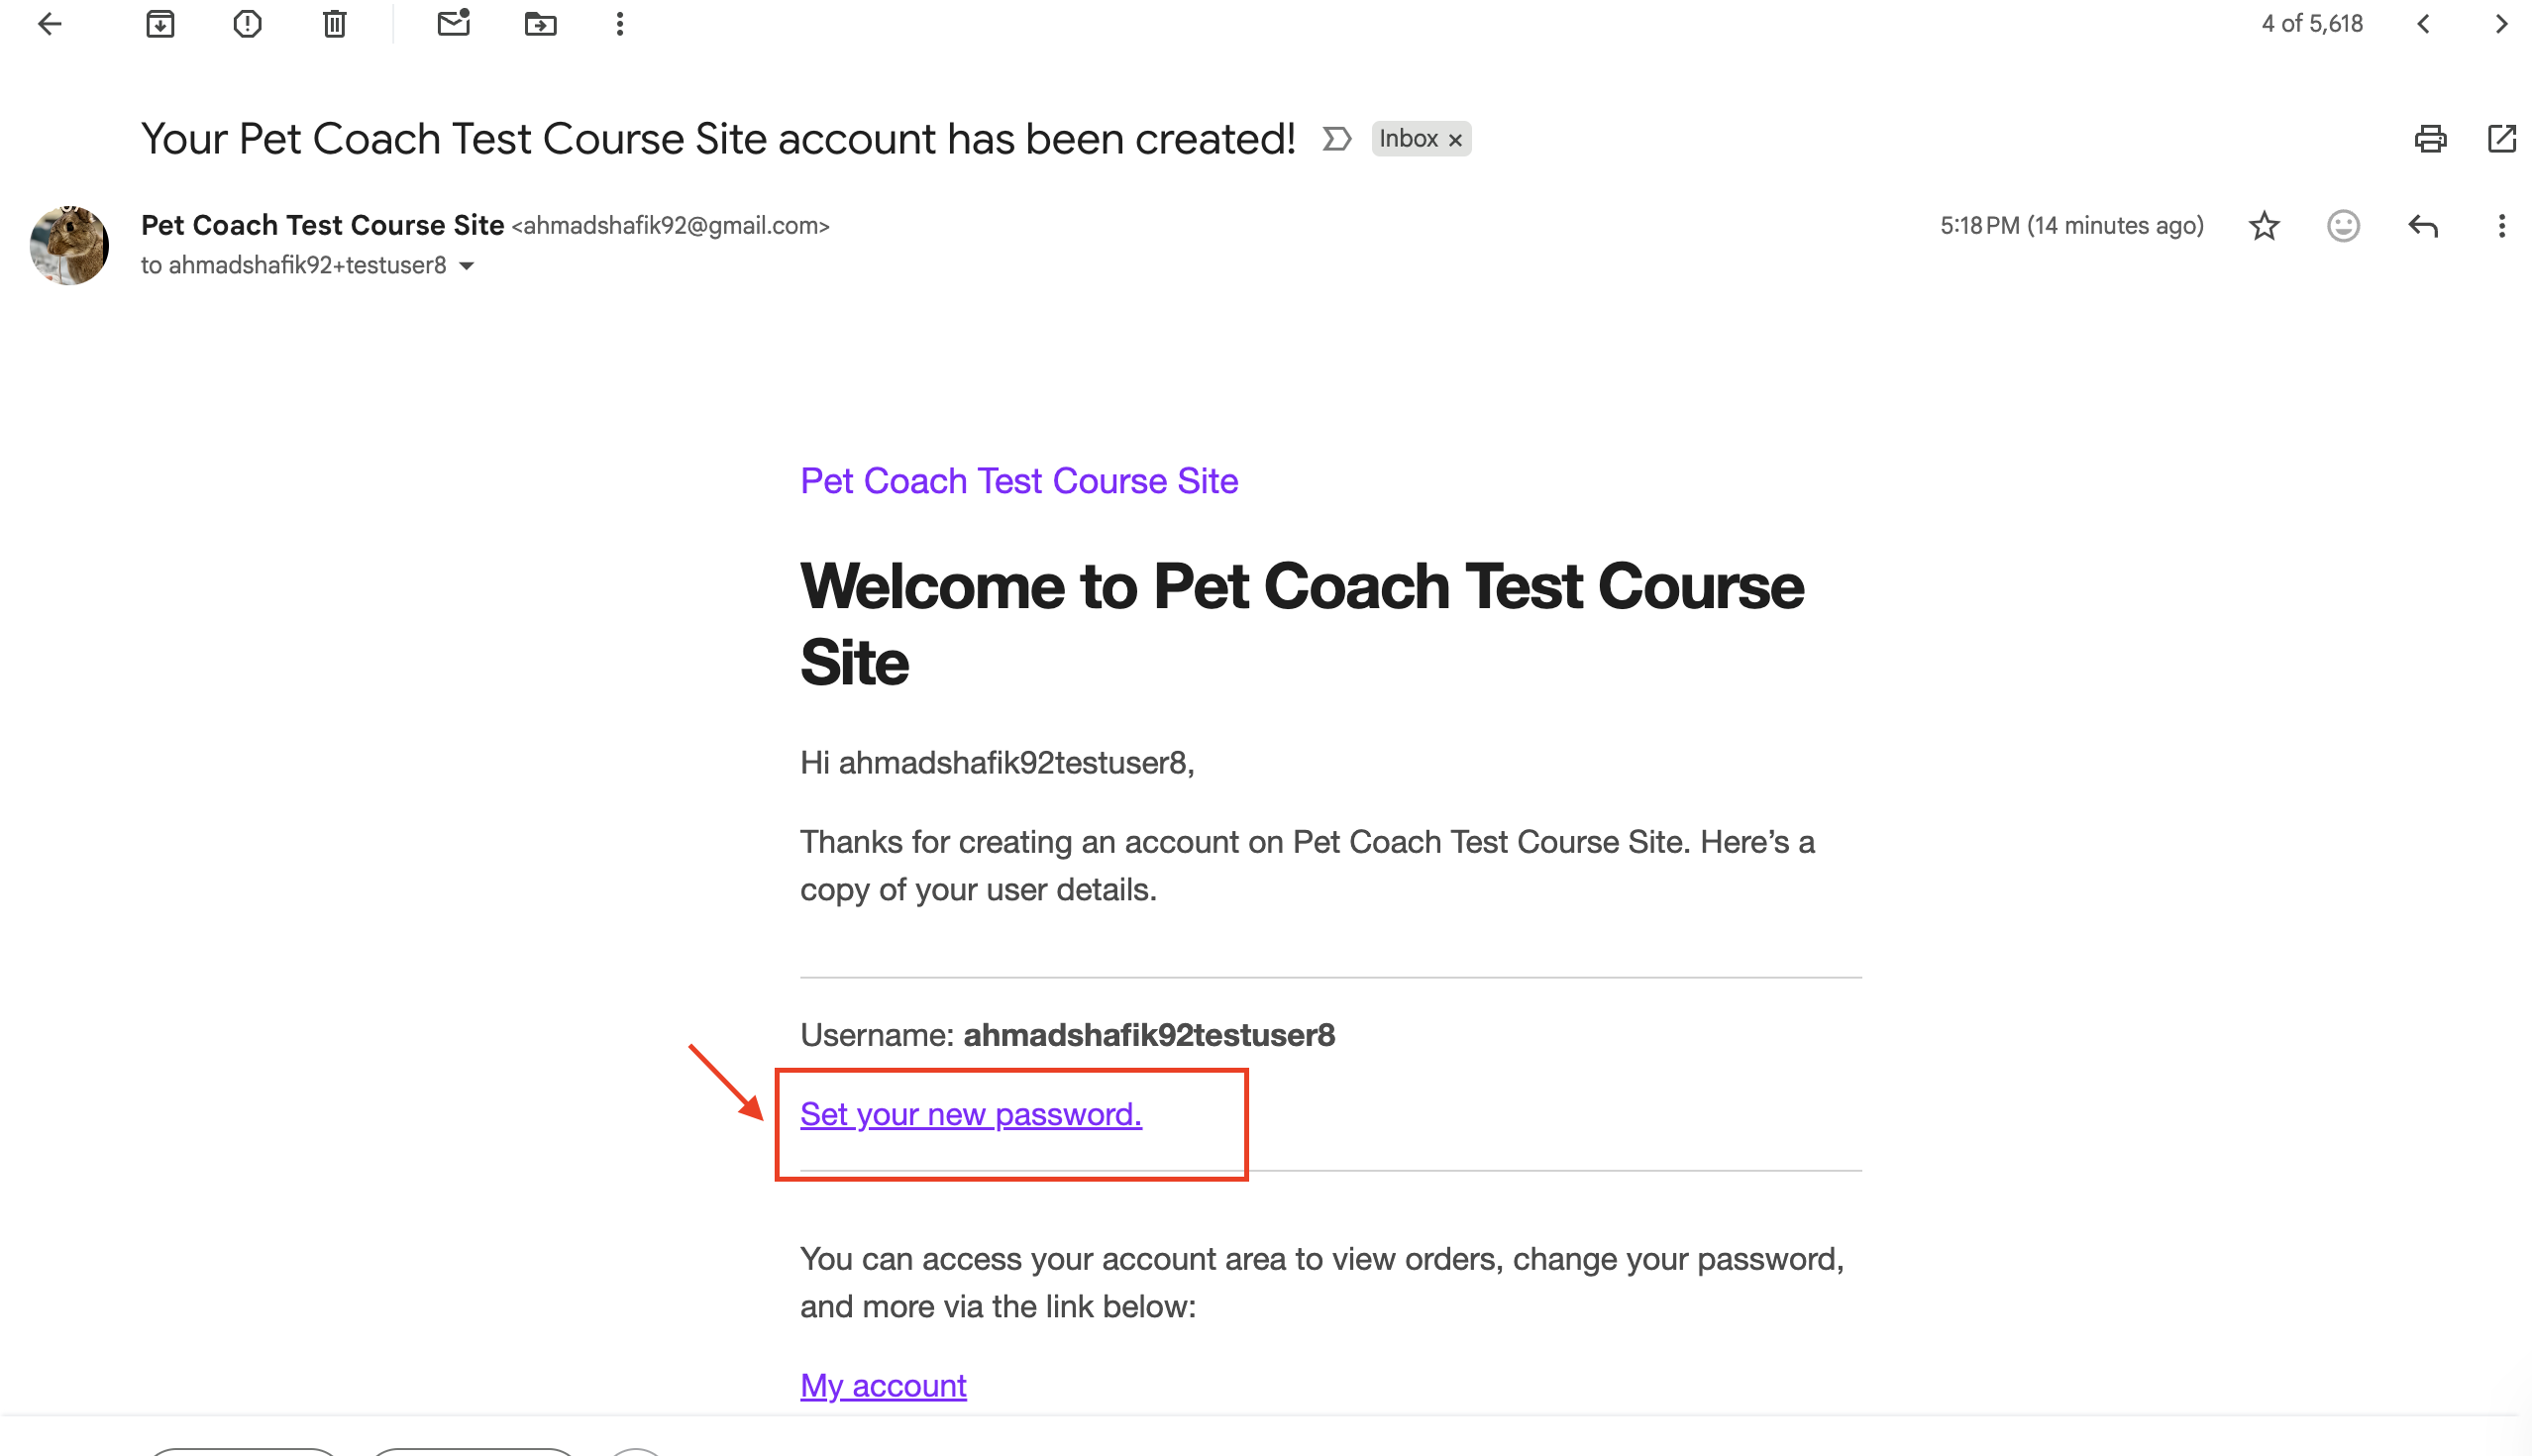
- After they register, they can set their password. Link sent via email
- Purchases product linked to Sensei course
- Prior to the purchase, user cannot access the product. See the list view
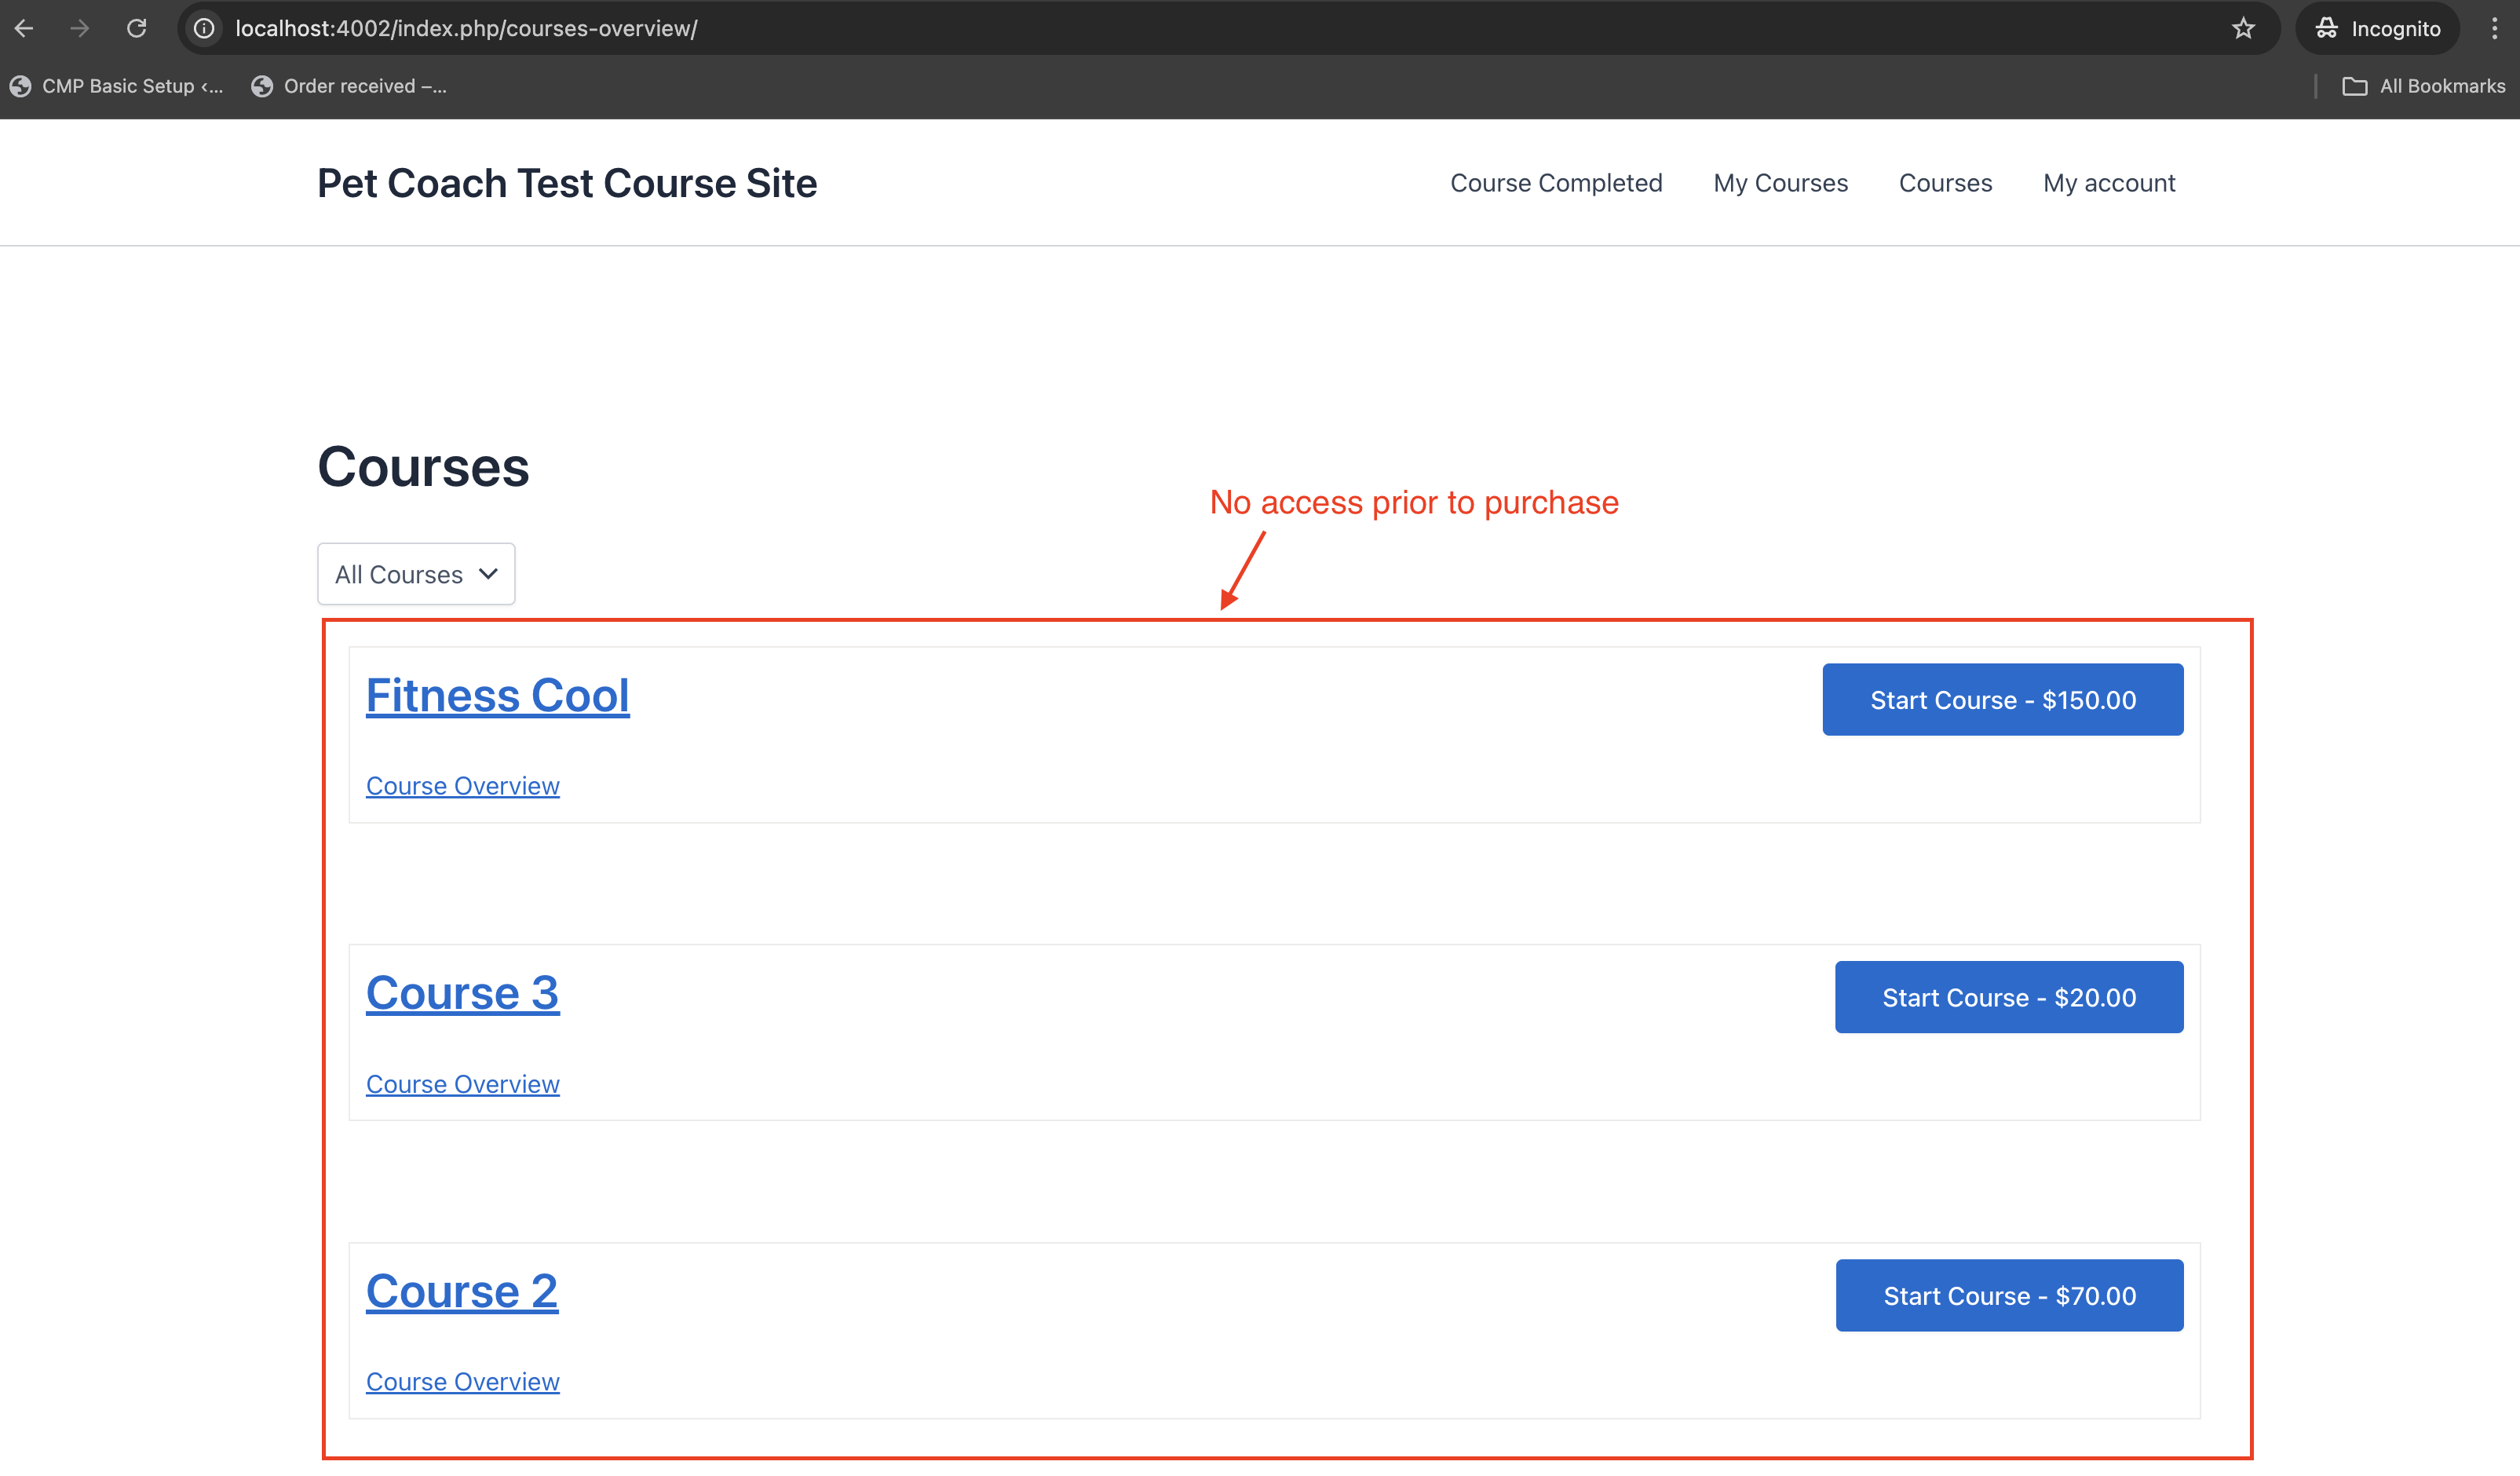
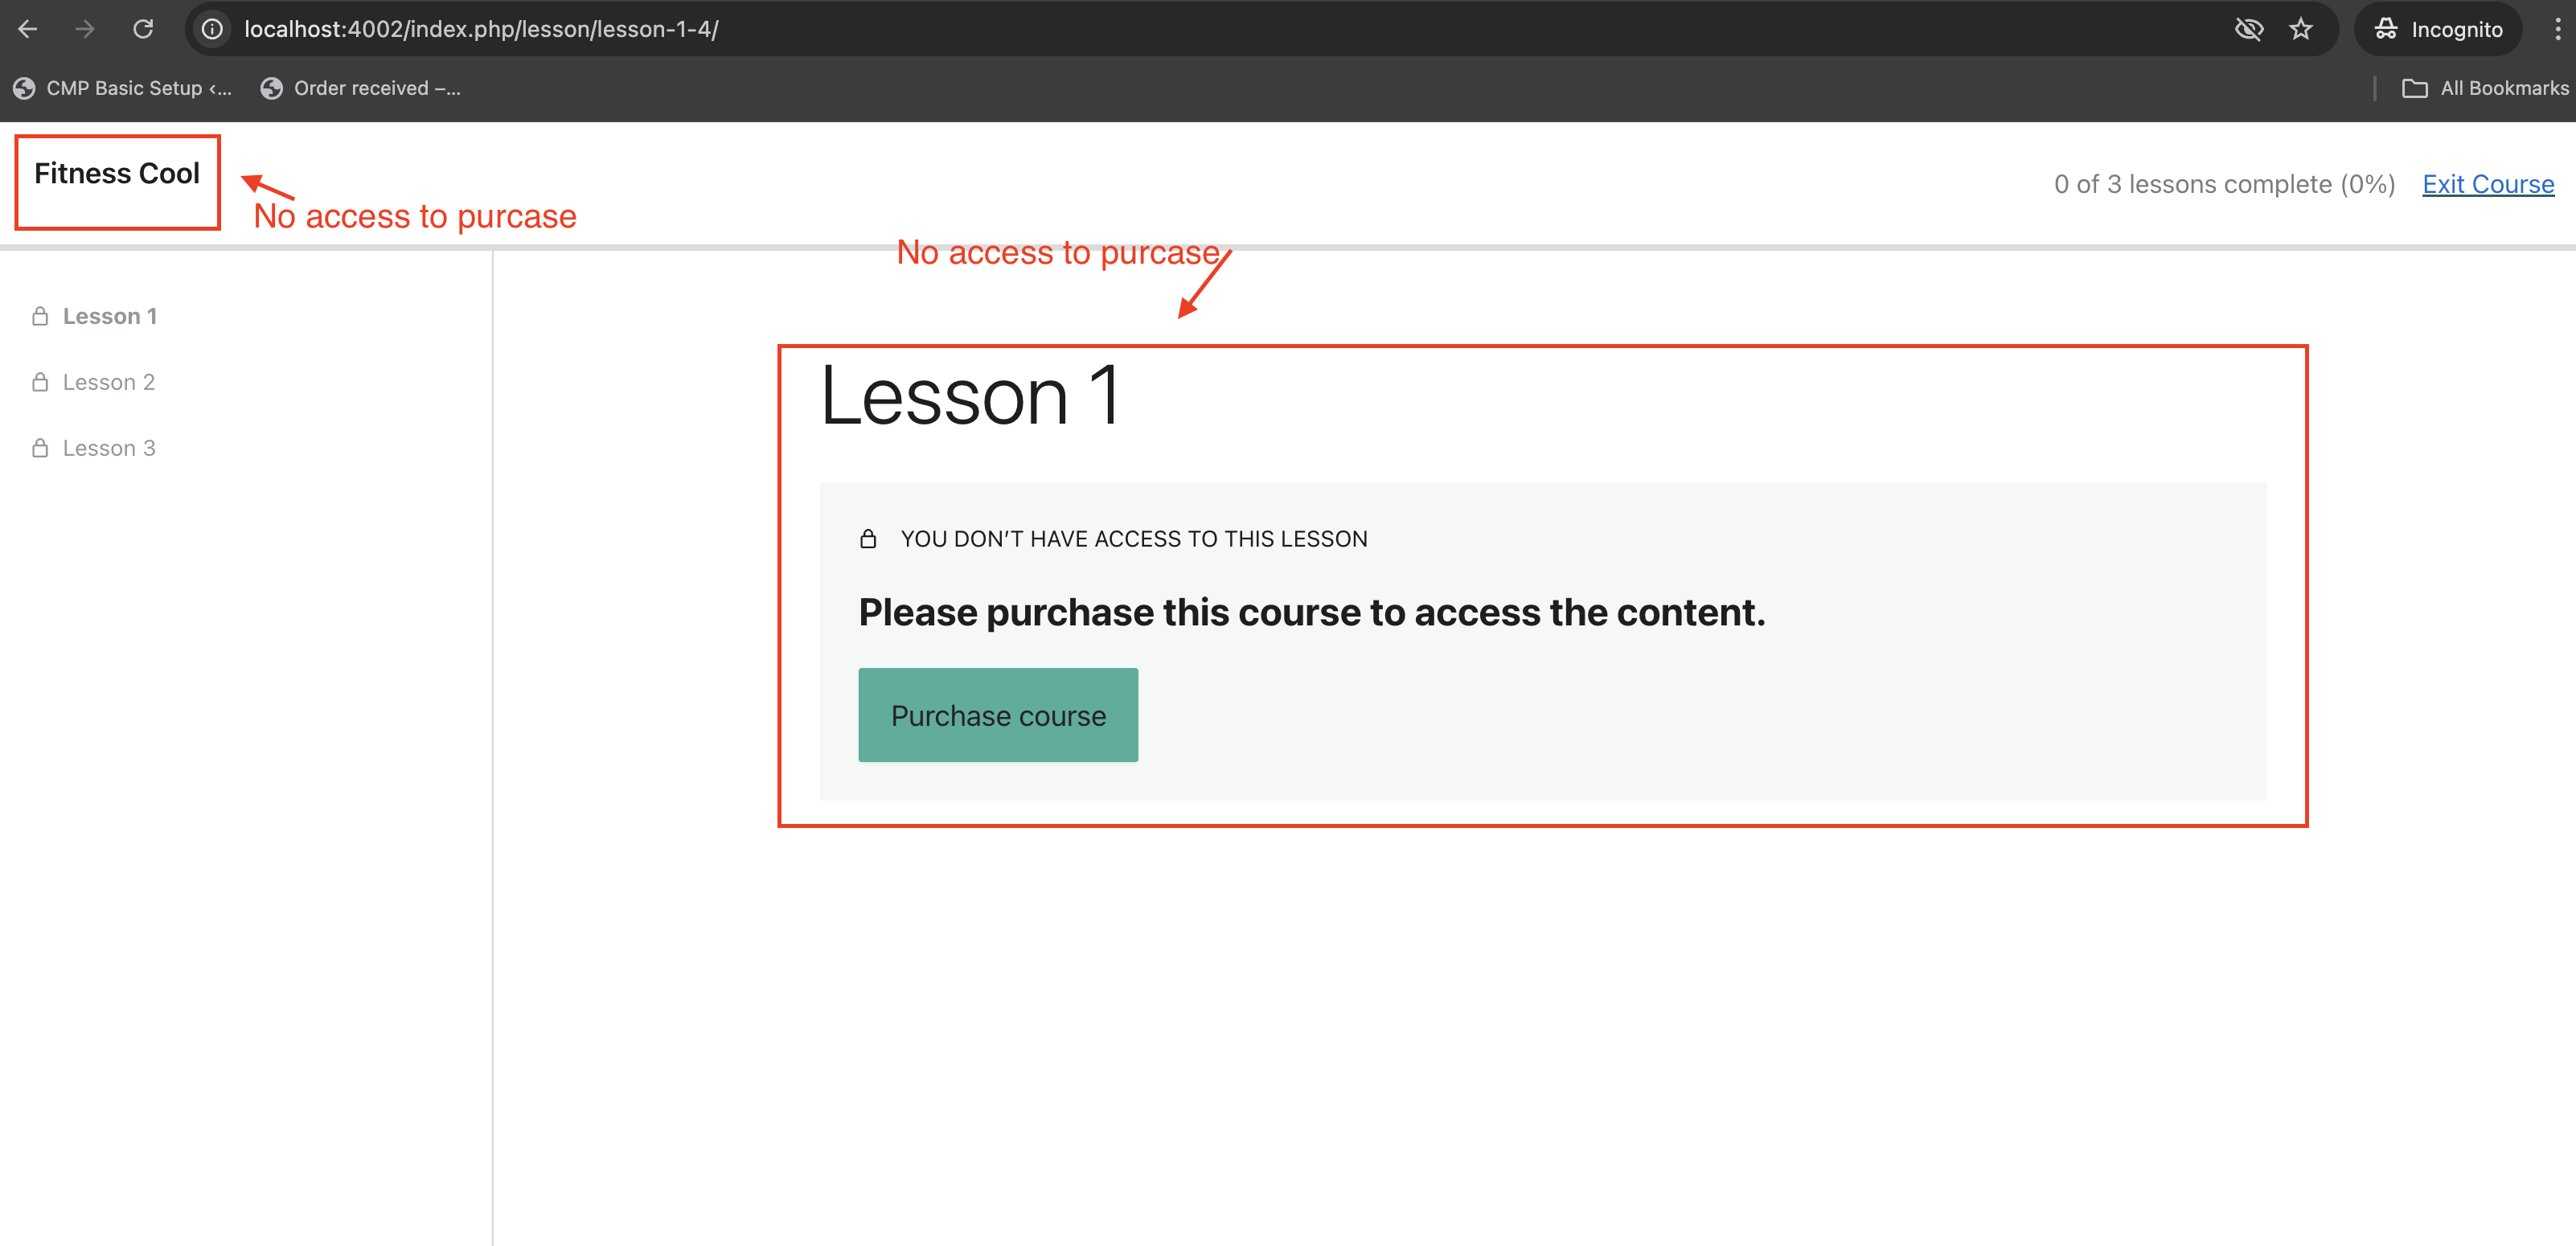
- If user tries to access course details, it will prompt payment
- Prior to the purchase, user cannot access the product. See the list view
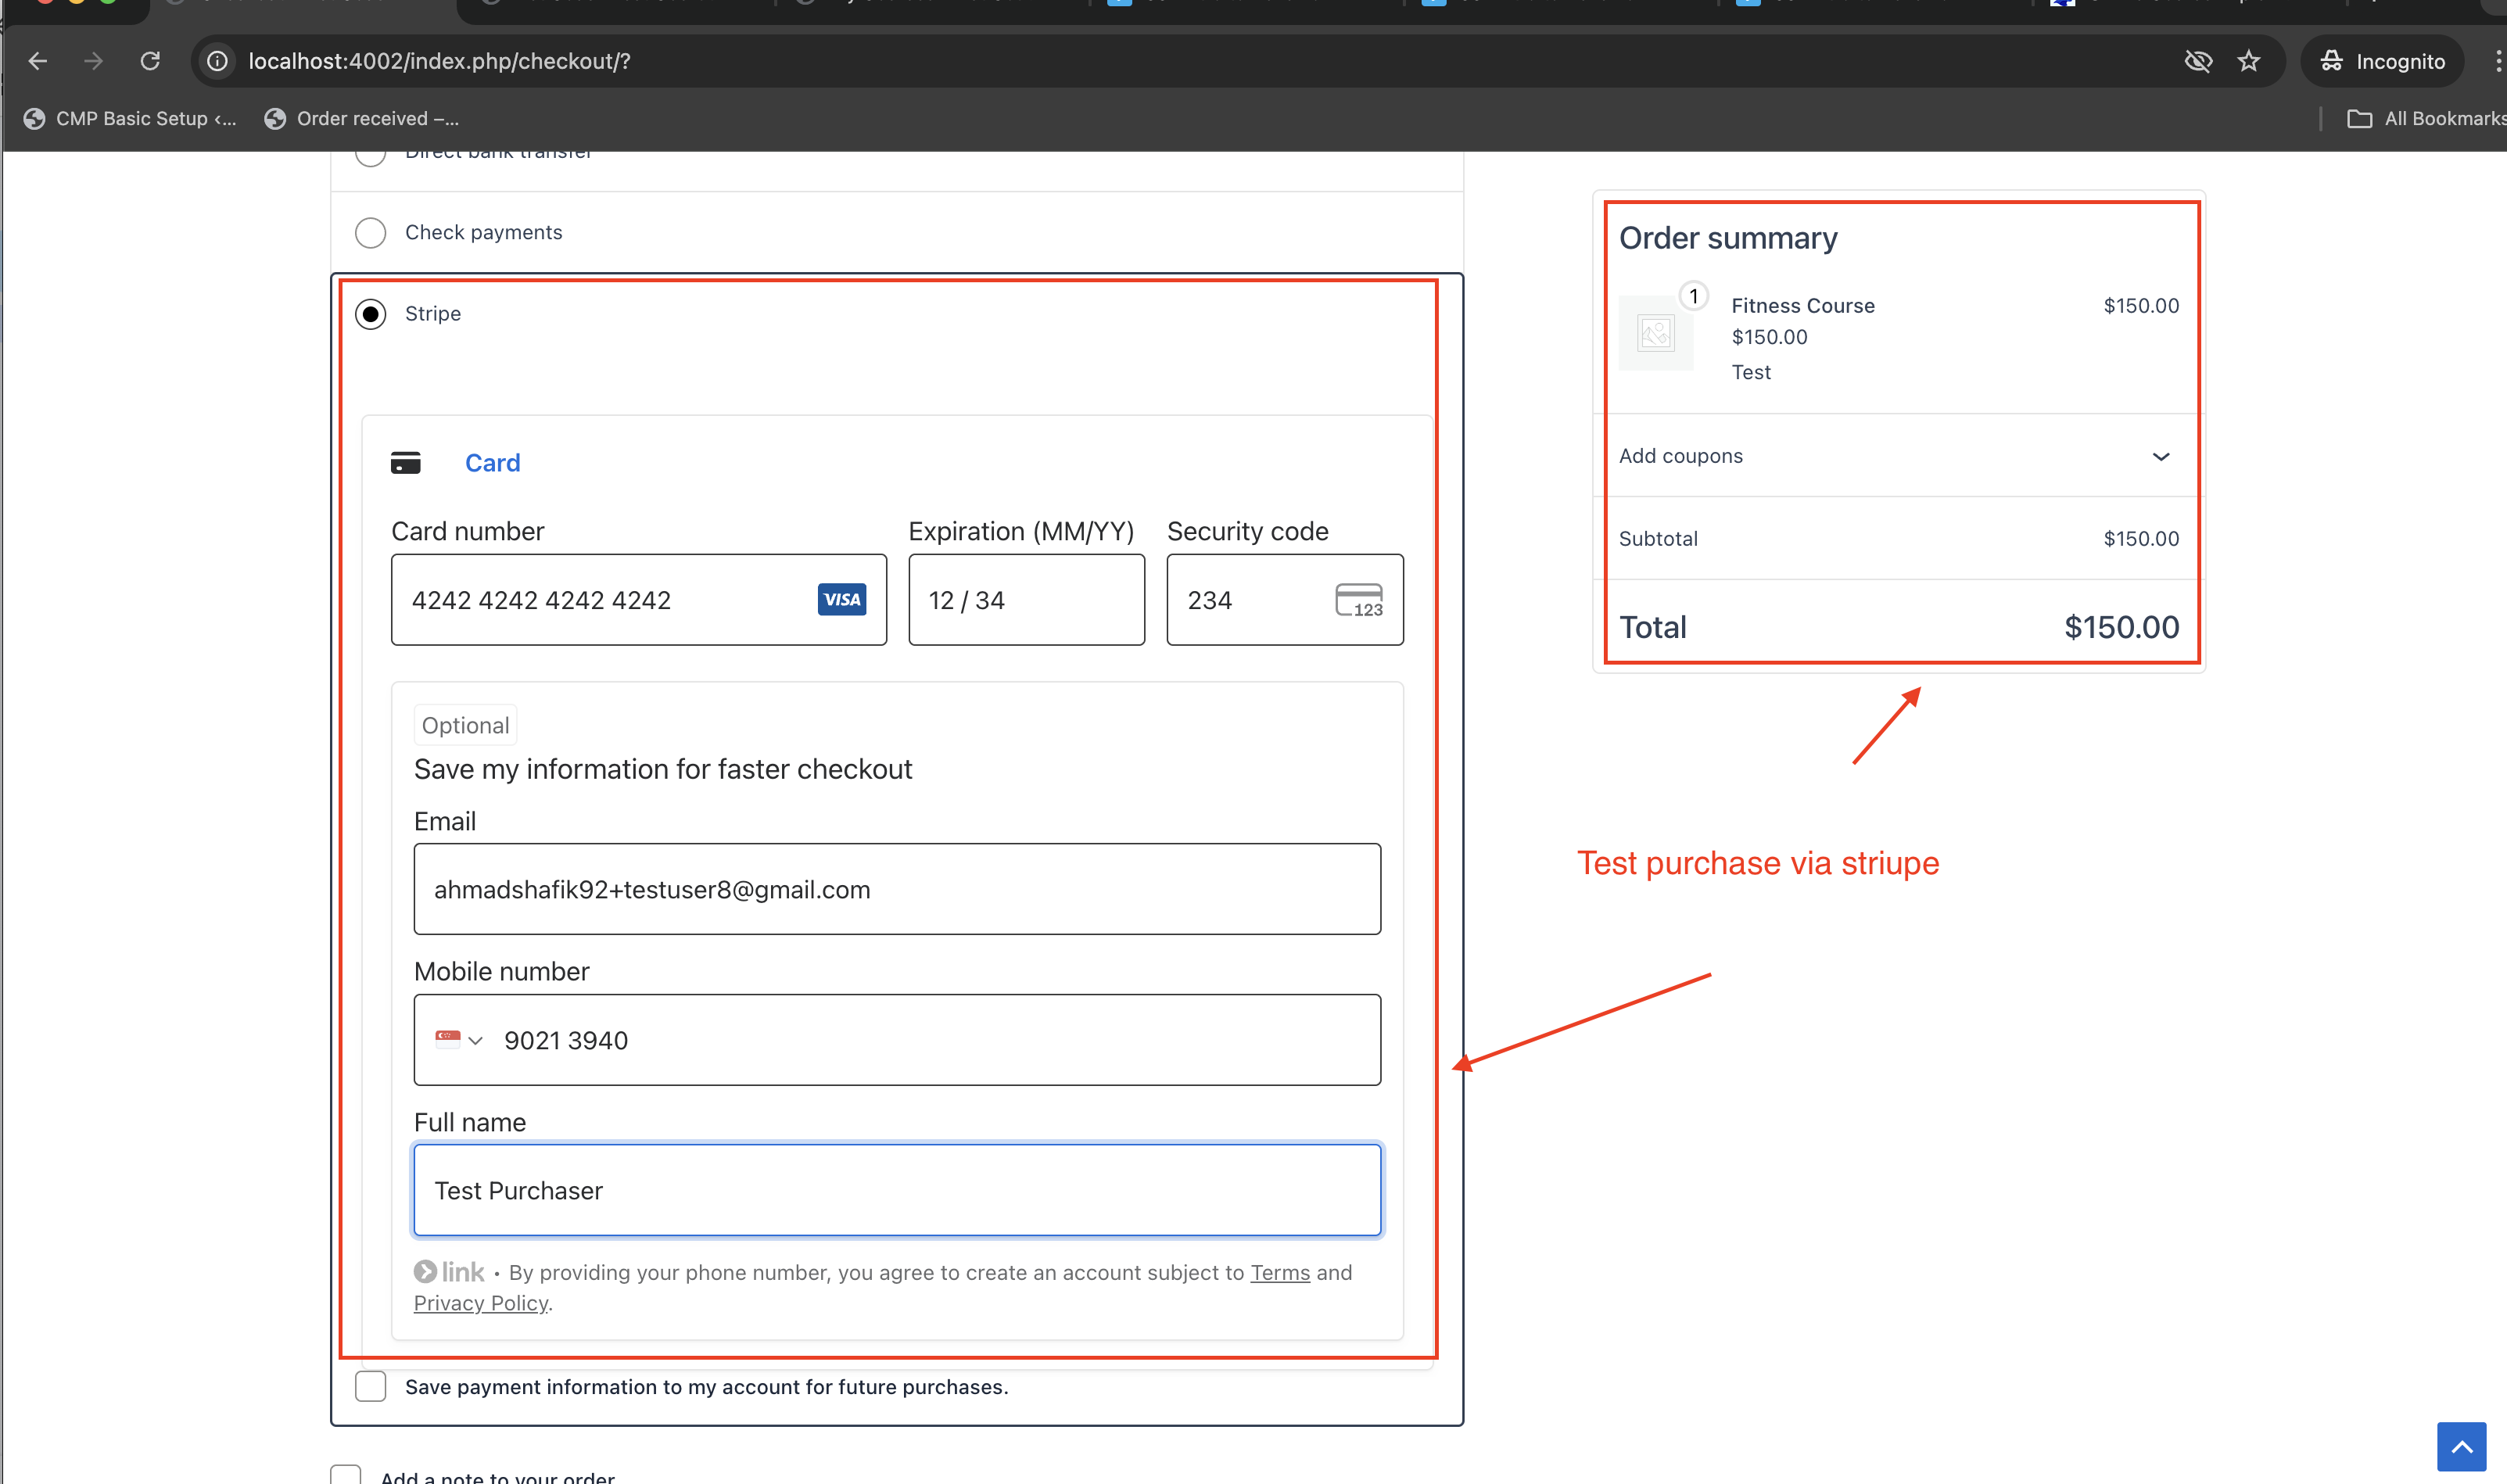
- Payment made via stripe
- See the stripe in the UI
- For those who like money, you can also see the money come in stripe
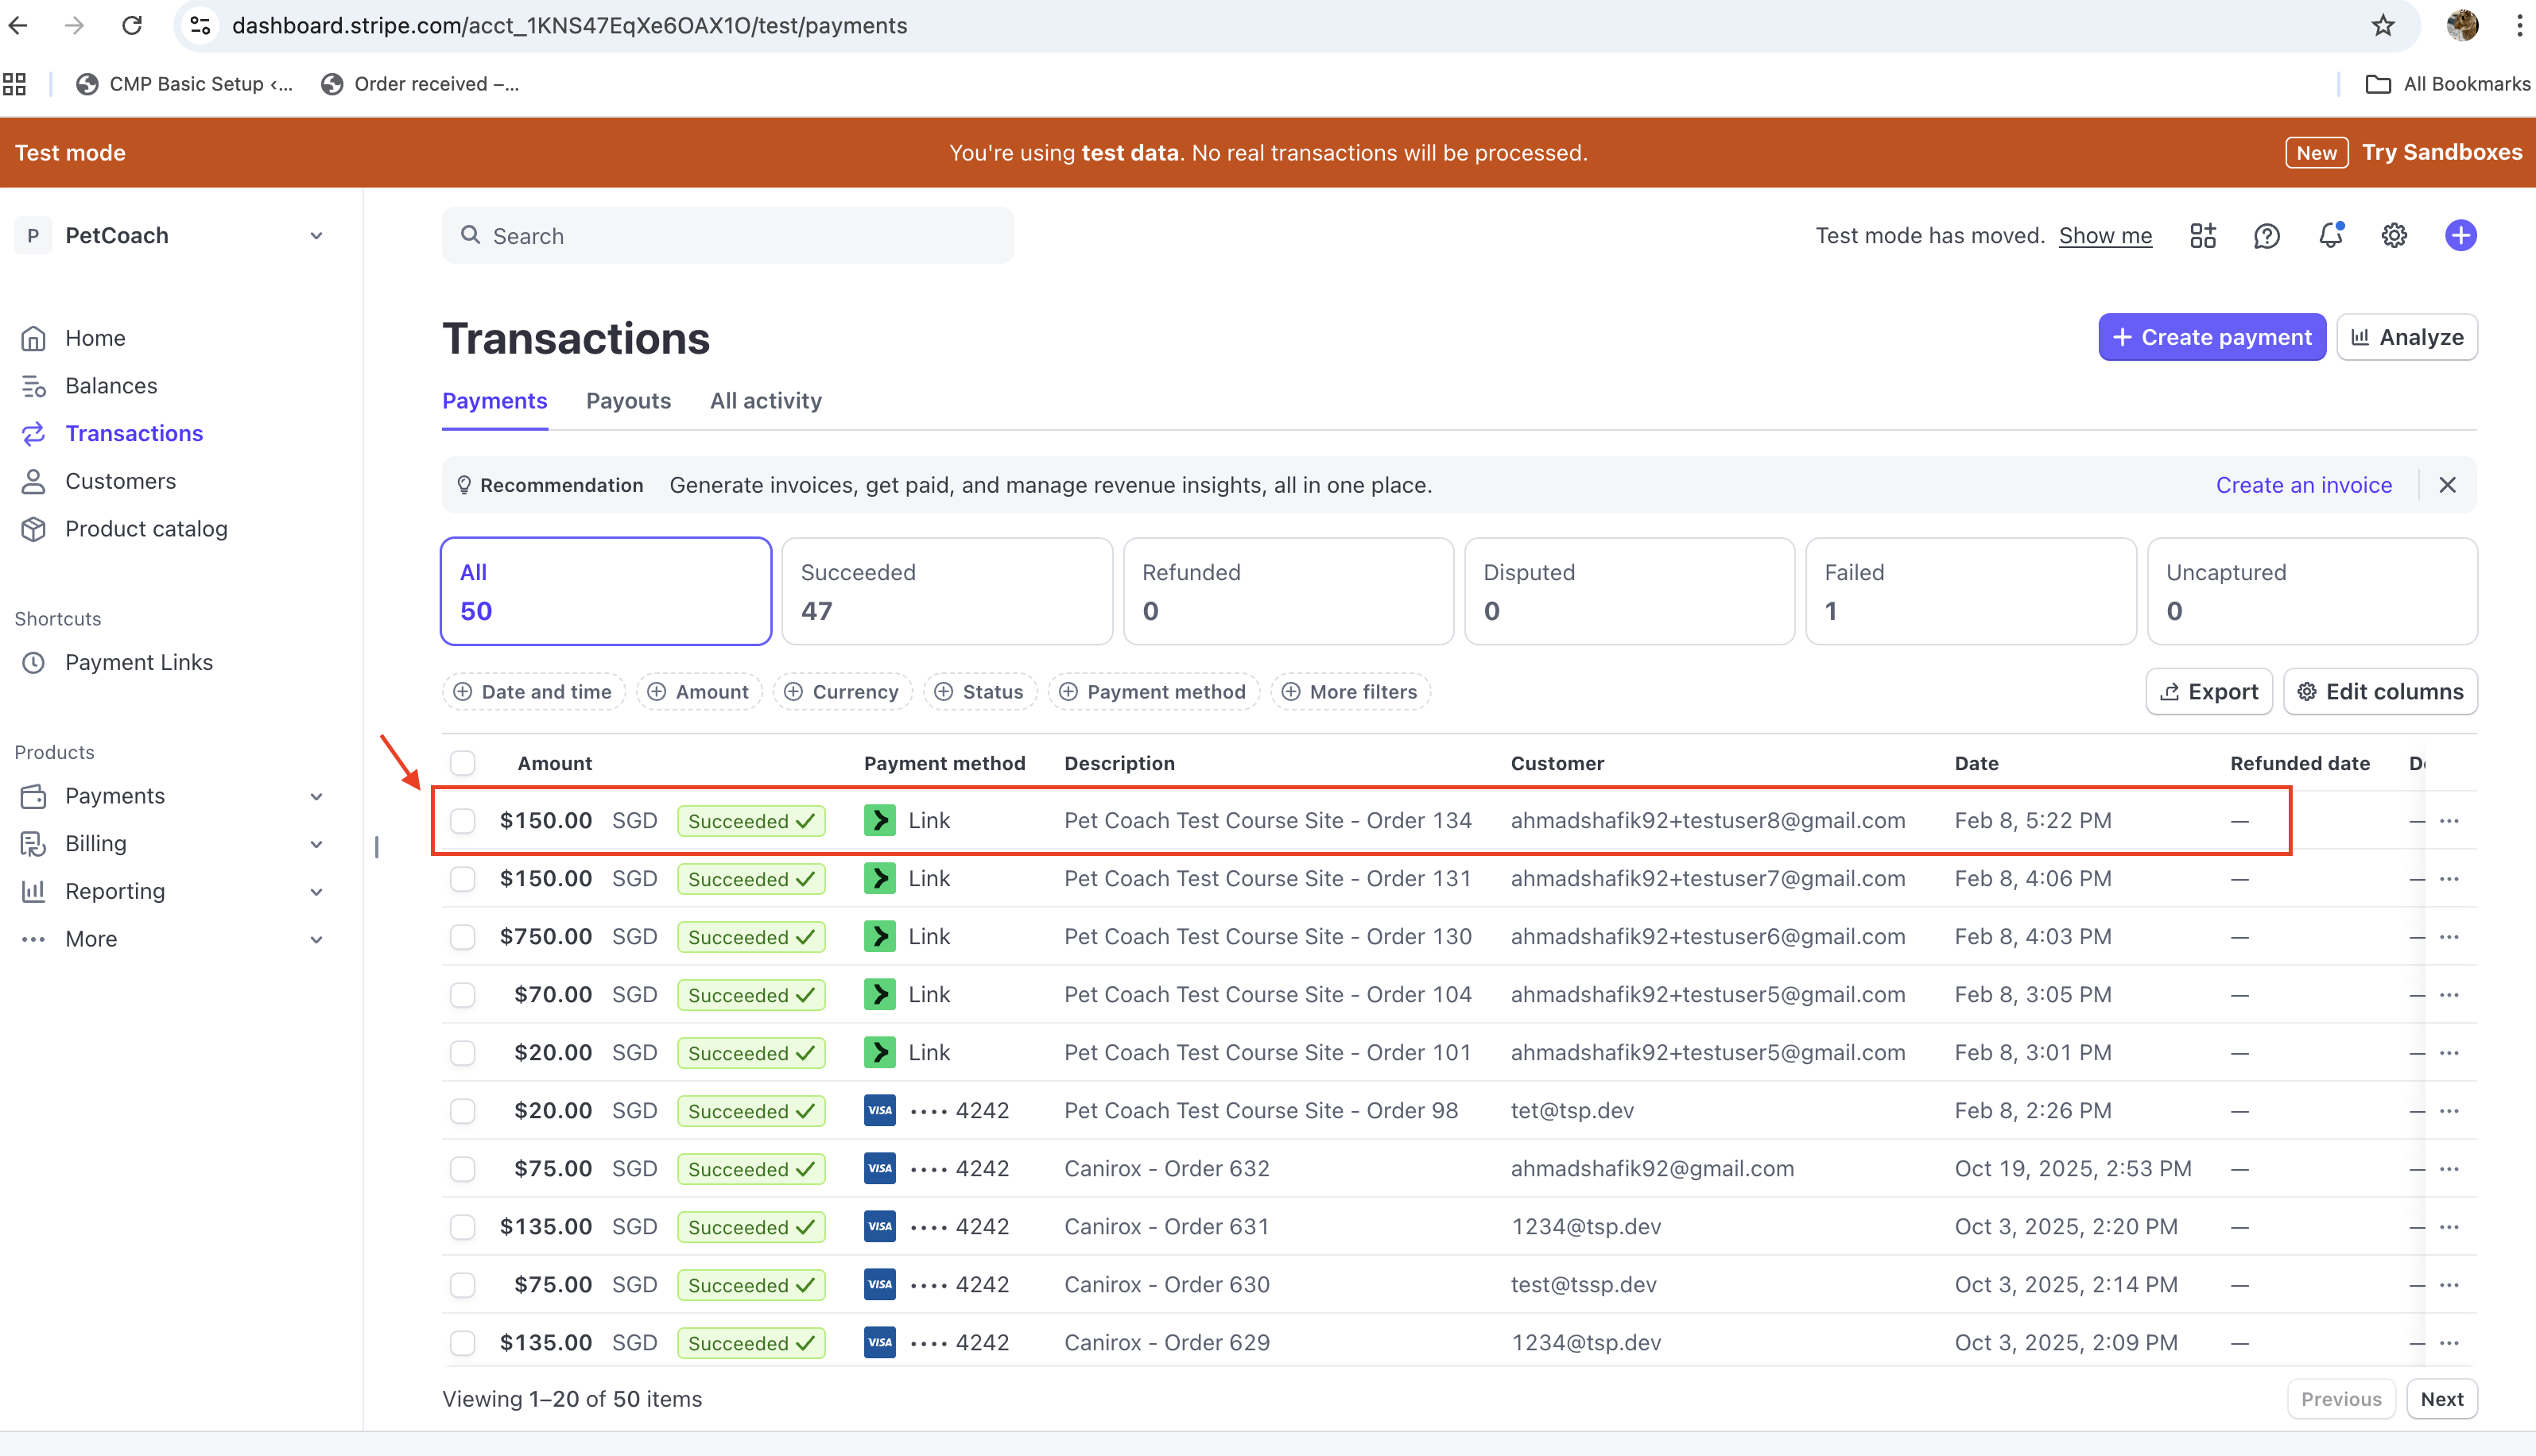
- See the stripe in the UI
- Access granted only after purchase
- After payment, they can see
continuesince they now have access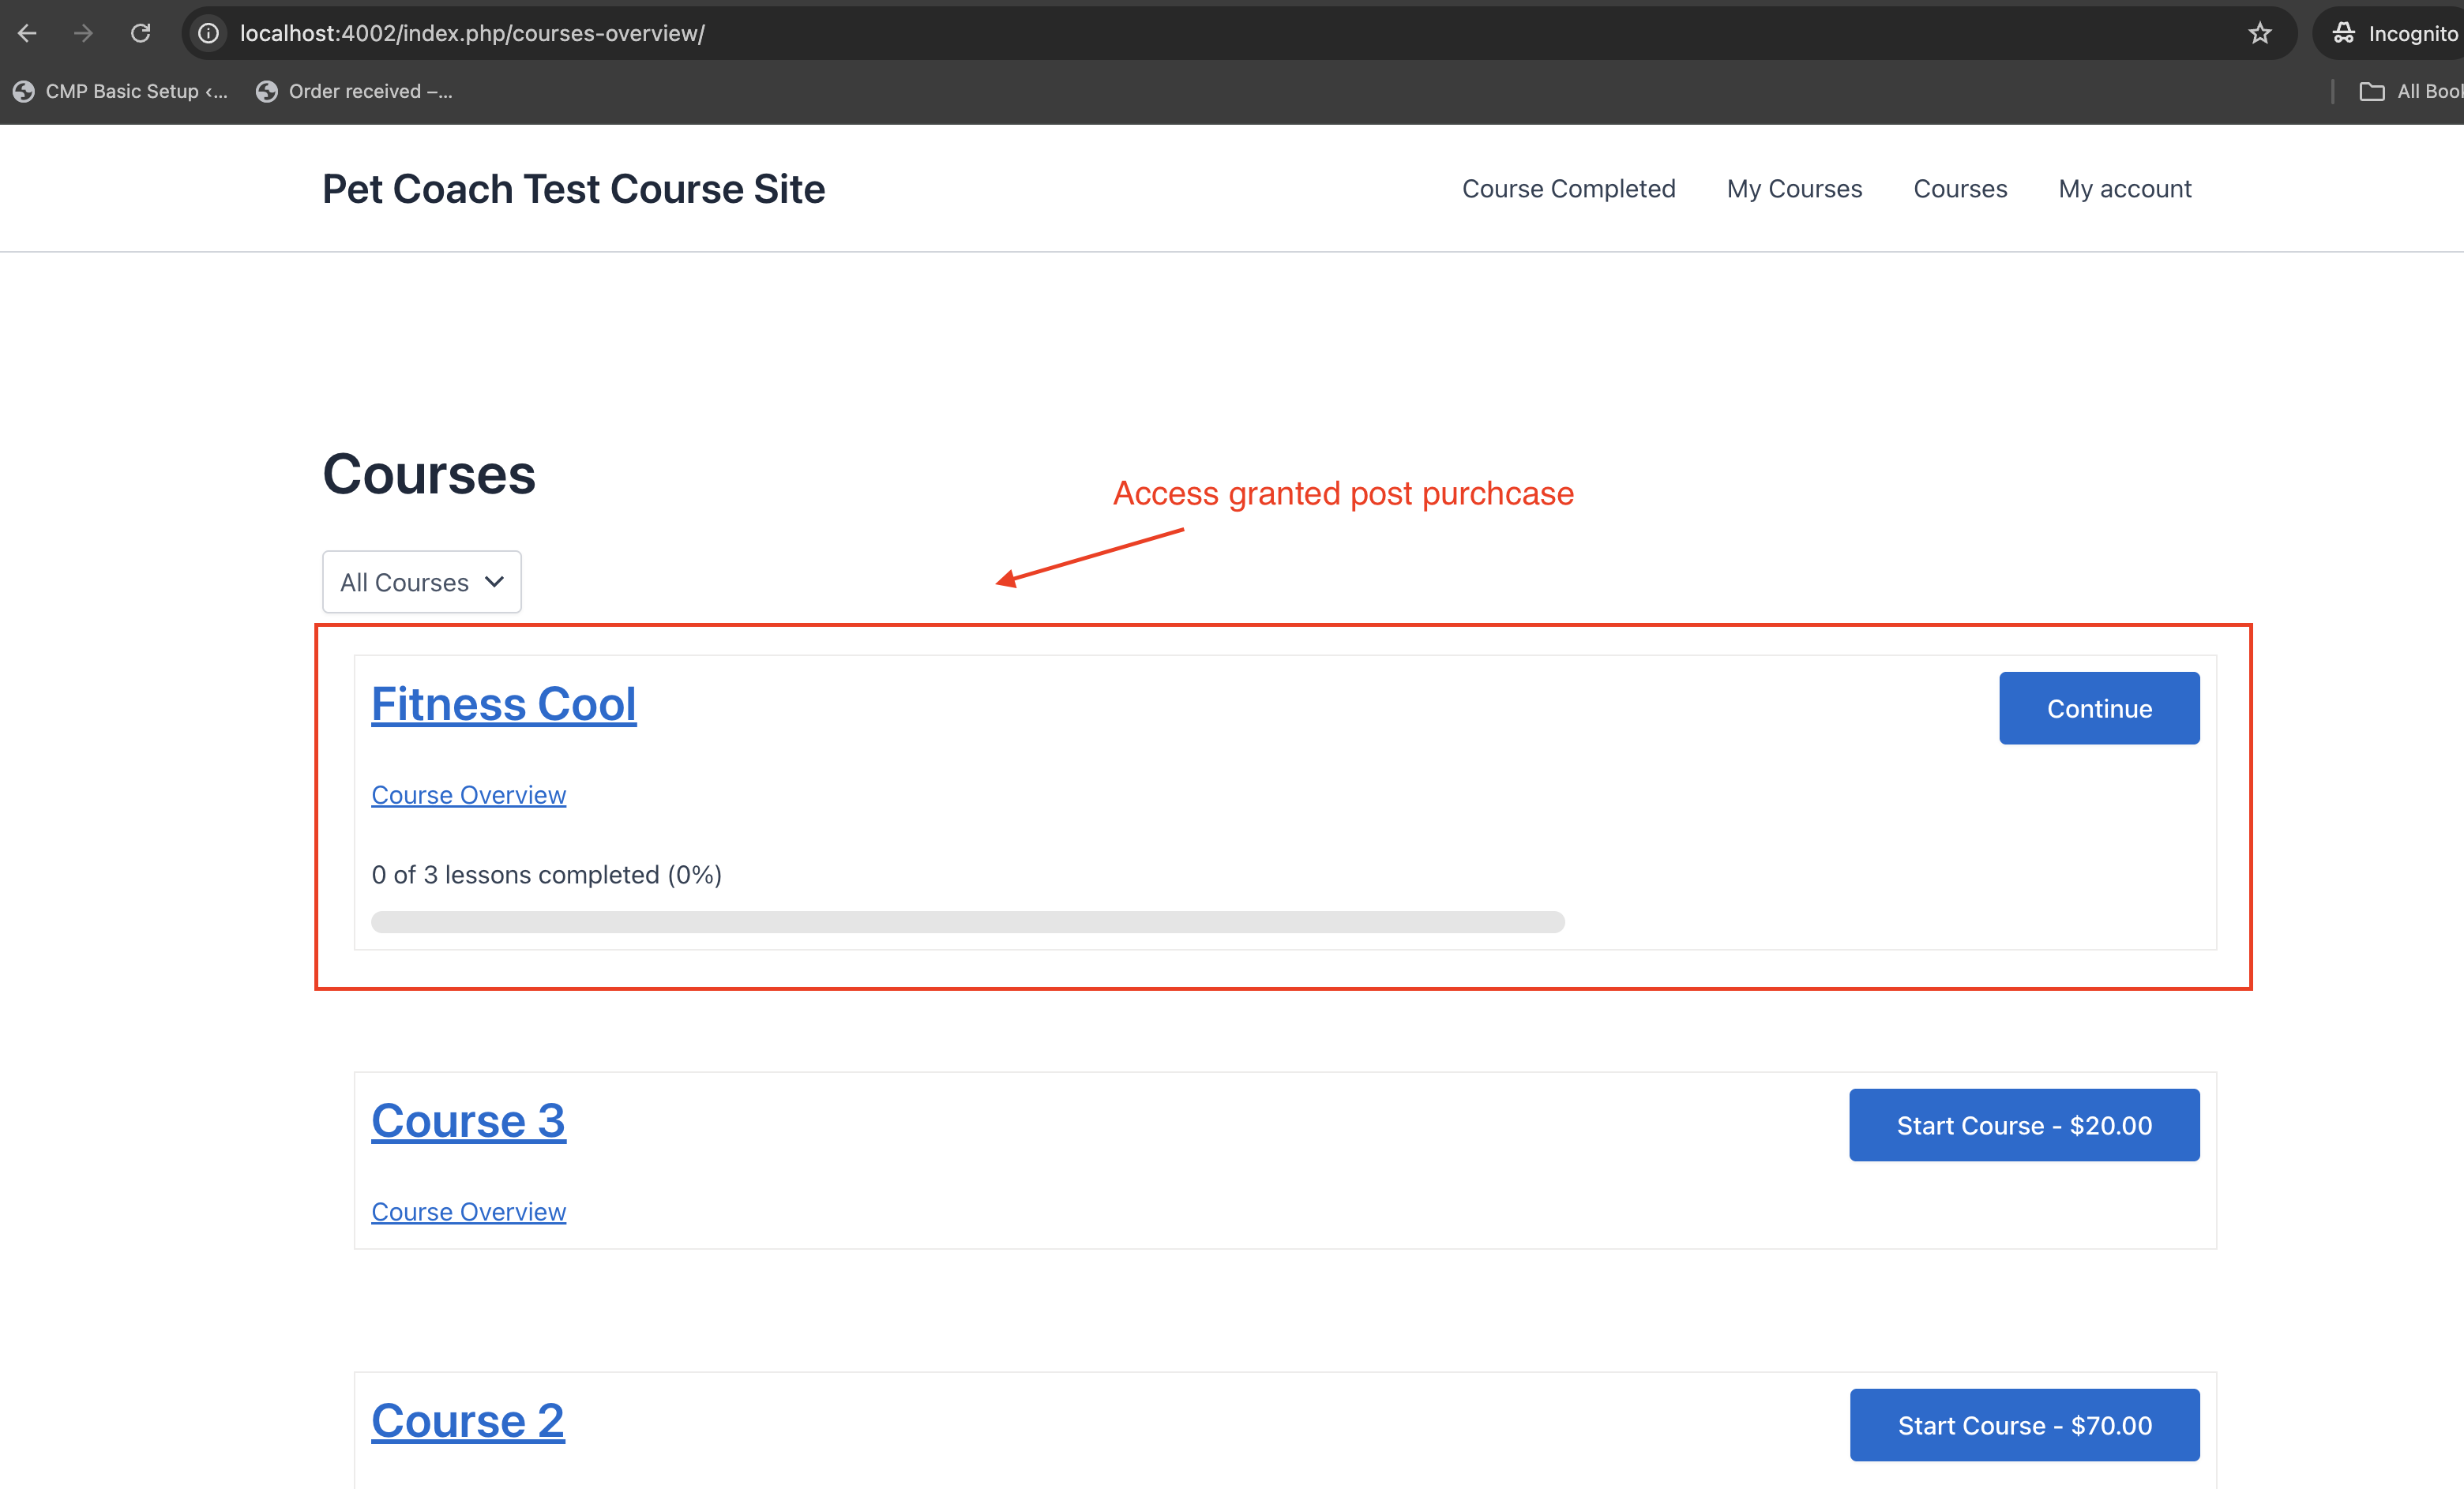
- Wigthin each course they can access the lessons
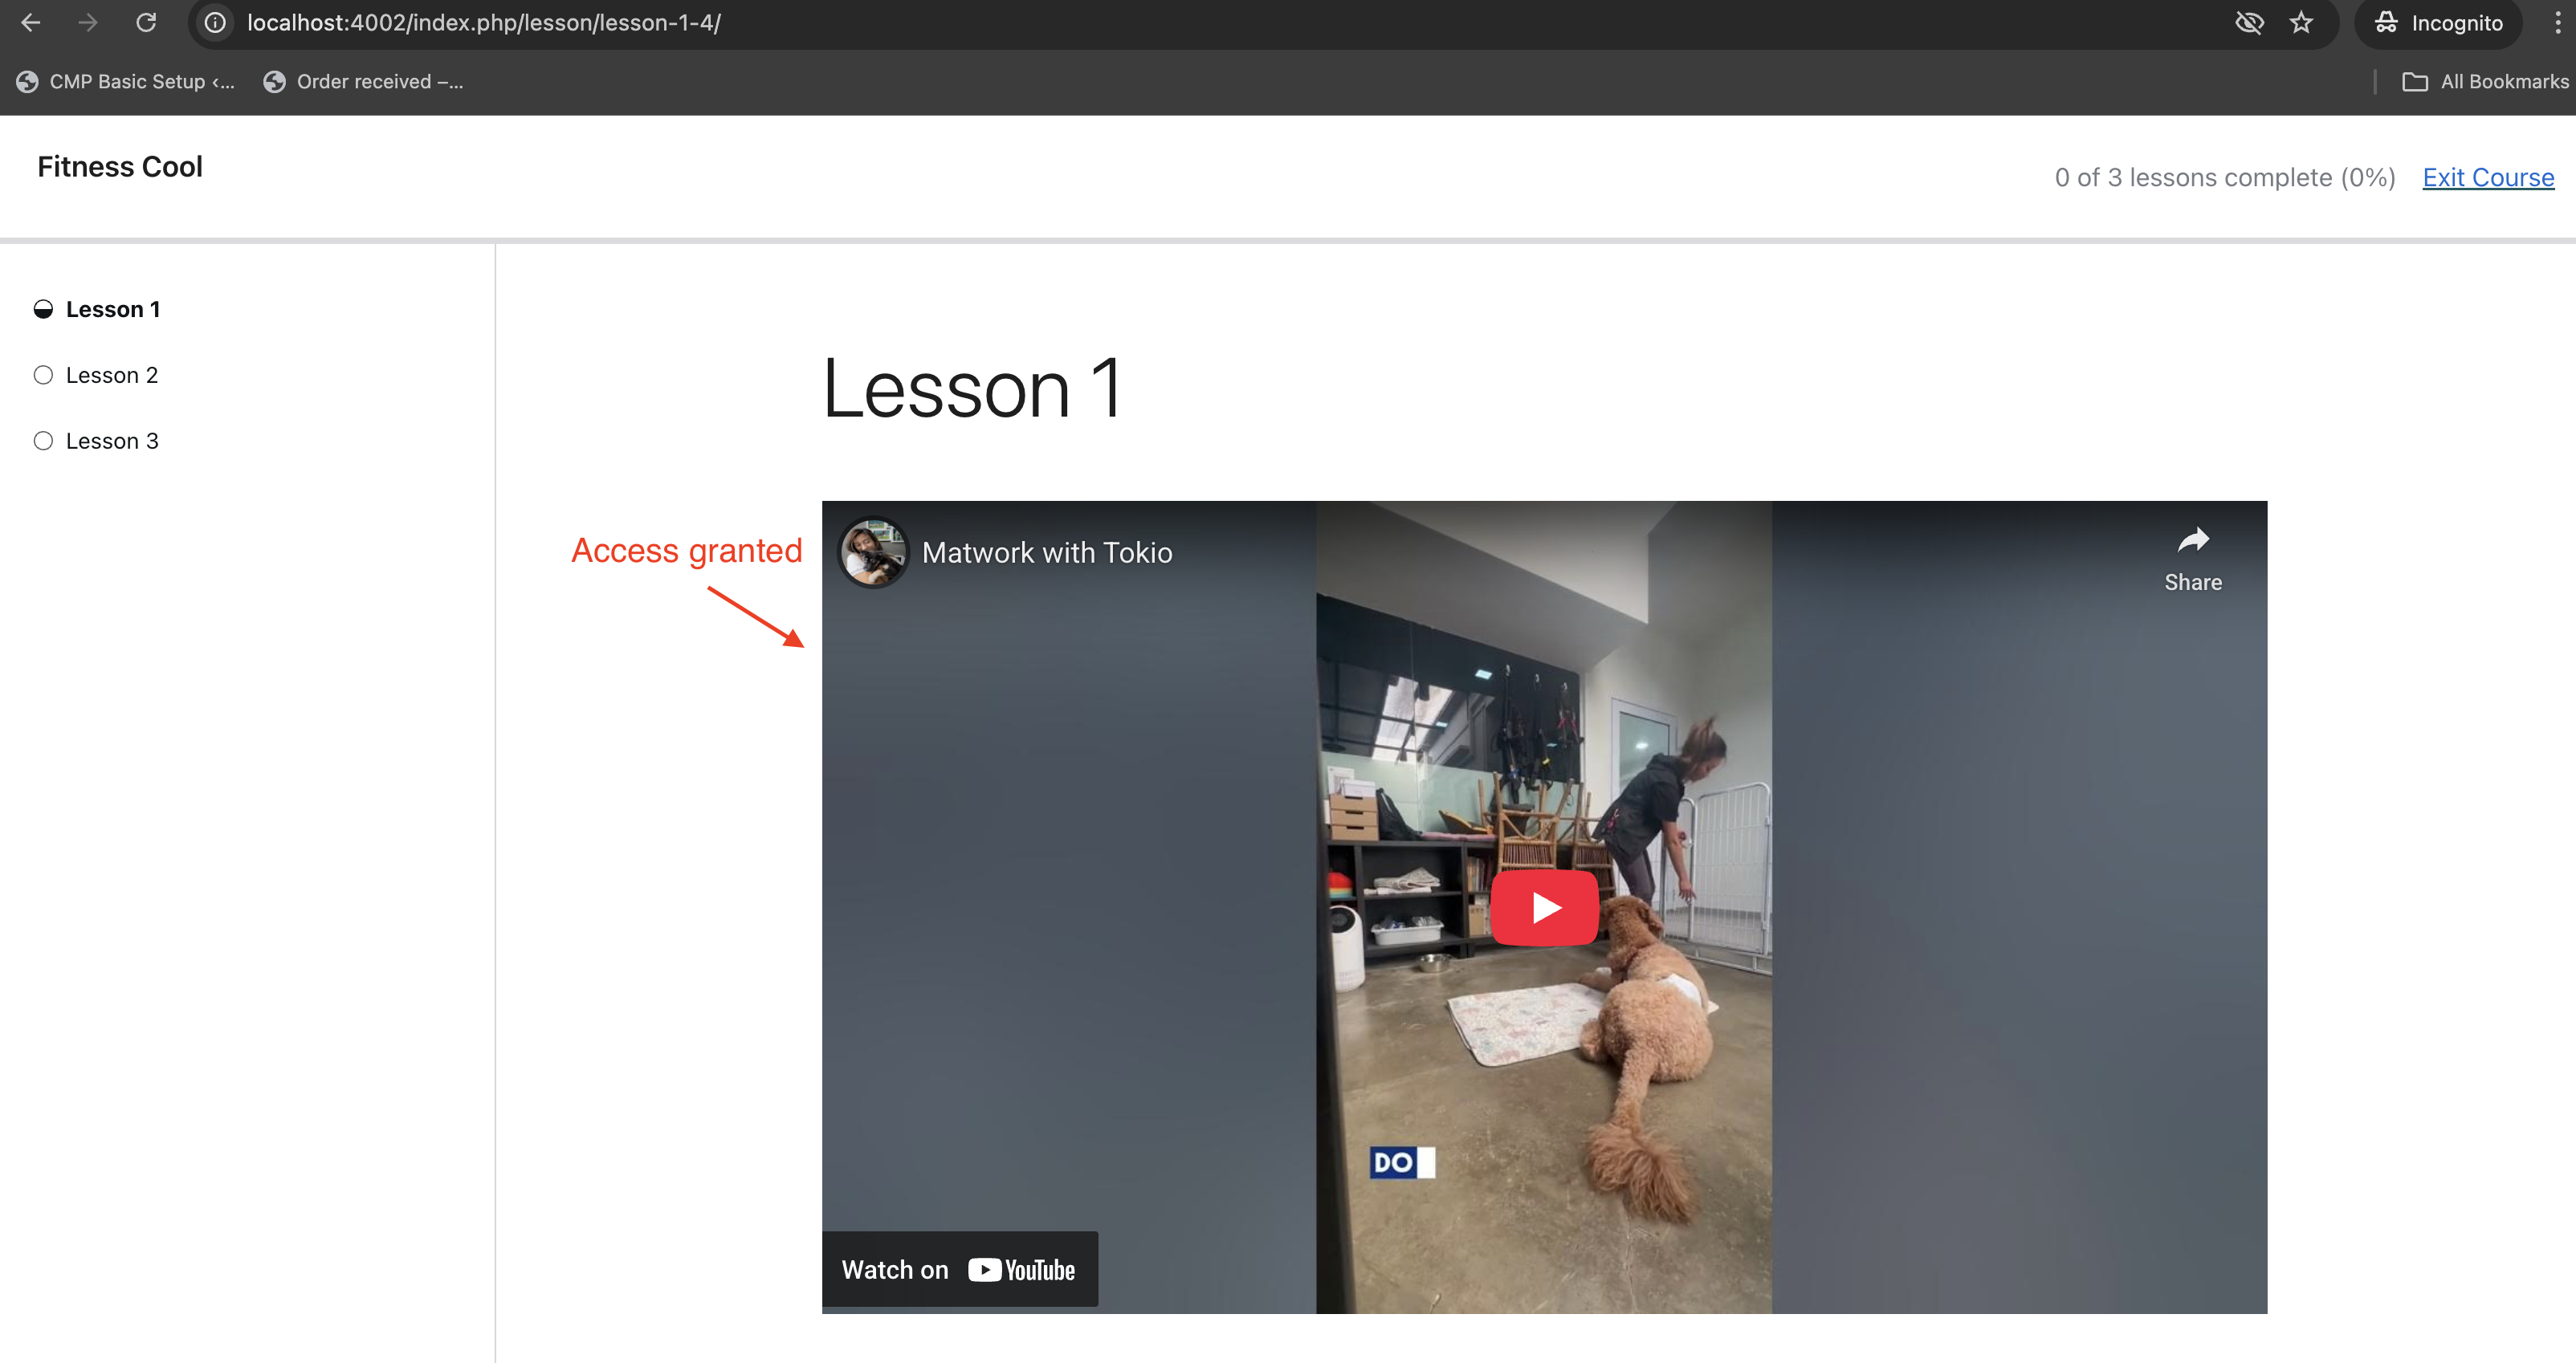
- After payment, they can see
Self-enrollment can be enabled, but WooCommerce purchase is the main access gate Emails & notifications are handled via SMTP
Optional Enhancements
- Course Bundles: Product can unlock multiple courses
- Product Pages: Show included courses for clarity (via shortcode or template snippet)
- Video Hosting: Vimeo preferred for access control
- Local Testing: Use ports like 4002 for multiple test sites
<?php
$product_id = get_the_ID();
$courses = Sensei()->course->get_courses_by_product_id($product_id);
if($courses){
    echo '<ul>';
    foreach($courses as $course){
        echo '<li><a href="' . get_permalink($course->ID) . '">' . $course->post_title . '</a></li>';
    }
    echo '</ul>';
}
?>
Conclusion
And that really sums it up, a simple learning management platform all under your control. All the materials are under your control. Theme, colour scheme etc., under your control – and you are free to fiddle around with it as much as you want!
Until next time, peace and love!