Understanding the SPCP (SingPass/Corppass) OAuth Flow: A Code Walkthrough
Table of contents
- What SPCP is
- The flow, in five steps
- The flow, end to end
- Step 1 – Redirect the user to Corppass
- Step 2 – The user authenticates and consents
- Step 3 – Corppass redirects back with a code
- Step 4 – Exchange the code for a token
- Step 5 – Decode the token, read the claims
- Do we need to call anything else after this?
- Glossary
What SPCP is
SPCP stands for SingPass/Corppass – Singapore’s national digital identity system. SingPass identifies an individual; Corppass is the corporate counterpart, used when a person is acting on behalf of a company. An application integrates with Corppass so that a user can log in and prove two things at once: who they are, and which company they’re authorised to act for – without the application ever handling a password itself.
The login handoff is done using OAuth 2.0 (the authorisation protocol) layered with OIDC – OpenID Connect (the identity layer on top of OAuth that adds the actual “who is this person” data). This walkthrough uses a real, working test harness written against Corppass to explain the flow concretely, rather than in the abstract.
How this was actually tested
Before any of this gets wired into a real application, it’s worth proving the mechanics work at all – and that’s exactly what this test harness is for. It’s a small console app whose entire job is to exercise the flow end to end, one run at a time:
- It generates the login URL (step 1 below) and prints it.
- A person opens that URL in a browser, logs in, and – since Corppass redirects the browser rather than calling us directly – copies the returned
codeout of the address bar by hand. - That code is pasted into the harness, which then performs the code-for-token exchange (step 4) itself and prints whatever Corppass sends back – success or failure – straight to the console.
That loop is also how every failure and fix described below was actually found: each attempt is a real console run, its request and response pasted verbatim into the debugging history, not a reconstruction after the fact.
The flow, in five steps
Every OAuth login – Corppass, Google, Facebook login, all of it – follows the same shape:
- Redirect the user to the identity provider (Corppass) with a request describing what we want.
- The user authenticates and consents at Corppass, not on our site.
- Corppass redirects back to us with a short-lived authorization code.
- We exchange that code for a token, server-to-server (the browser never sees this step).
- We read the token to get the claims (facts) about the user/entity.
flowchart LR
    subgraph IdP["Corppass"]
        Store[("SingPass identity +\nCorppass entity data")]
        OIDC["/authorize and /token\nendpoints"]
        Store <--> OIDC
    end
    Browser(["Browser"])
    SP["Our application\n(the relying party)"]

    Browser -- "1. hits a protected page" --> SP
    SP -- "2. redirects with an\nauthorize request" --> Browser
    Browser -- "3. forwards to Corppass" --> OIDC
    OIDC -- "4. login + consent" --> Browser
    Browser -- "5. redirected back\nwith a code" --> SP
    SP -- "6. exchanges code for token\n(server-to-server)" --> OIDC
Steps 1-3 in that diagram all happen inside the browser, in full view – that’s the “front channel.” Step 6 is the “back channel”: our own backend talking to Corppass directly, with the browser never involved. Keeping that distinction straight matters later, because it’s exactly why some of this is easy to screenshot and some of it isn’t.
The flow, end to end
Putting all five steps into one sequence, across both channels:
sequenceDiagram
    participant U as User (browser)
    participant SP as Our backend (SP)
    participant CP as Corppass

    U->>SP: GET a protected page
    SP->>U: 302 redirect to Corppass /authorize<br/>(client_id, redirect_uri, scope, state, nonce)
    U->>CP: GET /authorize?...
    CP->>U: Login + consent screen
    U->>CP: Submit Corppass credentials, consent
    CP->>U: 302 redirect to redirect_uri?code=...
    U->>SP: GET redirect_uri?code=...
    Note over SP,CP: Server-to-server from here --<br/>the browser is not involved
    SP->>SP: Generate a signed client<br/>assertion JWT (private key)
    SP->>CP: POST /token (code + client_assertion)
    CP->>SP: access_token + id_token
    SP->>SP: Decode id_token, read claims
Everything above the “server-to-server” note is why steps 1-3 were straightforward to capture in DevTools in the screenshots below. Everything below that note is step 4 – and it’s exactly why, if you went looking for that request in the same Network tab, you wouldn’t find it.
Step 1 – Redirect the user to Corppass
private static Uri generateCpLoginUrl()
{
    var uriBuilder = new UriBuilder(authUrl);          // Corppass's own /authorize endpoint
    var query = HttpUtility.ParseQueryString(uriBuilder.Query);
    query["redirect_uri"] = redirectUri;                // our own callback URL, pre-registered with Corppass
    query["response_type"] = response_type;              // "code"
    query["state"] = GenerateRandomString(10);
    query["scope"] = scope;                              // "openid"
    query["client_id"] = clientId;                       // our own registered client ID
    query["nonce"] = GenerateRandomString(10);

    uriBuilder.Query = query.ToString();
    return new Uri(uriBuilder.ToString());
}
This builds one URL. The user’s browser is sent there – this is the entire “please log this person in” request. Each parameter is doing a specific job:
client_id– identifies us to Corppass. Corppass knows this ID and has our public key and redirect URI on file for it.redirect_uri– where Corppass should send the user back to once they’ve logged in. This has to match, character-for-character, what Corppass has registered for ourclient_id– more on why that matters below.scope– what we’re asking permission for. Here it’s justopenid, meaning “confirm this person’s identity.”response_type=code– tells Corppass we want the Authorization Code flow: give us back a code, not a token directly. This is the safer of the two options because the token itself never touches the browser.stateandnonce– random one-time values we generate and check again later, to prevent a malicious site from replaying or forging a login response.
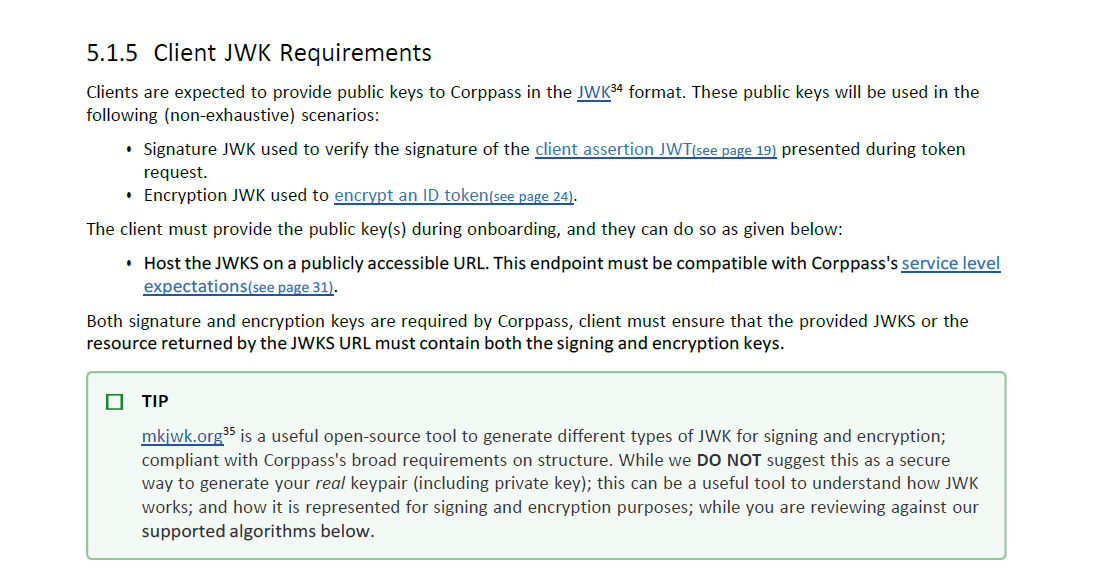
We also need to publish our own public key beforehand, so Corppass can later verify requests we sign (step 4). Corppass’s own integration spec is explicit about this requirement:
Seeing it live, in a real browser
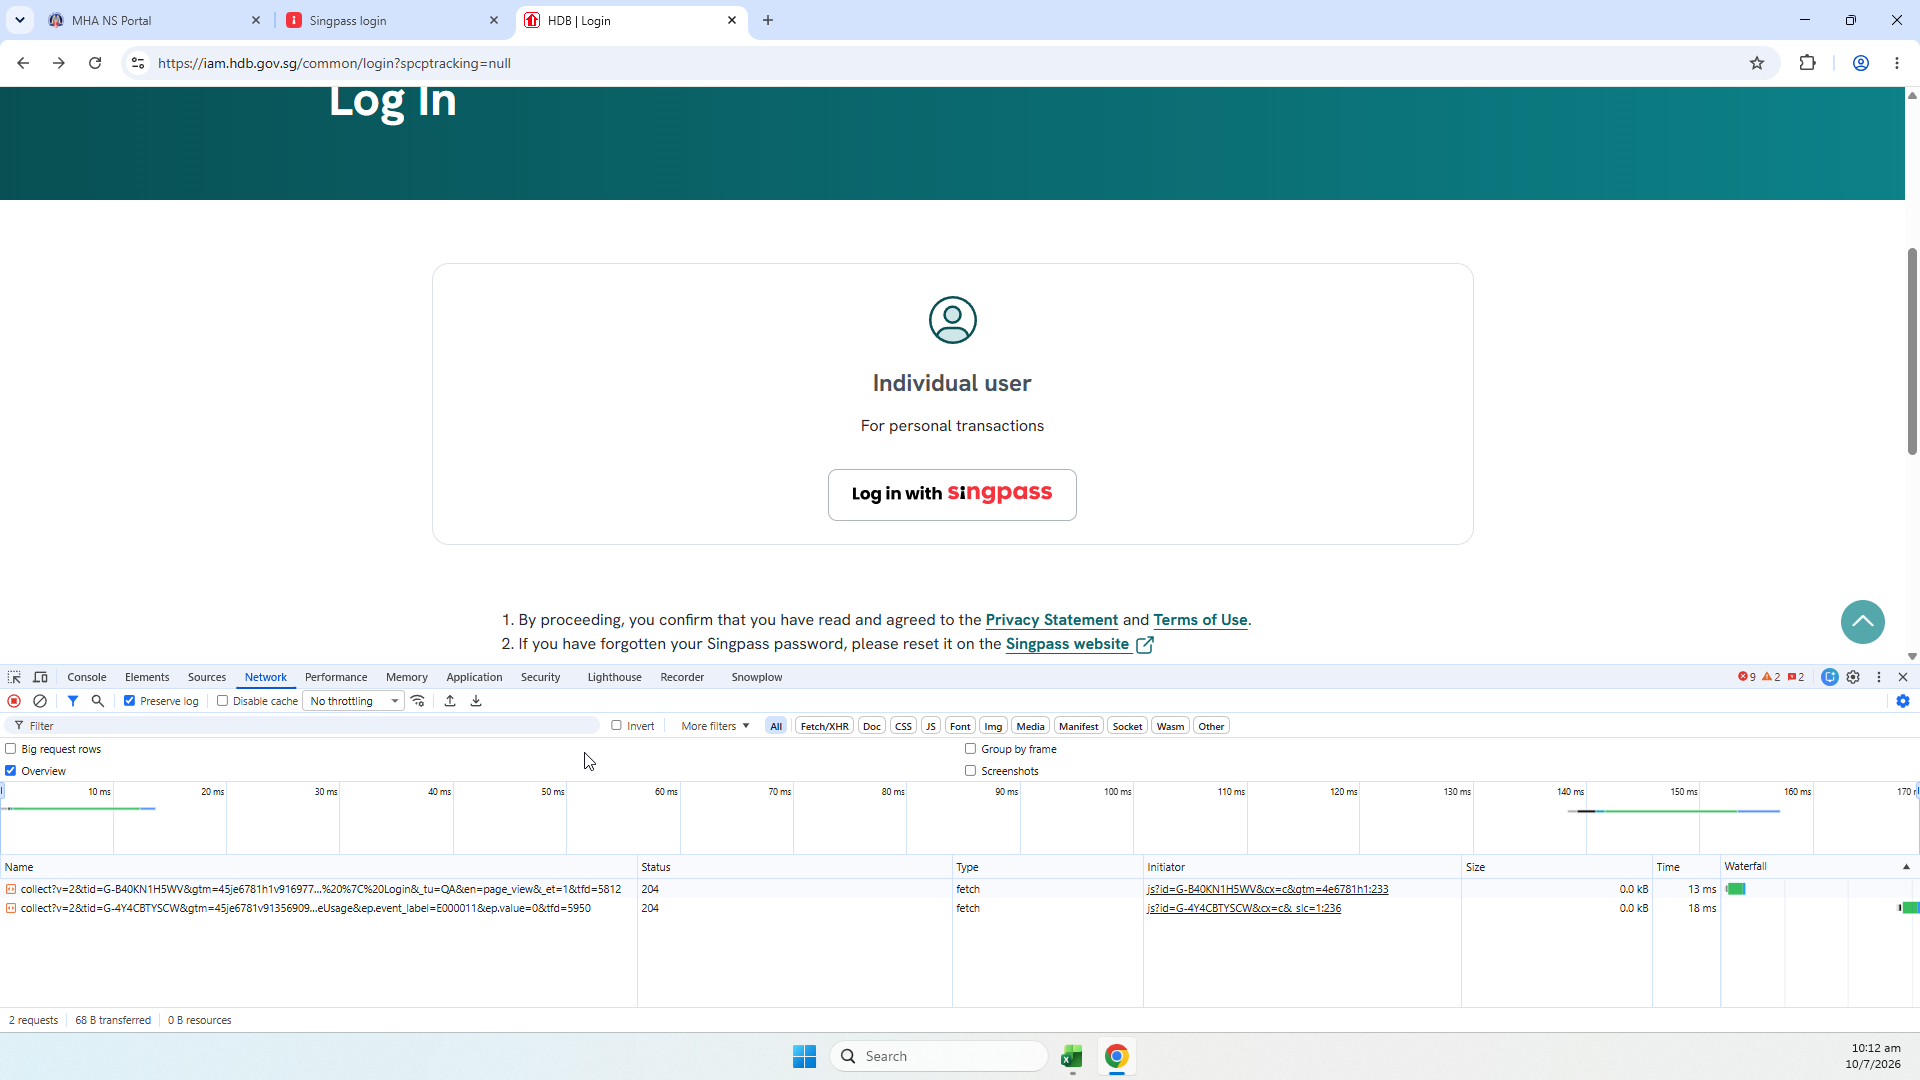
Everything above is easy to see for real, because SPCP powers the login button on many public government e-services. The same “Log in with Singpass” entry point below is what any relying-party login page presents to a user – clicking it is what fires off the redirect described in step 1:
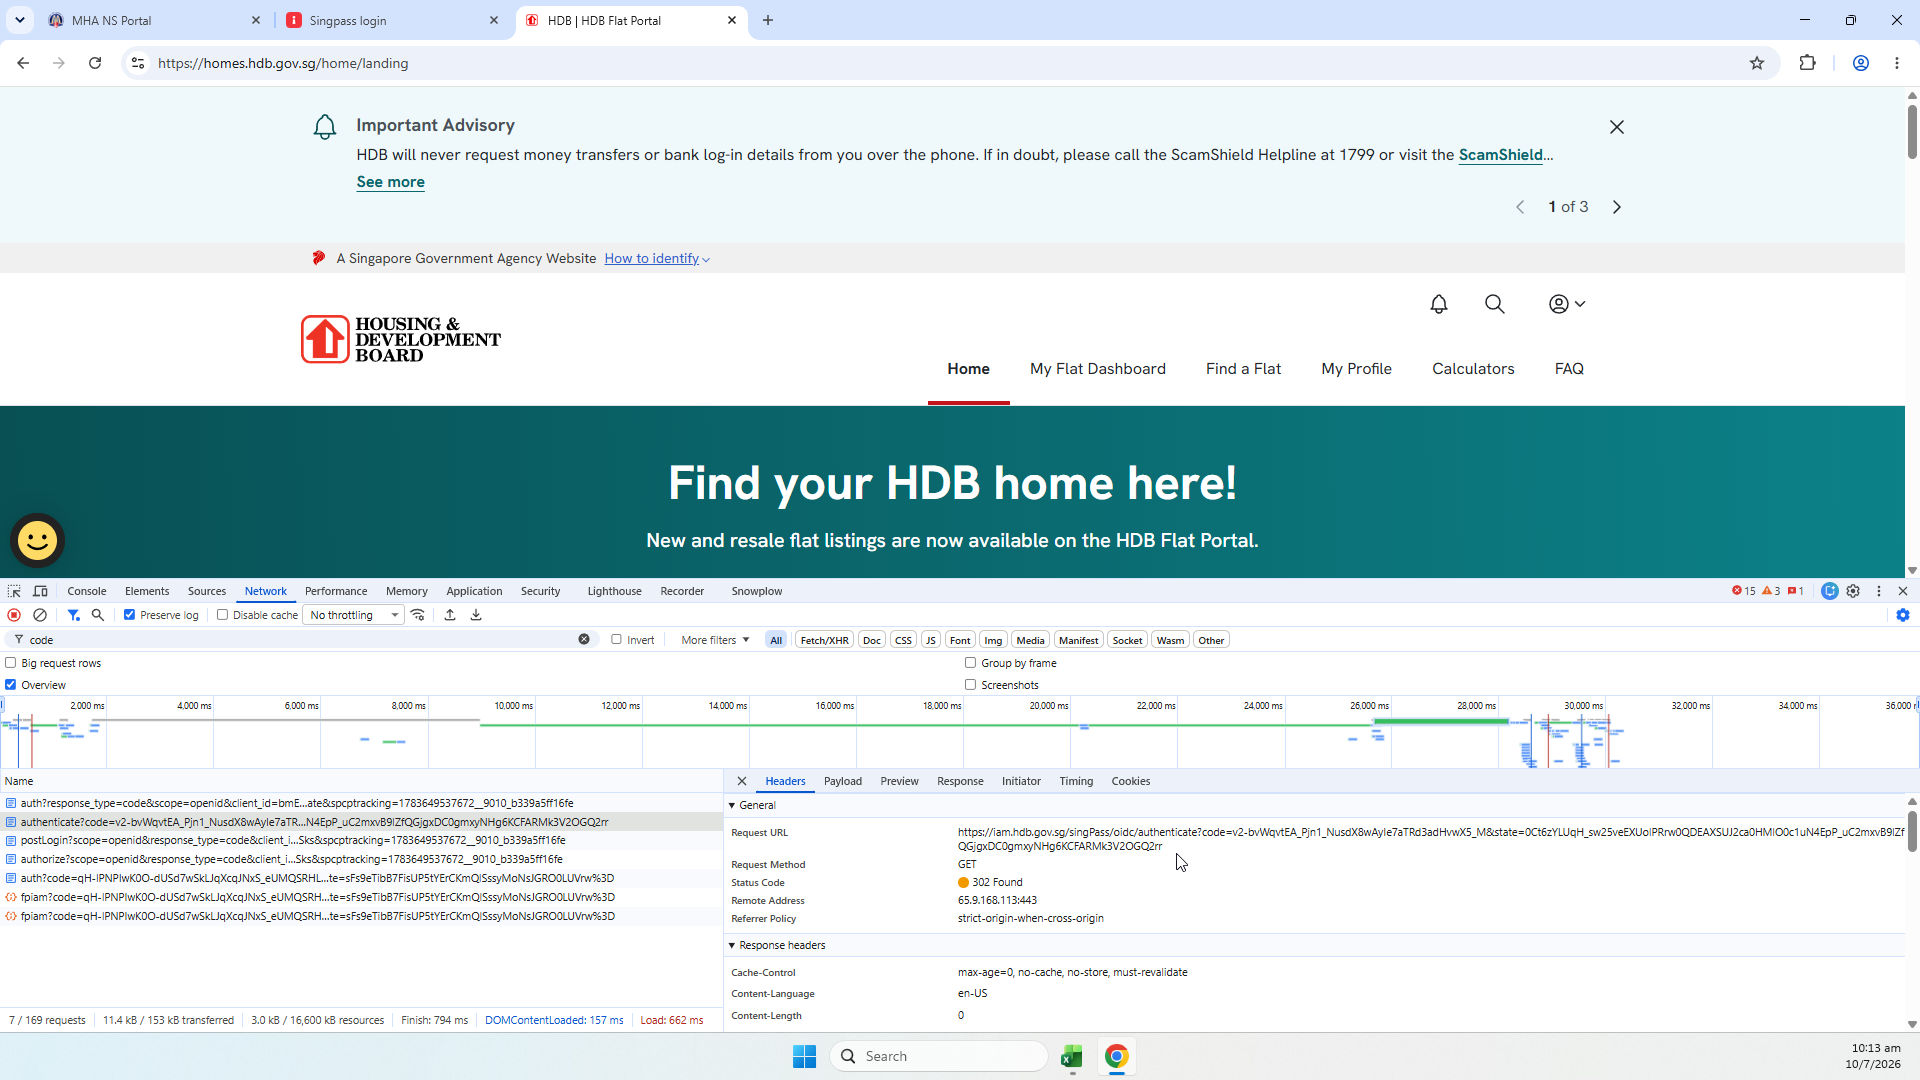
Clicking that button sends the browser to Singpass, and with the browser’s own DevTools Network tab open, the actual redirect request is sitting right there to inspect – the exact query string this walkthrough has been describing, response_type=code&scope=openid&client_id=...&redirect_uri=...&state=...&nonce=...:
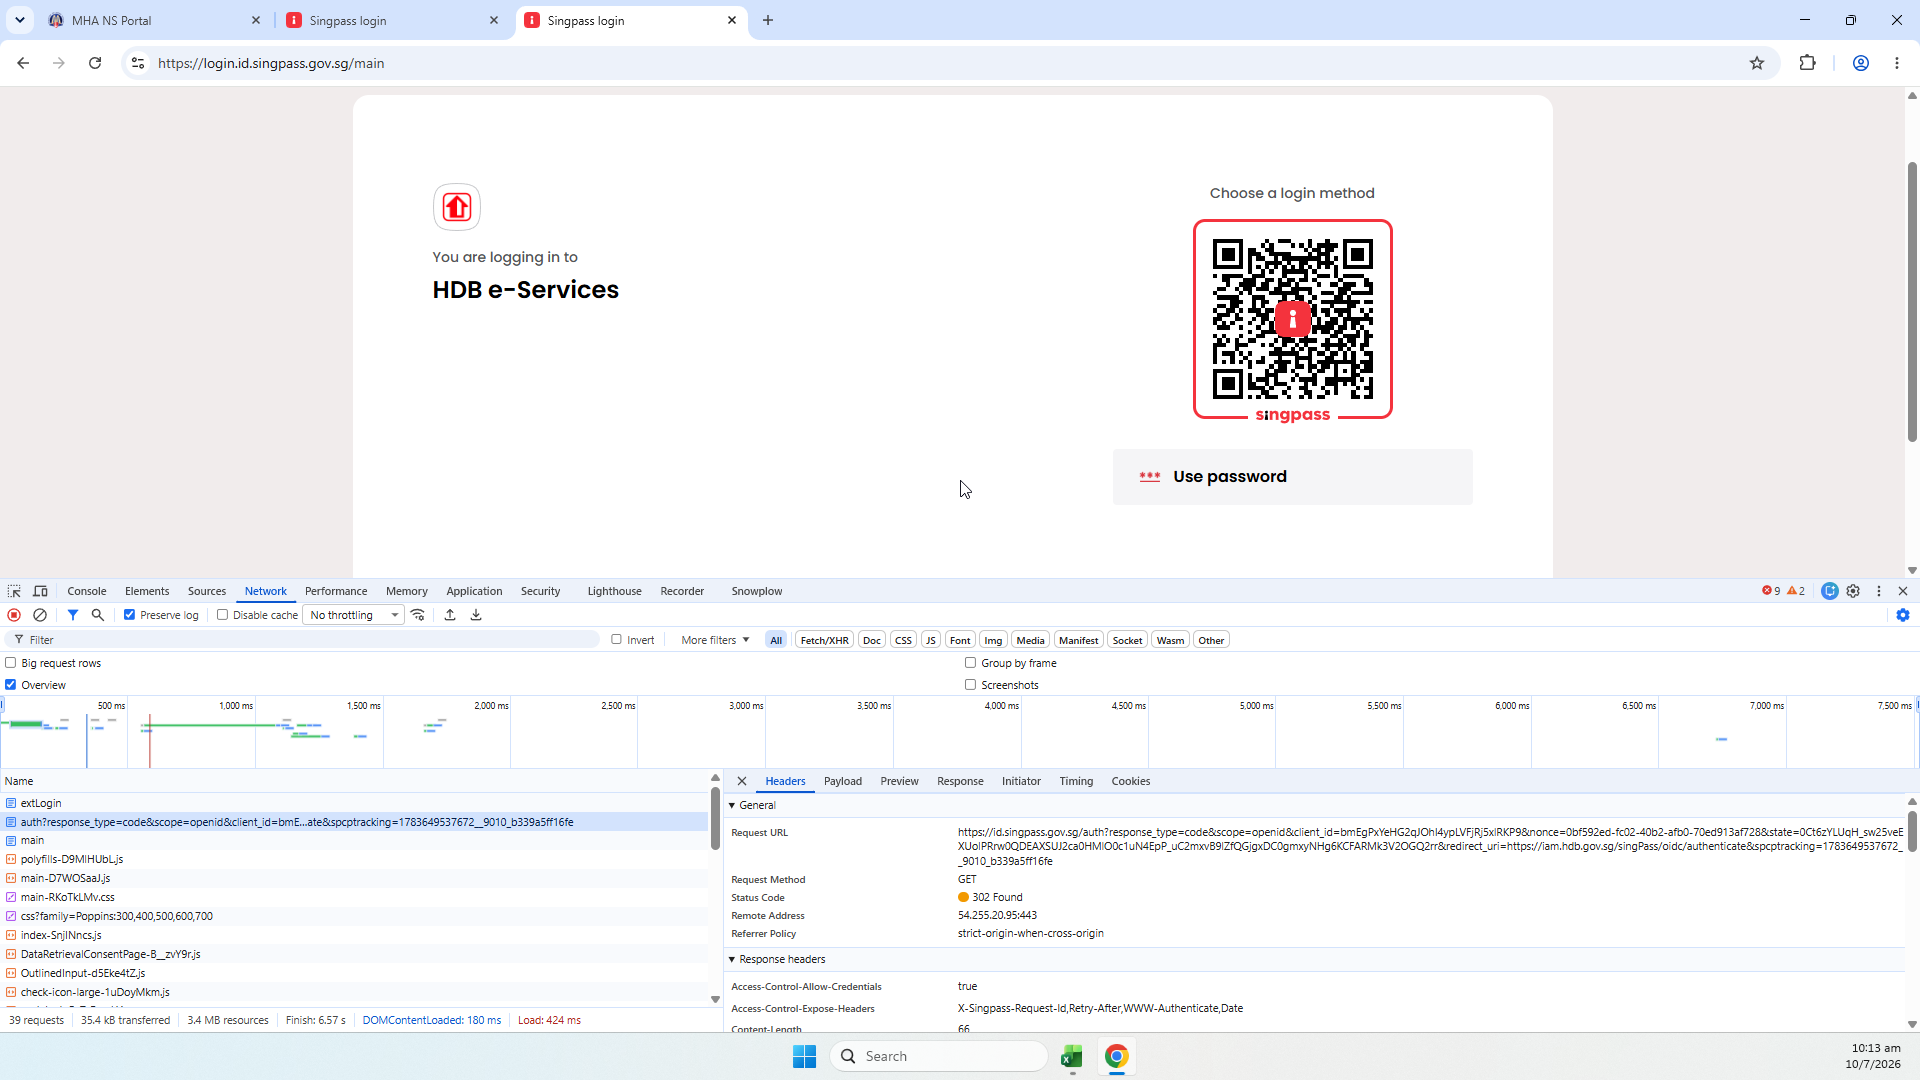
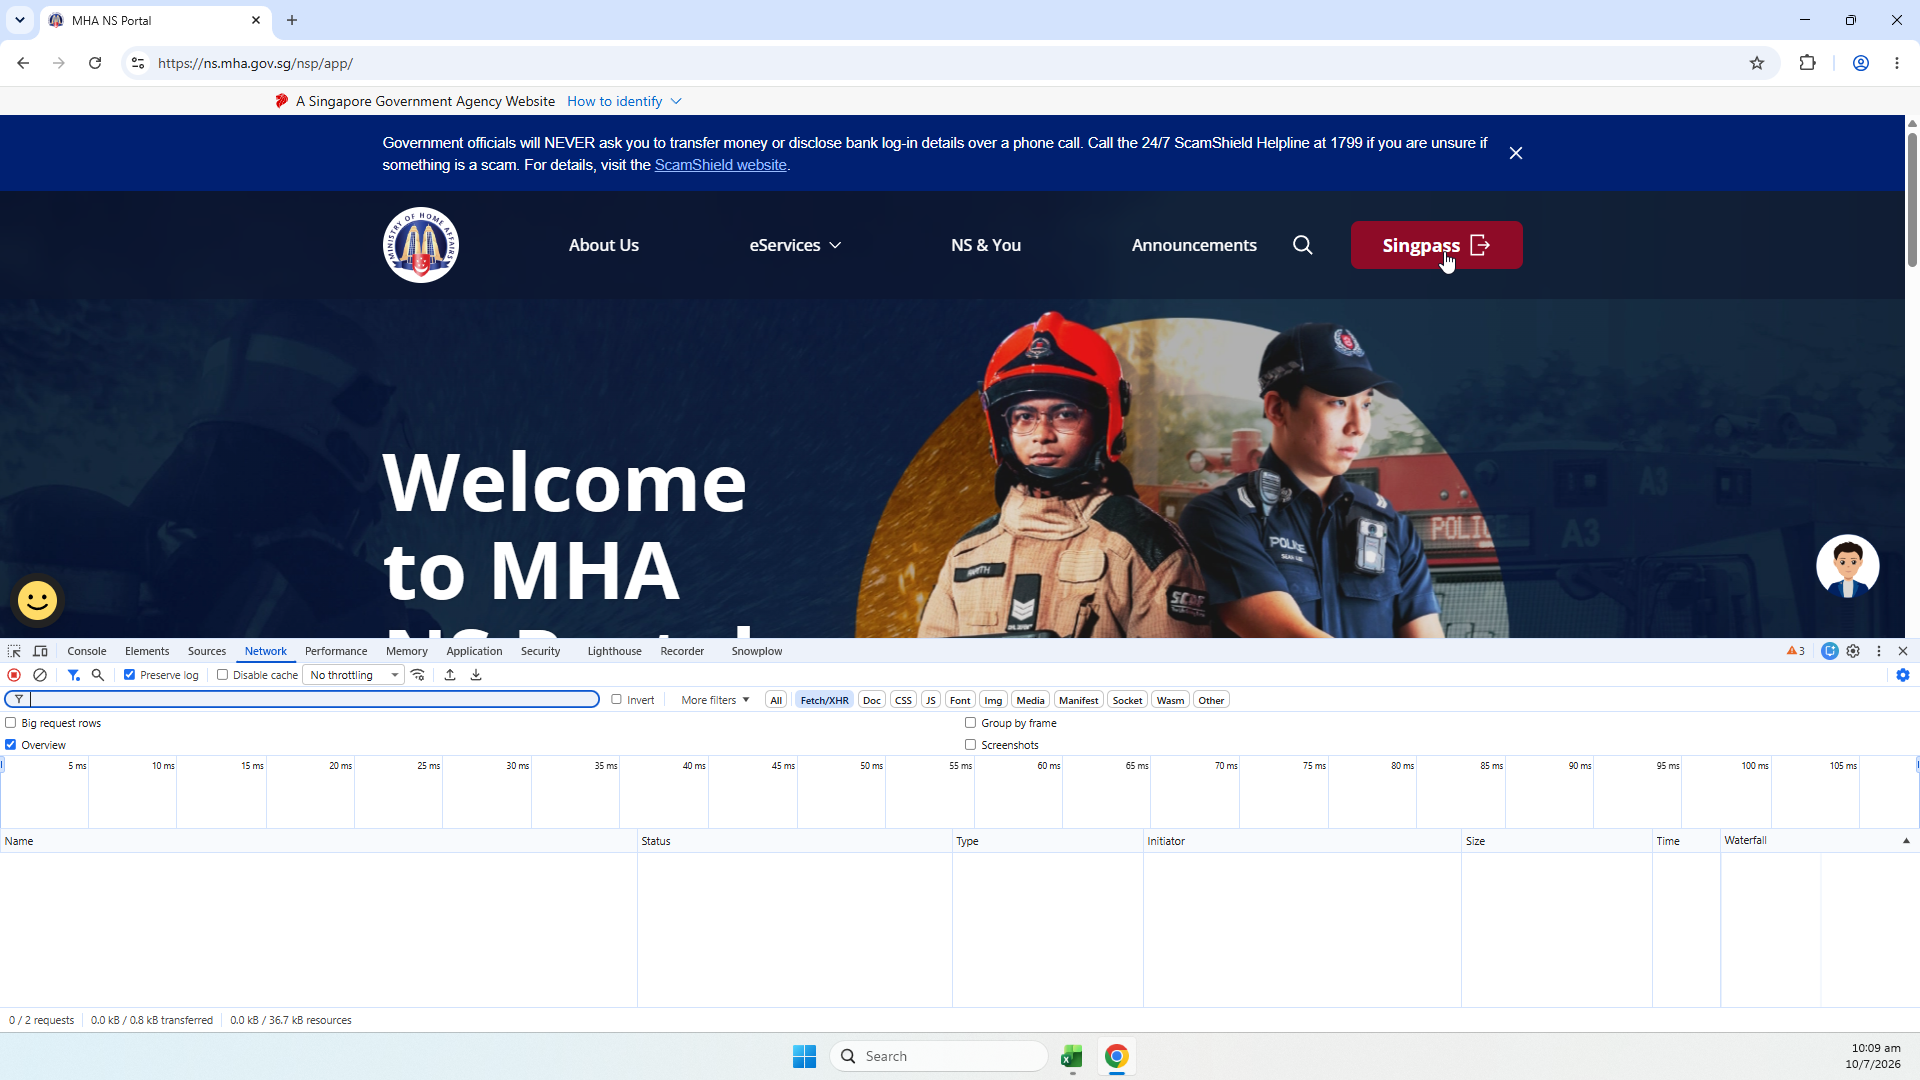
This particular capture happens to be a SingPass (individual) login into a public housing-related e-service, not Corppass – but that’s the point worth underlining: SingPass and Corppass are two doors into the same underlying OIDC infrastructure and the same flow. Everything this walkthrough explains using the Corppass code above is exactly what’s happening in this screenshot too. The same “Log in with Singpass” button shows up, unchanged, across unrelated government portals:
Step 2 – The user authenticates and consents
This step happens entirely on Corppass’s side – their login page, their MFA, their consent screen (“Corppass will share your name and entity info with this application”). We don’t write any code for this; we just send the browser there and wait.
Step 3 – Corppass redirects back with a code
If the login succeeds, Corppass redirects the browser to our redirect_uri with a code appended, e.g.:
https://<our-callback-host>/corppass_callback?code=<AUTHORIZATION_CODE>
This code is single-use and expires within minutes. It’s not the token yet – it’s just proof that the login happened. Anyone who intercepted this code alone still couldn’t do anything with it, because redeeming it (step 4) requires us to also prove our own identity as the client.
Continuing the same live capture from step 1: once login is complete, the browser lands back on the relying party’s own site, and – again visible in DevTools, this time as the request the relying party’s own callback endpoint receives – there’s the real authorization code, appended exactly as ?code=...:
Step 4 – Exchange the code for a token
Steps 1 through 3 all just happened, in full view, inside a single browser tab – that’s why they were straightforward to screenshot above. Step 4 is different in kind, not just detail: it is the one step that talks server-to-server. Our backend calls Corppass’s token endpoint directly over HTTPS; the browser is never involved and never sees this request or its response. If you went looking for it in the same DevTools Network tab used for the screenshots above, you would not find it – there is nothing there to find, because the browser has no part in it. There are two parts to it.
4a. Prove who we are, without a shared secret. Instead of a client secret (a password we’d have to keep everywhere our backend runs), Corppass uses private-key JWT client assertion: we sign a short JWT with our own private key, and Corppass verifies it against the public key we’ve already published (the JWKS shown above).
private static string generateClientAssertion(ECDsaSecurityKey key, string kid)
{
    var claims = new List<Claim>
    {
        new("sub", clientId),
        new("aud", issuer),
        new("iss", clientId),
    };

    var signingCredentials = new SigningCredentials(key, SecurityAlgorithms.EcdsaSha256);

    var tokenDescriptor = new SecurityTokenDescriptor
    {
        TokenType = "JWT",
        Subject = new ClaimsIdentity(claims.ToArray()),
        IssuedAt = DateTime.UtcNow,
        Expires = DateTime.UtcNow.AddMinutes(5),
        SigningCredentials = signingCredentials,
    };

    var tokenHandler = new JwtSecurityTokenHandler();
    var jwtToken = tokenHandler.CreateJwtSecurityToken(tokenDescriptor);
    jwtToken.Header["kid"] = kid;
    return tokenHandler.WriteToken(jwtToken);
}
This JWT is valid for 5 minutes and just says “I am this client, signed by a key you already trust.” Corppass checks the signature against our published public key rather than us sending any secret over the wire.
4b. Send the code + the assertion to the token endpoint:
clientAssertion = generateClientAssertion(signSecKey, kidSig);

var data = new Dictionary<string, string>
{
    { "code", authCode },
    { "grant_type", grantType },                      // "authorization_code"
    { "redirect_uri", HttpUtility.UrlEncode(redirectUri) },
    { "client_assertion_type", clientAssertionType },  // urn:ietf:params:oauth:client-assertion-type:jwt-bearer
    { "client_assertion", clientAssertion },
};

var requestBody = string.Join("&", data.Select(kvp => $"{kvp.Key}={kvp.Value}"));
var content = new StringContent(requestBody, Encoding.UTF8);
content.Headers.ContentType = new MediaTypeHeaderValue("application/x-www-form-urlencoded");

var response = await httpClient.PostAsync(tokenUrl, content);
var tokenResponse = JsonConvert.DeserializeObject<TokenResponse>(await response.Content.ReadAsStringAsync());
If everything matches – the code hasn’t expired or been used already, the assertion signature checks out, and (critically) the redirect_uri here matches the one used in step 1 exactly – Corppass responds with a JSON body containing an access_token and an id_token. These two are not interchangeable: the access token is a bearer credential for calling APIs on the user’s behalf, while the ID token is the OIDC-specific JWT that directly carries facts about who logged in – the one we care about for “who is this.”
A real pitfall – one parameter name
Worth walking through in detail, because it’s such a good illustration of how strict OAuth implementations are, and how a typo can send debugging in completely the wrong direction. Here’s the actual sequence of attempts, run through the console harness described above, one after another:
Attempt 1 – redirect_url, sent as-is:
POST <token endpoint>
code=<AUTHORIZATION_CODE>&grant_type=authorization_code&redirect_url=https://<our-callback-host>/corppass_callback&client_assertion_type=urn:ietf:params:oauth:client-assertion-type:jwt-bearer&client_assertion=<CLIENT_ASSERTION_JWT>
response statusCode: 400
{"error":"invalid_request","error_description":"FBTOAU223E The received redirection URI does not match the redirection URI that this grant was issued to."}
From the end user’s side, that failure looked like this:
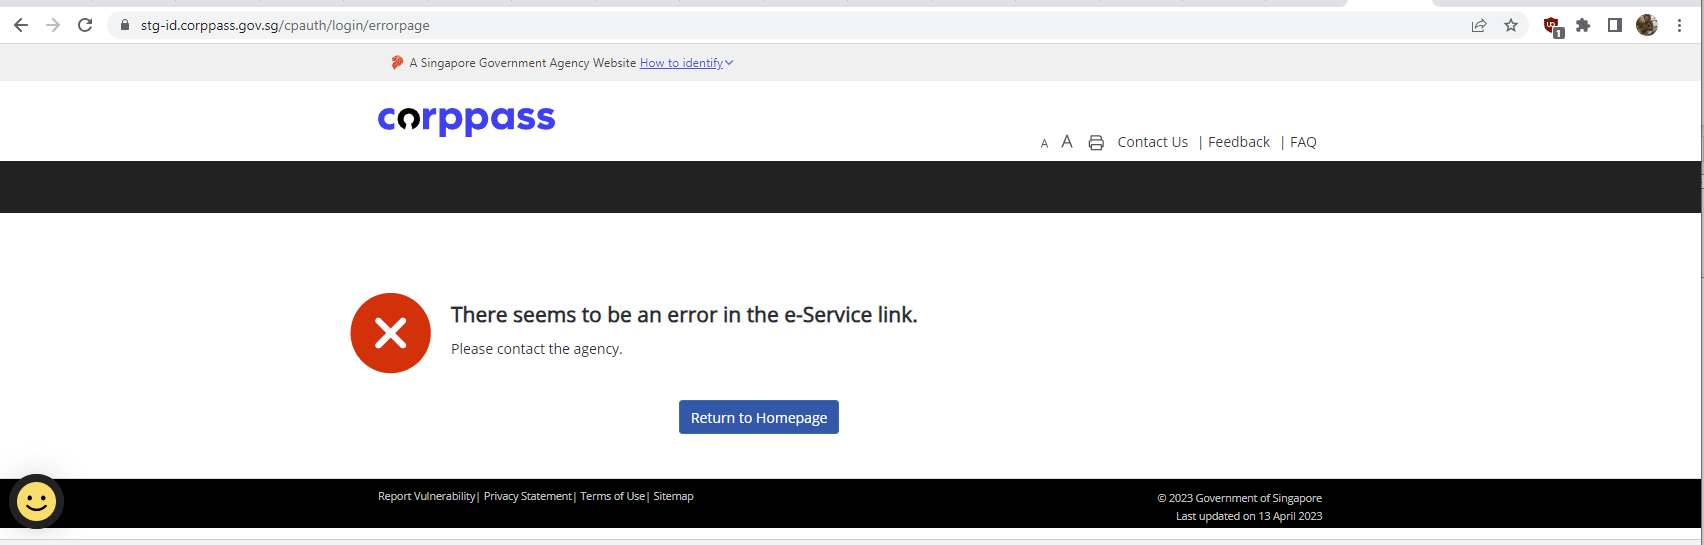
Reading that error literally, the obvious next guess is that the URI value is wrong somehow – maybe it needs URL-encoding.
Attempt 2 – same parameter, now URL-encoded, on the theory that encoding was the problem:
redirect_url=https%3A%2F%2F<our-callback-host>%2Fcorppass_callback&...
response statusCode: 400
{"error":"invalid_request","error_description":"FBTOAU223E The received redirection URI does not match the redirection URI that this grant was issued to."}
Identical failure. Encoding the value changed nothing, because the value was never the problem.
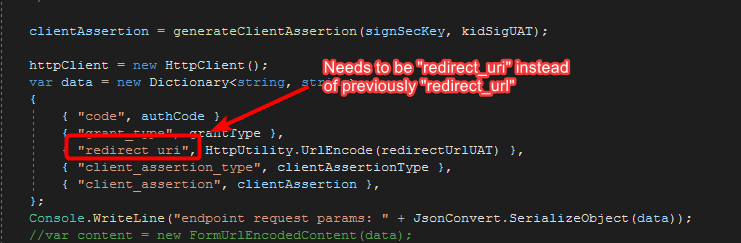
Attempt 3 – the actual fix, renaming the key itself:
- { "redirect_url", HttpUtility.UrlEncode(redirectUri) },
+ { "redirect_uri", HttpUtility.UrlEncode(redirectUri) },
response statusCode: 200
{
  "access_token": "<ACCESS_TOKEN>",
  "id_token": "<ID_TOKEN>",
  "token_type": "bearer",
  "scope": "openid",
  "expires_in": 599
}
The lesson worth taking away: the request was sending redirect_url. The OAuth spec’s parameter is redirect_uri. One letter – url vs uri – and Corppass silently treated the field as not sent at all, so it could never match what was used in step 1. Nothing about the error message pointed at the parameter name; it just read as a values mismatch, which is exactly why two rounds of “fixing” the value went nowhere. First-time OAuth integrations run into this exact shape of bug constantly – the parameter names are rigid and unforgiving, and a typo shows up as a business-logic error, not a syntax error.
Step 5 – Decode the token, read the claims
The ID token is a JWT – three base64 sections (header.payload.signature), plus in Corppass’s case it’s also encrypted (JWE), so it needs our private decryption key before it can even be parsed. Once decoded, the payload looks roughly like this (values below are illustrative, not real):
{
  "userInfo": {
    "CPAccType": "User",
    "CPUID_FullName": "<FULL NAME>",
    "ISSPHOLDER": "YES"
  },
  "entityInfo": {
    "CPEntID": "<UEN>",
    "CPEnt_TYPE": "UEN",
    "CPEnt_Status": "Registered"
  },
  "nonce": "<NONCE>",
  "amr": ["pwd", "swk"],
  "iss": "https://id.corppass.gov.sg",
  "sub": "<SUBJECT_IDENTIFIER>",
  "aud": "<OUR_CLIENT_ID>"
}
This is the payoff of the whole flow, and it’s worth pausing on: this single decoded token already contains sensitive, identifying data – a person’s full name, and the UEN (company registration number) and registration status of the entity they’re acting for. No further API call is even needed to get this much. That’s exactly why every earlier step exists the way it does: signed requests instead of shared secrets, encrypted tokens instead of plain JSON, exact redirect URI matching, short-lived codes and assertions. All of that machinery exists specifically to make sure only the legitimate client, for the legitimate user, can ever get to this payload.
In code, this decoding step looks like:
private static Entity retrieveDataFromIdToken(string token)
{
    JwtSecurityTokenHandler tokenHandler = new();
    JwtSecurityToken jwtToken = tokenHandler.ReadJwtToken(token);

    var entityInfo = jwtToken.Claims.FirstOrDefault(claim => claim.Type == "entityInfo")?.Value;
    var cpEntityInfo = JsonConvert.DeserializeObject<Dictionary<string, string>>(entityInfo);

    return new Entity
    {
        Id = cpEntityInfo["CPEntID"],
        Type = cpEntityInfo["CPEnt_TYPE"],
        Status = cpEntityInfo["CPEnt_Status"],
    };
}
Do we need to call anything else after this?
Not necessarily – and this is worth being explicit about, because it’s easy to assume a token is only ever a means to another API call. Once step 4 returns, the flow’s job – confirm who this is – is already done. Whether anything further happens depends entirely on whether the claims already sitting inside the ID token (step 5) are enough for what the application needs:
- If they’re sufficient – e.g. the application only needed to know the person’s name and which entity they represent – the flow ends right here. Nothing further is called. The
access_tokenreturned alongside the ID token can simply go unused. - If they’re not sufficient – e.g. the application needs a fuller profile than the token carries – the
access_tokenfrom step 4 is then used as a bearer credential on further, separate API calls to whatever resource server holds that additional data.
That second case – using the access token for a subsequent resource-server call – is deliberately not covered in this walkthrough. It’s a separate integration built on top of the identity we already have, not part of the SPCP OAuth mechanics itself, which is the actual subject here.
Glossary
| Term | Plain-language meaning |
|---|---|
| redirect_uri | The exact URL Corppass sends the user back to after login. Must match what’s pre-registered for our client, byte for byte. |
| scope | What we’re asking permission for (e.g. openid = confirm identity). |
| authorization code | A short-lived, single-use proof-of-login handed to the browser, which only has value once redeemed by the legitimate client. |
| access token | A credential for calling APIs on the user’s behalf. |
| ID token | An OIDC JWT carrying facts about who logged in (the identity payload itself). |
| client assertion | A JWT we sign with our own private key to prove our identity to Corppass, instead of sending a shared secret. |
| JWKS | JSON Web Key Set – where we publish our public key so Corppass can verify our client assertion’s signature. |
Until next time, peace and love!